Showing posts with label Smooch Spritz. Show all posts

Tuesday, August 9, 2011

Memory Makers August Blog Bounce - Ch-Ch-Ch-Changes!


Hello and welcome to my stop on the Memory Makers Magazine Blog Bounce!  If you've been following along, you should have arrived from Lain's blog, but if not, you can start at the Memory Makers Magazine blog, or you can just continue on from here.

Our theme this month is all about the changes in our lives!  If there is one thing that is "constant" and predictable about life, it's change.  Some of you may know that Seth and I have been together for a long time.. 9-1/2 years this month, to be exact!  I thought it would be fun to create a page with a few different photos of us from over the years.  :)
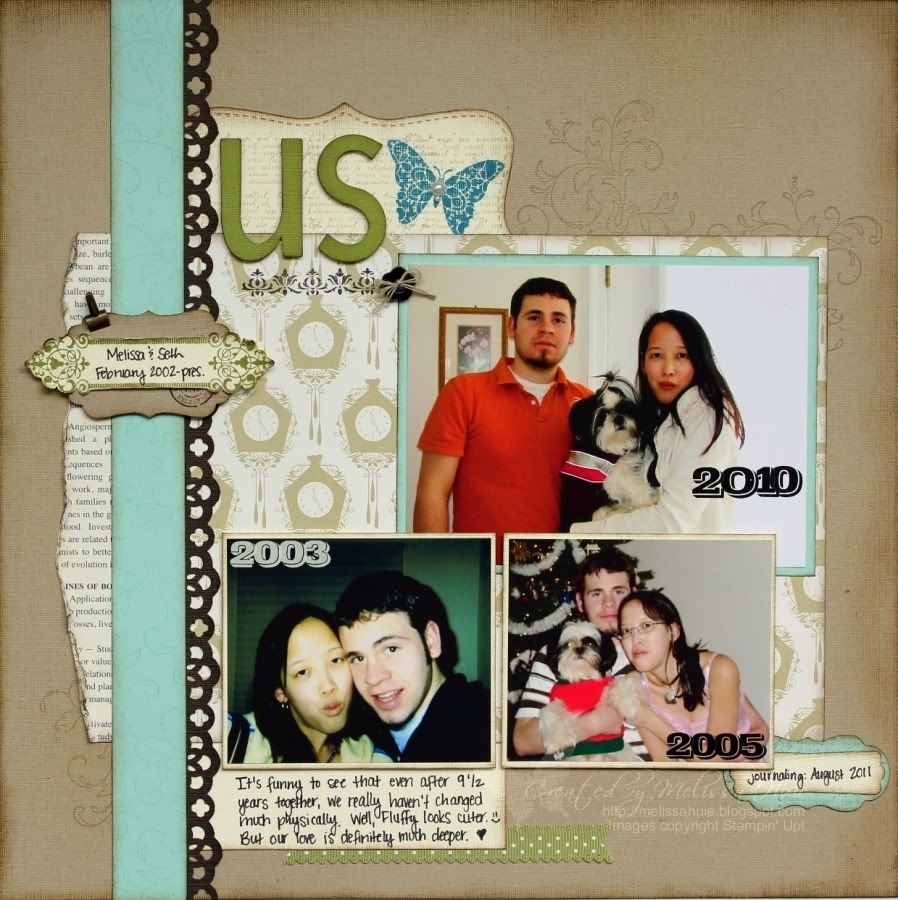

I used a PageMap from this month, changing a few things here and there, but sticking close to the sketch.  I really love this sketch and can see myself using it for many different layouts!

It was a lot of fun to pull out some of our "older" photos, from before the digital camera age. :)  I did a lot of stamping and distressing on this page, and even misted some Vanilla Shimmer and Gold Glow Smooch Spritz!

The journaling reads:  "It's funny to see that even after 9-1/2 years together, we really haven't changed much physically.  Well, Fluffy looks cuter. :)  But our love is definitely much deeper. ♥"  (By the way, Fluffy is 7 years old; she joined our family in 2004.)
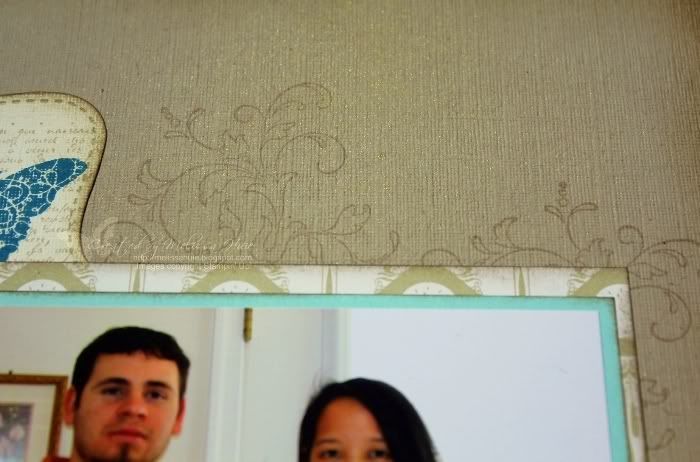

It felt so good to stamp after not doing so for a while!  Here's a close-up of my title area:
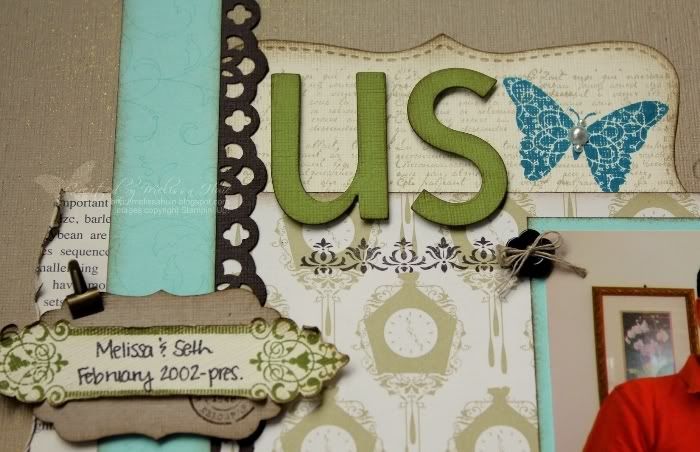

Don't you think that the Timeless Portrait Designer Series Paper is just perfect for the theme?  I absolutely love this collection! :)

Ok, I have to run for now.  Your next stop on the blog bounce is Wendy's blog!  Enjoy the hop, and thanks for stopping by!

"Us" scrapbook page supplies (12" x 12"):
All supplies are by Stampin' Up!
Stamps:  Creative Elements, French Foliage
Ink:  Crumb Cake, Soft Suede, Early Espresso, Old Olive, Pool Party, Island Indigo
Paper:  Crumb Cake, Very Vanilla, Early Espresso, and Pool Party cardstock, Timeless Portrait Designer Series Paper, First Edition Specialty Designer Series Paper
Accessories/Tools:  Vintage Type Rub-Ons (retired), Vanilla Shimmer and Gold Glow Smooch Spritz, Basic Black Stampin' Write Journaler, Basic Black Designer Button, Linen Thread, Old Olive 1/2" Scallop Dots Ribbon, Mini Library Clip, Stampin' Sponges, Pearl Basic Jewels, Top Note Bigz die, Simple Letters Alphabet Bigz dies, Lots of Labels Sizzlits dies, Modern Label Punch, Decorative Label Punch, Lace Ribbon Border Punch, Big Shot

Friday, November 5, 2010

Vintage Mojo Rosette

Happy Friday!

I naturally gravitate towards autumnal colors, so this week's color combination challenge (using Peach Parfait, Early Espresso and Cajun Craze) at Splitcoaststampers kept jumping out in my mind.  I combined it with this week's Mojo Monday sketch to create my card...


This is definitely a card that you couldn't fit in a regular envelope, but that just makes it so much more fun! :)

I created my background by rolling the Very Vintage jumbo wheel across the cardstock several times, using my Wheel Guide to allow me to fill the background nicely.  I then stitched two pieces of Chantilly Lace Trim together using a zig-zag stitch, and stitched that to the background.

I then sprayed some Log Cabin Smooch Spritz over the Newsprint Designer Series Paper, using the Mostly Vintage mask to create a pretty pattern on the DSP.  Two layers of pleated Waffle Paper make for a pretty treatment at the top, which was then topped off with a piece of Cajun Craze (stamped with the Music Notes wheel) punched with the Eyelet Border Punch.  I had scored the Cajun Craze piece and folded it over the top of the panel, then tied a piece of Early Espresso 1/8" Taffeta Ribbon around it.

The butterfly shows off our fun cork, which cuts beautifully in the Big Shot.  This butterfly was die-cut using the Beautiful Butterflies Bigz die, then I tied some Linen Thread around to create the body and antenna.  I added some Basic Rhinestone Jewels to the body as well.

I just love the way the rosette turned out!  It's a spiral piece die-cut with the Table Setting Bigz XL die, which I rolled into the rosette shape, starting at one end of the spiral.  The die-cut actually creates a bigger rosette, but I trimmed it a little to make it small enough for my card.  I spritzed the rosette with Log Cabin Smooch Spritz as well, then bent the petals down a little. I then sponged it with Early Espresso ink before adding the three Basic Rhinestone Jewels.

Ok, the last part of the card is the sentiment tag, which I created by layering the Decorative Label punch-out and a die-cut from the Lots of Tags Sizzlits die set.  Don't you think they layer perfectly?

Well, hope I explained it all well enough. :)  Thanks for stopping by, and I hope you have a wonderful weekend!

Vintage Rosette card supplies:
Stamps:  Occasional Quotes
Ink:  Early Espresso Classic Stampin' Pad, VersaMark ink
Paper:  Early Espresso, Cajun Craze, Peach Parfait, Crumb Cake, and Very Vanilla cardstock, Newsprint Designer Series Paper
Accessories/Tools:  Basic Rhinestone Jewels, Chantilly Lace Trim, Early Espresso 1/8" Taffeta Ribbon, Linen Thread, Cork Sheet, Early Espresso Waffle Paper, Mostly Vintage mask, Music Notes Wheel, Very Vintage Jumbo Wheel, Eyelet Border and Decorative Label Punches, Lots of Tags Sizzlits die set, Table Setting Bigz XL die, Beautiful Butterflies Bigz die, Stampin' Sponges, Big Shot, sewing machine and vanilla thread

Friday, September 17, 2010

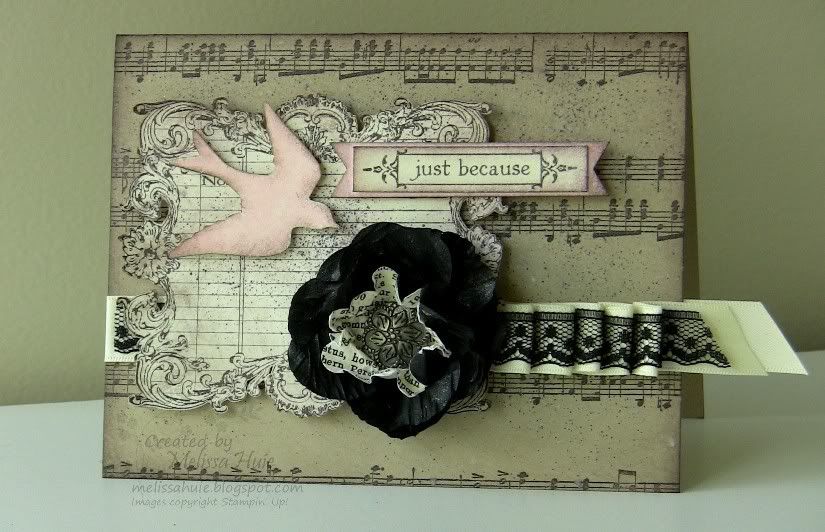
A very vintage "Just Because" card!

Happy Friday!!

So... guess what??  I made a card!

Yes, that's right.  I know it's been too long, and I apologize!  There are various reasons for this, but I'll try and be a better blogger. :)

Well, I received some new Stampin' Up! goodies not too long ago, and I had been itching to make something with them!  I had to find my stamping mojo though, so I went looking through some challenge blogs.  This week's challenge from Stampin' Celebration prompted me to play, as it uses such a gorgeous color combo!


So much fun, eh?  Let me tell you about all these awesome goodies!

The background was created using the Music Notes wheel and Early Espresso ink.  Isn't that new wheel just gorgeous?  It is one of my must-have items from the Idea Book & Catalog, and I was so happy when I got my little hands on it!  Lining up the multiple images was a breeze with the Wheel Guide!

I stamped the beautiful image from the Notably Ornate stamp set (another must-have), cut it out, and distressed it (along with everything else on this card).  I spritzed over different elements using the Color Spritzer and the Basic Black Stampin' Write marker, and when the card was all finished, I sprayed the front all over with lots of Vanilla Shimmer Smooch Spritz.  It's so beautifully sparkly in real life. :)

The new Raven Lace Trim from the new Holiday Mini Catalog looks just gorgeous layered over the satin ribbon.  I created the pleating effect using Mini Glue Dots (one of my favorite ways to add interest to ribbon)... I just love how it turned out with the lace!

See that pretty flower?  I made that using the new waffle paper!  It was so easy to create!  I simply punched out a few flowers using the Fancy Flower XL punch and layered them slightly off from each other (not lining them up), scrunching them up a little.  Next, I punched out a scalloped circle from the Newsprint Designer Series Paper (one of my favorite packs!), sprayed it with water on both sides to loosen the fibers, and crumpled it up.  I then layered it on top of the waffle paper flowers and punched a hole in the middle.  The Antique Brad just works so wonderfully as a flower center... don't you think?

Tip:  When punching the waffle paper, be sure to first layer some cardstock underneath, and punch through both layers.  I like to use either Whisper White or Very Vanilla.  This ensures that you have a nice, clean cut through your waffle paper!

Ok, gotta run!  I need to start packing and organizing my stuff for the retreat I'm going to later this month.  Thanks for stopping by!

"Just Because" vintage card supplies:
Stamps:  Notably Ornate
Ink:  Early Espresso
Paper:  Crumb Cake, Pink Pirouette and Very Vanilla cardstock, Newsprint Designer Series Paper
Accessories/Tools:  Music Notes Wheel, Vanilla Shimmer Smooch Spritz, Color Spritzer, Basic Black Stampin' Write Marker, Stampin' Sponge, 1-3/8" Scallop Circle and Fancy Flower Punches, Raven Lace Trim and Very Vanilla 5/8" Satin Ribbon, Antique Brad, Waffle Paper Assortment #2

Saturday, August 21, 2010

Hey Buh-dy! scrapbook page

Happy Saturday!

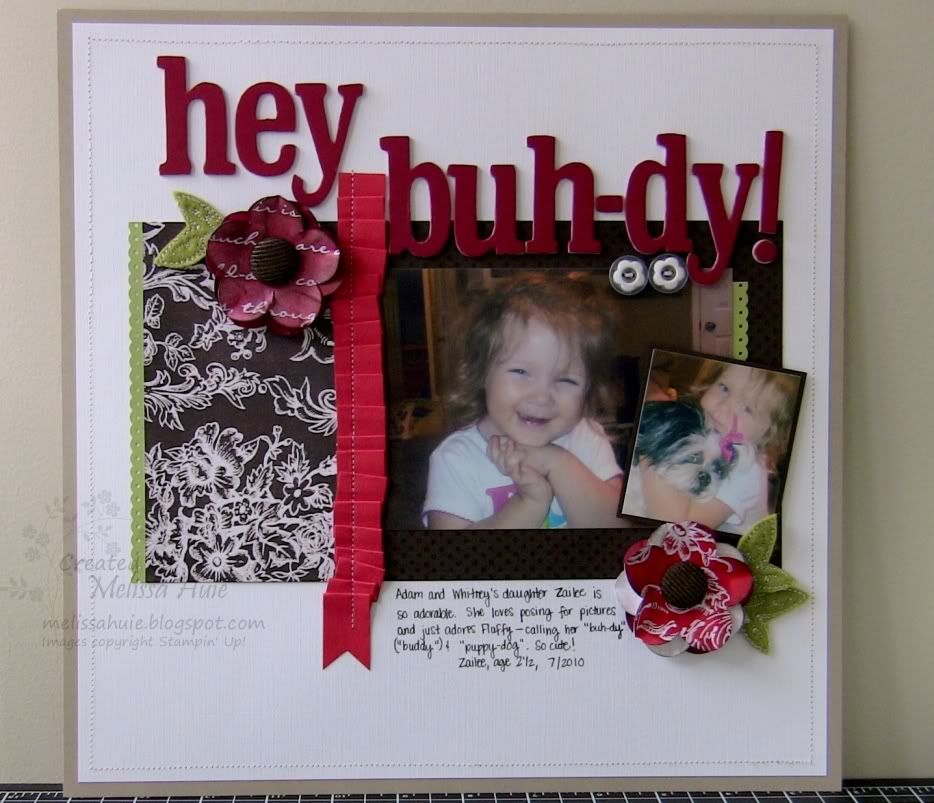
Friends of Seth's brother have a daughter named Zailee.  We've known her all her life, and she's always been so adorable and such a joy to be around.  She's 2-1/2, and we had the pleasure of seeing her when we went back to VA last month.  She wanted me to take her picture numerous times, asking after each photo, "can I please see it?"  I'd tell her how cute the photo is, and she'd reply, "yes, it sure is!"

Zailee just adored our Shih Tzu, Fluffy.  She spent as much time as she could around her, petting and hugging her and saying "hey buh-dy" and "hey puppy-dog".  I couldn't wait to scrapbook these photos. :)  The larger photo is the result of me saying "smile!" and the second one is of her giving Fluffy a hug.  I used a sketch from August's PageMaps, and colors inspired by this top at Anthropologie:


Sigh, another article of clothing from that store to add to my long wish list. ;)  Anyway, here's my page...


The journaling reads:  "Adam and Whitney's daughter Zailee is so adorable.  She loves posing for pictures and just adores Fluffy - calling her "buh-dy" ("buddy") & "puppy-dog".  So cute!"

So there's my favorite Presto Patterns Specialty DSP again, using the toile piece.  I brayered Early Espresso over it, then spritzed it with Vanilla Shimmer Smooch Spritz to give it some sparkle.  I created my pleating to separate the panels by first breaking down the fibers a little in a strip of Poppy Parade (actually two strips to make it long enough), then folding it into pleats.  I then sewed down with my sewing machine.  I also sewed around the white cardstock, and did some hand-stitching on the buttons.  The Presto Patterns DSP also shows up on both of the flowers, colored with Cherry Cobbler and Poppy Parade.  Tip:  I don't have the Poppy Parade ink pad yet, but the brush tip on the marker worked just great at coloring that DSP!

The flowers add a nice bit of texture.  I punched out three pieces of paper for each one, using cardstock and Presto Patterns DSP.  Each layer was crumpled, folded and inked with Early Espresso.  I used a Stampin' Sponge and Early Espresso ink to color some Crumb Cake Corduroy Brads.  And BTW, the Early Espresso cardstock behind the photo was stamped with the single stamp Dot, Dot, Dot in Early Espresso.

One more story about Zailee - she has a new baby brother, who is named after their father Adam.  She calls him "Baby Adam".  Seth's mom, Gina, asked her what her mommy brought back from the hospital, and she replied, "Baby Adam".  Gina asked her then if she wanted baby Adam to stay, or if she wanted him to go back to the hospital.  Zailee said she wanted him to stay, and that she loved him.  Aww.  ♥

Well, have a fabulous day, and thanks for stopping by!

hey buh-dy! scrapbook page supplies (12x12):
Stamps:  Dot, Dot, Dot
Ink:  Early Espresso, Cherry Cobbler
Paper:  Early Espresso, Crumb Cake, Pear Pizazz, Poppy Parade, and Cherry Cobbler cardstock, Whisper White textured cardstock, Presto Patterns Specialty Designer Series Paper
Accessories/Tools:  Sweet Pea Stitched Felt (retired), Whisper White buttons (retired), Crumb Cake Corduroy Brads (retired), Loads of Letters On Board Chipboard (retired), Vanilla Shimmer Smooch Spritz, Poppy Parade Stampin' Write Marker, Basic Black Stampin' Write Journaler, Stampin' Sponges, Dotted Scallop Ribbon Border and Fancy Flower XL Punches, sewing machine and thread

Friday, May 21, 2010

SCIC03 - Elegant Thanks card

Hi!  Happy Friday!

I'm so excited (and a little nervous) to be going to a crop tomorrow!  It's a fairly small crop, with a local scrapbooking group I found on Meetup.com.  My first one with them!  I don't go to crops very often, and I'm such a last-minute planner.. let's just say that I need to get going on getting a few things together!

Krystal's fabulous Stampin' Celebration Inspiration Challenge this week just took my breath away!  For some reason I've really taken a liking to purple in the past year or so, and I've always loved rich colors.  Take a look!


And here's my take on it:


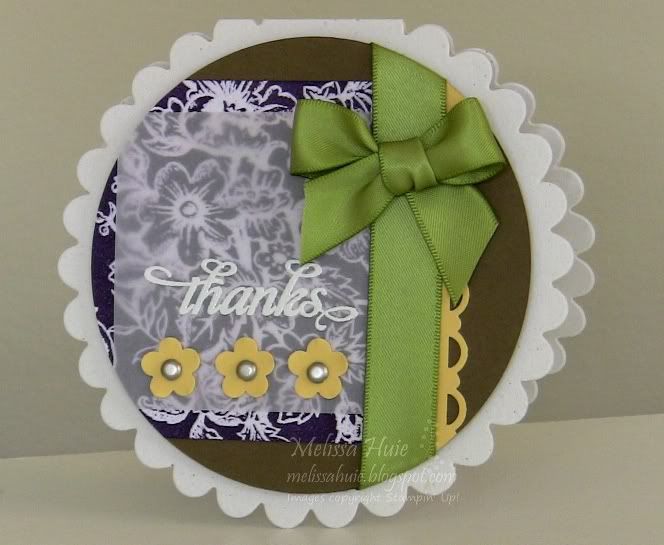
I actually used a sketch challenge from one of my favorite online hangouts, the Memory Makers Magazine Forum.  My friend Kathi found a layout sketch created by Becky Fleck (PageMaps), and I turned it into a card.

Isn't that sheet with the white flowers just gorgeous??  It's one of the sheets from the Presto Patterns DSP in the Summer Mini.  I just love how many different looks you can get using these papers.  I applied Elegant Eggplant ink across the sheet with a brayer, then sprayed it with Vanilla Shimmer Smooch Spritz.  Then I took a piece of Vellum Cardstock and embossed the sentiment with VersaMark and White Stampin' Emboss Powder.  *Tip - attach vellum easily by using choice placement!  I attached my piece by using the silver brads on the flowers, some Tombow Mono Multi Liquid Glue along the right side under the ribbon, and a Mini Glue Dot under the bow.

I created the card base using a piece of folded Naturals White cardstock, lining it up on the Scallop Circle Bigz die so that the fold is "inside" the die-cut.  The Soft Suede circle is approximately 3-7/8", and there is a So Saffron circle of the same size inside.  I love being able to quickly and easily create any size circle I need (up to 6") with the Circle Scissors Plus!

Well, I need to get packing!  Hope you have a fabulous rest of the day!

Elegant Thanks card supplies:
Stamps:  Thank You Kindly
Ink:  Elegant Eggplant, VersaMark
Paper:  Naturals White, Soft Suede and So Saffron cardstock, Vellum cardstock, Presto Patterns Designer Series Paper
Accessories/Tools:  Vintage Brads, Old Olive satin ribbon, White Stampin' Emboss Powder, Vanilla Shimmer Smooch Spritz, Brayer, Trio Flower Punch, Circle Scissors Plus, Scallop Circle Bigz Die, Scallop Trim Border Punch (available July 1), Big Shot

Wednesday, May 5, 2010

Altered Art Journal Details

Hello!

It's a gorgeous day outside!  After I get done here I think I will take my furbaby to the dog park.. after taking Benadryl, of course!  :)

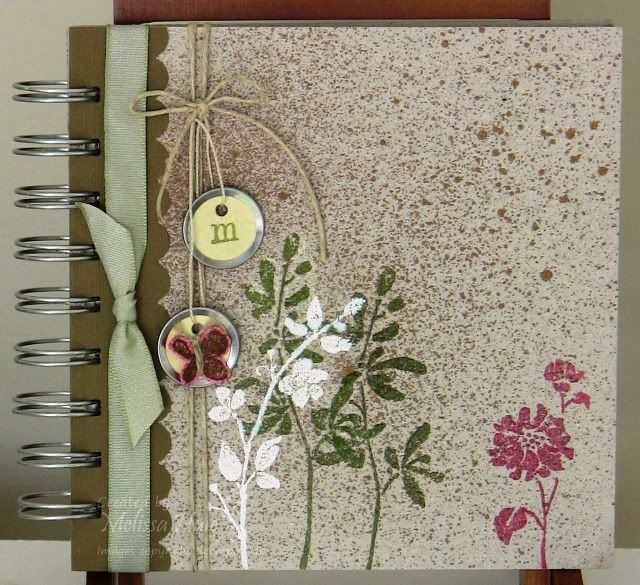
Here are some more details on the 5" x 5" Art Journal that I altered for the Stampin' Addicts Summer Mini Blog Hop this past weekend!  It originally started as a "raw" chipboard album that looks like this (forgot to take a picture of mine, so here's a photo from the SU! online store):


The covers are actually 5-1/4" x 5-1/4", and the book has 20 5" x 5" sheets of Very Vanilla cardstock inside - so they stamp beautifully!  The Spiral Punch works wonderfully for adding extra pages inside.  If you are covering the journal covers with paper, or just adding paper around the binding like I did, the Spiral Punch also helps you create a nice finished look.

Here's my decorated one:


I first spritzed the journal with a bit of Log Cabin Smooch Spritz.  This color is gorgeous!  It's a sort of copper/bronze shimmer, and just creates a beautiful vintage look.  The Smooch Spritz can be a little unpredictable at times (in a good way!), so you'll want to protect your work area with something like our Color Catcher.  I then stamped each flower image with Craft ink - Old Olive, Whisper White and Regal Rose - embossing each one with Clear Embossing Powder.  I just love the opaque-ness of the Craft inks and how beautifully they layer!

After punching the scalloped border along the Soft Suede textured cardstock, I lined up the paper against the binding, making a mark where the first binding hole would be at the bottom of the journal.  Using Paper Snips, snip the mark on the cardstock.  You can then slide that slit into the guide of your Spiral Punch to begin your punching, then go back and punch that slit into a spiral as well.

I used a little Mellow Moss taffeta ribbon, then felt to really amp up the botanical garden look, I needed some Hemp Twine!  (Don't forget that Mellow Moss is one of the colors retiring in June!)  I used the new Mini Vintage Tags to create cute little accents to hang off the Hemp Twine bow.  The tags come with thin Vanilla string attached, and I shortened the one attached to the "m" tag.  I stamped the butterfly from the Watercolor Trio set with Soft Suede ink, onto Regal Rose cardstock, and attached it with a Mini Glue Dot.

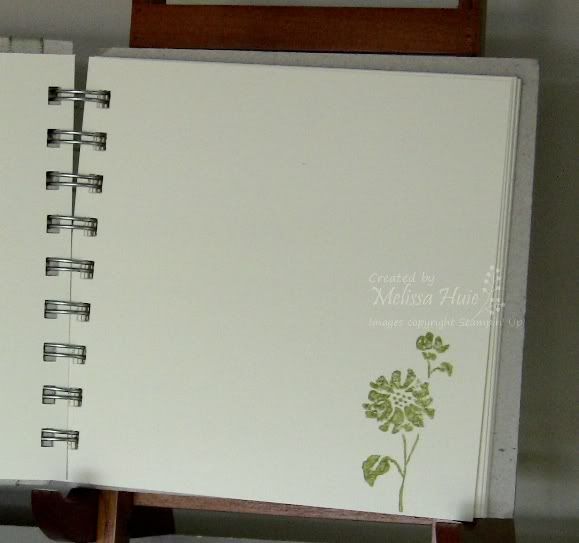
I also stamped the inside of the pages.  I will probably go back and add more stamping.  The pages inside are the same ultrasmooth Very Vanilla cardstock that stamps like a dream!


Here I used Old Olive Classic ink to stamp the flower image.  I actually stamped it off once onto scratch paper to make it a little lighter.

I love this journal!  I can't wait to start using it and also to get more of them!

Have a wonderful day!

Art Journal supplies:
Stamps:  Watercolor Trio, Calendar Alphabet & Numbers
Ink:  Old Olive, Regal Rose and Whisper White Craft Stampin' Pads, Soft Suede and Old Olive Classic Stampin' Pads
Paper:  Soft Suede and Regal Rose cardstock
Accessories/Tools:  On Board 5" x 5" Art Journal, Scallop Edge Border and Spiral Punches, Clear and White Stampin' Emboss Powders, Log Cabin Smooch Spritz, Mini Vintage Tags, Mellow Moss taffeta ribbon, Hemp Twine, Linen Thread, Color Catcher