Showing posts with label Mojo Monday. Show all posts

Tuesday, May 15, 2012

Hello and a Mother's Day Card

Hello there!

Yes, I am still alive!  Sorry for my absence!  Things have been a bit different around here - I will share about that soon! :)

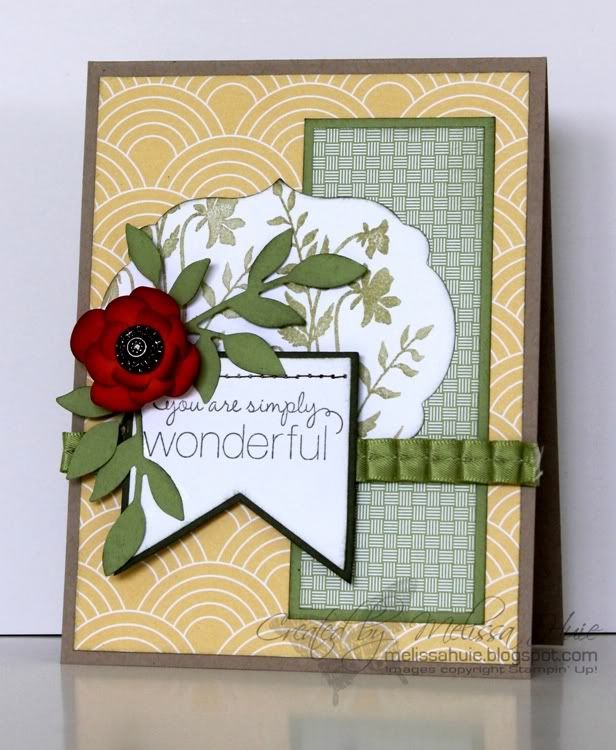
I have been crafting a little, but not very much... I miss it!  I did create a couple of Mother's Day cards.  Here is one of them, based on last week's Mojo Monday and colourQ challenges:


I will be back very soon to share the other card!  Thanks so much for stopping by.  I hope all of you mothers out there had a great Mother's Day! :)

By the way... the new Stampin' Up! catalog will be released on June 1st - earlier this year!  It is a new format, too, and I think you will love it!  If you would like to reserve a copy, please contact me today!  I will also be starting up a new round of clubs soon, so keep an eye out for that.


You are simply wonderful card supplies:
Stamps:  Just Believe, Friendly Phrases
Ink:  Always Artichoke, Pear Pizzazz
Paper:  Tangerine Tango, Always Artichoke, Pear Pizzazz, Crumb Cake, and Whisper White cardstock, Twitterpated and Pocketful of Posies Designer Series Paper
Accessories/Tools:  Antique Brad, Pear Pizzazz Pleated Satin Ribbon, Labels Framelits Die, Floral Fusion Sizzlits Die, Little Leaves Sizzlits Die, Big Shot, Stampin' Sponge

Friday, April 1, 2011

A retro birthday

Happy Friday!

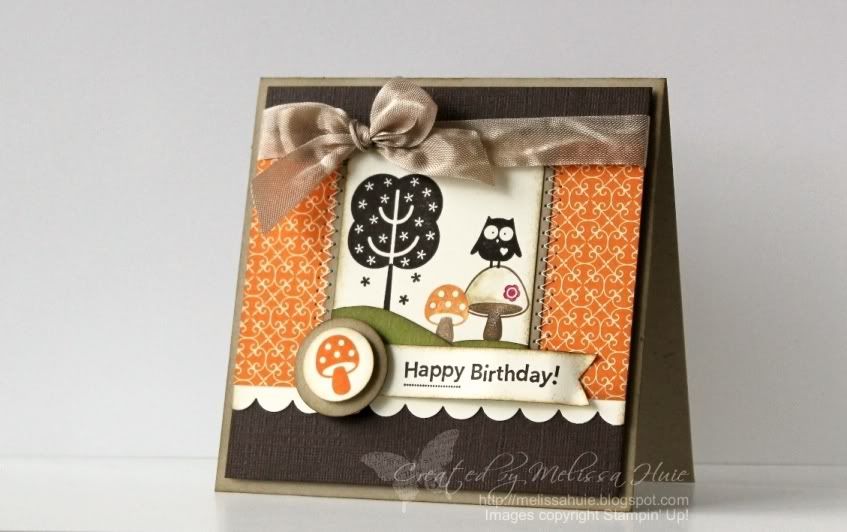
Just a quick post... today I have a card to share with you!  I loved the sketch for Mojo Monday this week, and it worked out perfectly with how I envisioned my card..


I love those little mushrooms, don't you?  :)

I did a bit of masking and sewing on here, and used my rotary blade from the Cutter Kit to create my grassy hills.  The card itself is 4-1/4" x 4-1/4".  I love how it turned out!

Well, I have to run!  Thanks for stopping by!

Retro Birthday card supplies:
Stamps:  Funky Four, On Your Birthday, Love Bandit (retired)
Ink:  Early Espresso, Soft Suede, Pumpkin Pie
Paper:  Crumb Cake, Early Espresso, Very Vanilla, and Old Olive cardstock, Sweet and Sour Specialty Designer Series Paper
Accessories/Tools:  Crumb Cake Seam Binding Ribbon, 3/4" Circle Punch, 1" Circle Punch, Scallop Edge Punch, and Pumpkin Pie, Soft Suede, and Rose Red Stampin' Write Markers, sewing machine and vanilla thread

Wednesday, February 16, 2011

Butterfly Bliss

Hello and happy Wednesday!

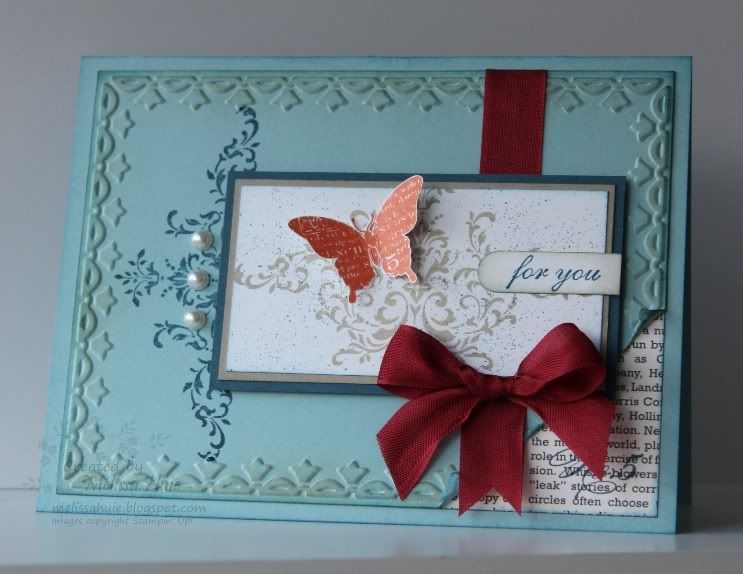
I really love the new Bliss stamp set (which by the way, you can get free as part of Sale-a-bration!) - it makes for really beautiful cards, with little effort!  I combined the color challenge from colourQ and the sketch challenge from Mojo Monday to create my card for today:


The colors in this week's colourQ threw me off a little, but I was ready for a challenge. :)  I do like the way it all turned out!

Well, I need to run.. busy night!  Thanks for stopping by!

Butterfly Bliss card supplies:
Stamps:  Bliss (Sale-a-bration freebie), Clearly For You
Ink:  Crumb Cake, Not Quite Navy, Tangerine Tango
Paper:  Whisper White, Crumb Cake, Not Quite Navy, and Baja Breeze cardstock, First Edition Specialty Designer Series Paper
Accessories/Tools:  Cherry Cobbler Seam Binding Ribbon, Pearl Basic Jewels, Not Quite Navy Stampin' Write Marker, Color Spritzer, Word Window Punch, Cutter Kit, Framed Tulips Textured Impressions Folder, Big Shot

Wednesday, January 26, 2011

Well hello!

Hello there!

Sorry for the long hiatus!  I hope your year has been going well so far!  I've been keeping busy.. I finished the foundation of my December Daily 2010 album a couple of weeks ago, then I was waiting for pictures to be developed and to arrive.  I've been working on that little by little, when I had time.  So hopefully I will have those pages to share with you soon!


My sweet and talented friend Lisa Young awarded me with the Stylish Blogger Award!  Thank you, Lisa!  (I hope you forgive me for taking so long to do this!)  I am supposed to tell you 8 things you might not know about me.  Hmm.. let's see...

1.  I am a "middle child" - I have two brothers, one older and one younger.  I've always wanted a sister. :)

2.  Instead of taking a cruise, I would MUCH rather backpack through Europe.  Someday!

3.  Nature provides some of the most comfort to me.  There is not much better than sitting on a porch, listening to a steady rainfall.

4.  I listen to all kinds of music, and consider it to be a big part of me.  My favorite bands are Flyleaf, Evanescence, and Coheed & Cambria.  I also enjoy a little Taylor Swift and Mindy Gledhill.

5.  I secretly yearn to be a fashion designer.  A friend and I discussed this at length at one point, and even talked of making it into a side business together.  I'm not really an accomplished seamstress, although I am working on it. :)

6.  Seth and I have been together for 9 years, less than a month from today.  We met at our first real jobs, working at a grocery store.

7.  I dream of owning a small-scale farm.  I would love to have my own cows, chickens, and sheep, and a beautiful, old farmhouse.

8.  I've never been a party-girl, and don't mind at all sitting at home, comfy, in my jammies.  Yes, boring, I know. ;)

Ok, those are the things I can think of, off the top of my head!  Here are 8 blogs that inspire me.. please take a moment to check them out, if you can.  I wish I could list you all, because you all inspire me!

Lisa - Life in Flip-Flops
Susan - Susan's Little Scraps
Lora - The Squirrel Hole
Krystal - Krystal's Cards and More
Tanya - Tinkerin in Ink
Marian - Mustard Seed Creations
Donna - Funky Junk Interiors
Anne - The Maui Stamper

And I do have a card to show you!  Fancy that, huh?  hehe


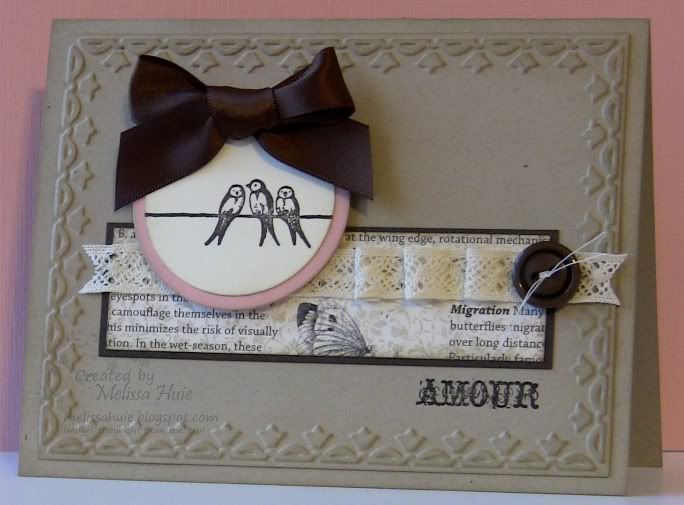
I used Mojo Monday's sketch this week, and a new stamp set from the Occasions Mini Catalog.  I love that set!  To add a little interest to the strip of DSP (also from the Occasions Mini), I stamped across with one of the stamps in the same set in Crumb Cake ink.  I'm also loving that new Framed Tulips embossing folder.. one of my favorite things to do is to actually emboss a separate piece of cardstock, and adhere it to the same color card base to create a tone-on-tone look.  Subtle, but additional texture!

And hey.. it qualifies for the Valentine's Day challenge on the SUO Challenges blog!  Awesome! :)

Ok, I must run.  I'm off to crop for the day!  Thanks for stopping by, and I hope you have a wonderful day!

Espresso Amour card supplies:
Stamps:  Clearly for You
Ink:  Crumb Cake, Early Espresso, and Soft Suede
Paper:  Crumb Cake, Early Espresso, Very Vanilla, and Blushing Bride cardstock, First Edition Specialty Designer Series Paper
Accessories:  Early Espresso Satin Ribbon, Chantilly Lace Trim, Early Espresso button (Neutrals Designer Buttons), 1-3/4" Circle Punch, Circles #2 Originals Die, Framed Tulips Textured Impressions Embossing Folder, Big Shot, vanilla thread

Thursday, November 11, 2010

Winter Post Greetings

Hello!

One of my all-time favorite stamp sets has been Winter Post.  It seems that I've been on a vintage kick lately, but I think it really started when Winter Post was released.  :)

I used Mojo Monday's sketch this week to create my card..


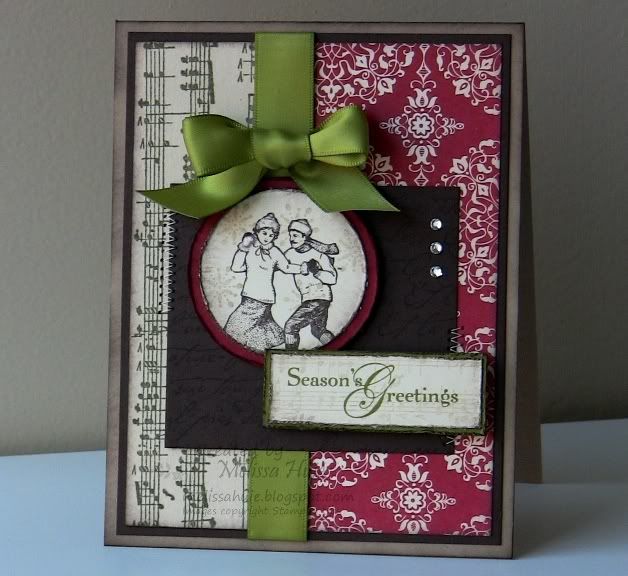
Yes, yes.. the Music Notes wheel again.. which, by the way, makes two appearances on this card. :)   I love it!  The Very Vanilla cardstock on the left was stamped twice with the Music Notes wheel and Always Artichoke ink, then adhered to the right of the Love Letter Designer Series Paper.  The center Early Espresso piece was stamped with the retired French Script background stamp, then sewn onto the card front.  To get the really light impression on the sentiment piece, I inked up the wheel with my Crumb Cake ink pad, then rolled it on scratch paper before going over the Very Vanilla cardstock.

I stamped the ice skaters over some snowflakes (which were stamped with the same technique as above to get a lighter shade of ink) on a 1-3/4" circle, which was then layered on a 2" circle die-cut with the Circles #2 die.  Notice the little hint of shimmer on the female skater?  I filled in her hat and gloves with a little Illuminate Top Coat Smooch Pearlized Accent Ink.  It's so pretty and has such a subtle shimmer!

Of course, to finish off the card, I needed to also add some of my favorite embellishments, the Basic Rhinestone Jewels.  :)

Thanks for stopping by, and I hope you have a great day!

Winter Post Greetings card supplies:
Stamps:  Winter Post, Snow Swirled, French Script (retired)
Ink:  Crumb Cake, Early Espresso, Old Olive, and Always Artichoke
Paper:  Very Vanilla, Crumb Cake, Early Espresso, Riding Hood Red, and Old Olive cardstock, Love Letter Designer Series Paper
Accessories/Tools:  Music Notes Wheel, Basic Rhinestone Jewels, Old Olive Satin Ribbon, 1-3/4" Circle Punch, Circles #2 Originals die, Big Shot, sewing machine and thread

Friday, November 5, 2010

Vintage Mojo Rosette

Happy Friday!

I naturally gravitate towards autumnal colors, so this week's color combination challenge (using Peach Parfait, Early Espresso and Cajun Craze) at Splitcoaststampers kept jumping out in my mind.  I combined it with this week's Mojo Monday sketch to create my card...


This is definitely a card that you couldn't fit in a regular envelope, but that just makes it so much more fun! :)

I created my background by rolling the Very Vintage jumbo wheel across the cardstock several times, using my Wheel Guide to allow me to fill the background nicely.  I then stitched two pieces of Chantilly Lace Trim together using a zig-zag stitch, and stitched that to the background.

I then sprayed some Log Cabin Smooch Spritz over the Newsprint Designer Series Paper, using the Mostly Vintage mask to create a pretty pattern on the DSP.  Two layers of pleated Waffle Paper make for a pretty treatment at the top, which was then topped off with a piece of Cajun Craze (stamped with the Music Notes wheel) punched with the Eyelet Border Punch.  I had scored the Cajun Craze piece and folded it over the top of the panel, then tied a piece of Early Espresso 1/8" Taffeta Ribbon around it.

The butterfly shows off our fun cork, which cuts beautifully in the Big Shot.  This butterfly was die-cut using the Beautiful Butterflies Bigz die, then I tied some Linen Thread around to create the body and antenna.  I added some Basic Rhinestone Jewels to the body as well.

I just love the way the rosette turned out!  It's a spiral piece die-cut with the Table Setting Bigz XL die, which I rolled into the rosette shape, starting at one end of the spiral.  The die-cut actually creates a bigger rosette, but I trimmed it a little to make it small enough for my card.  I spritzed the rosette with Log Cabin Smooch Spritz as well, then bent the petals down a little. I then sponged it with Early Espresso ink before adding the three Basic Rhinestone Jewels.

Ok, the last part of the card is the sentiment tag, which I created by layering the Decorative Label punch-out and a die-cut from the Lots of Tags Sizzlits die set.  Don't you think they layer perfectly?

Well, hope I explained it all well enough. :)  Thanks for stopping by, and I hope you have a wonderful weekend!

Vintage Rosette card supplies:
Stamps:  Occasional Quotes
Ink:  Early Espresso Classic Stampin' Pad, VersaMark ink
Paper:  Early Espresso, Cajun Craze, Peach Parfait, Crumb Cake, and Very Vanilla cardstock, Newsprint Designer Series Paper
Accessories/Tools:  Basic Rhinestone Jewels, Chantilly Lace Trim, Early Espresso 1/8" Taffeta Ribbon, Linen Thread, Cork Sheet, Early Espresso Waffle Paper, Mostly Vintage mask, Music Notes Wheel, Very Vintage Jumbo Wheel, Eyelet Border and Decorative Label Punches, Lots of Tags Sizzlits die set, Table Setting Bigz XL die, Beautiful Butterflies Bigz die, Stampin' Sponges, Big Shot, sewing machine and vanilla thread

Tuesday, October 12, 2010

Eternal Perfect Love

Hello!

I hope you have been having a great week so far!

Today's card uses this week's Mojo Monday sketch, and one of my favorite sentiments...


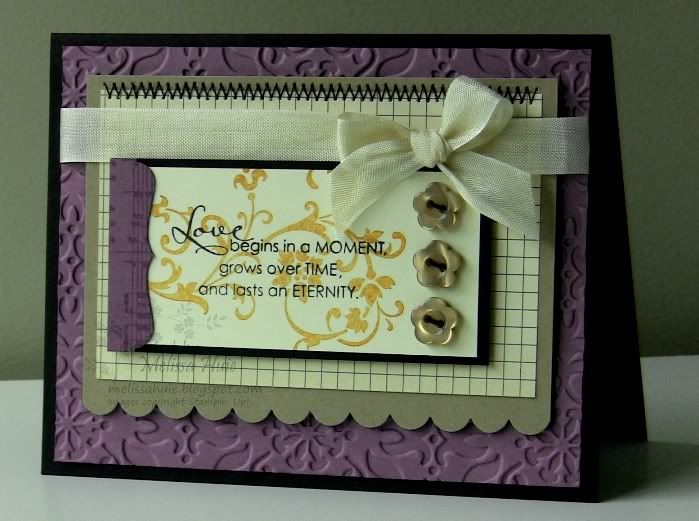
If you didn't know already, I simply ♥ this embossing folder, and you can get such a different look by doing what I did here - use the "debossed" side of the cardstock.  And that sentiment... isn't it just lovely?  I thought it deserved to be center-stage, with the beautiful flourish from the Elements of Style stamp set accenting it.  (To lighten the stamped flourish, I inked up my stamp in More Mustard, then stamped onto scratch paper before stamping on my cardstock.)

Another thing I am really loving right now is the Music Notes wheel.  Such a gorgeous accent on the left side there... can you tell I love how this card came out?  LOL

My dear friend Barb asked how I go about making a card.  Well, sometimes it is really just easier for me to start with a sketch... yes, I admit that sketches are your friend!  Some people may believe that sketches are too stifling.  Now see, this is where I think your creativity can really shine.  As you work with a sketch, you may decide you want something in a different place, etc.  Or, as I do very often, you can follow a sketch very literally.  Sketches can be very time-saving (and sanity-saving, hehe)... I encourage you to give one a try!

Here are some of my favorite sketch websites:
Sometimes I also will convert a scrapbook page sketch into a card.  PageMaps is a great sketch site that is updated monthly (Becky Fleck creates sketches for layouts as well as cards).

If you find yourself struggling with a color combo, I encourage you to check out one of my favorite challenge sites:
I know there are tons more, but these are ones that I try and keep tabs on, and feed into my Google Reader.

And sometimes I just go back and forth and change my color choices a lot while creating something.  It even helps to just walk away sometimes (sorry, I use this word a lot, apparently!), and come back later with a fresh(er) eye.  There are times when I, too, get a little frustrated with where my project is going, or just don't have any creative mojo.  When this happens, I may surf blogs and galleries for inspiration, or just play with some new products.

I am by no means an expert, but I hope that helps somewhat.  If not, feel free to ask more. :)  I love to help!

Well, thanks for stopping by!  I hope you have a great rest of the day!

Eternal Perfect Love card supplies:
Stamps:  Elements of Style, Occasional Quotes (Level 3 hostess set)
Ink:  More Mustard, VersaMark ink, Jet Black StazOn
Paper:  Basic Black, Crumb Cake, Perfect Plum, and Very Vanilla cardstock, Love Letter Designer Series Paper
Accessories/Tools:  Vintage Wallpaper Textured Impressions Folder, Music Notes Wheel, Very Vanilla 1/2" Seam Binding, Crumb Cake Designer Buttons, Decorative Label Punch, Scallop Edge Border Punch, needle, sewing machine and black thread

Tuesday, September 28, 2010

Thinking of You pennants card

Hello!

Do you ever create a card that makes you happy to look at it?  Today's card would be an example of that for me!  I hope that it makes the recipient feel the same way!  :)

I pulled inspiration from Stampin' Celebration's challenge this week:


...and incorporated this week's Mojo Monday sketch into my card...


I loved the pennants in the Stampin' Celebration inspiration photo!  They were very easy to create using the Modern Label Punch!  I simply inserted my cardstock straight edge first, looking through the underside of the punch.  I only inserted the cardstock a little more than 1/3 of the way in, and punched.  I then folded a lip into the punch-out, about 1/8" in, and glued each one around the Linen Thread.  I wanted to add a little texture, so I ran the whole thing through my Square Lattice Textured Impressions folder.  I love how it turned out, and it's a great way to use up scraps!

After placing the butterfly with a mini glue dot, I thought it'd be really cute to create a path using some Linen Thread (which by the way, is one of those accessories I can't live without!).  Just a couple of tiny dots of Crystal Effects keeps the loop perfectly in place!

I do have some exciting news that I will share soon!  Thanks for stopping by!

Thinking of You pennant card supplies:
Stamps:  Thoughts & Prayers
Ink:  Soft Suede
Paper:  Crumb Cake, Soft Suede, Whisper White, Marina Mist, Pink Pirouette, Pear Pizzazz, and Daffodil Delight cardstock, In Color Patterns Designer Series Paper (Level 1 hostess pack)
Accessories/Tools:  Modern Label Punch, Marina Mist 5/8" Satin Ribbon, Linen Thread, Beautiful Wings Embosslits die, Soft Suede and Pear Pizzazz Stampin' Write Markers, Crystal Effects, Neutrals Designer Buttons

Tuesday, September 21, 2010

Friend to friend silhouette card

Hello!

I hope you had a great weekend!

Today I have a quick and easy card to show you.  This week's Mojo Monday sketch is very clean and simple, yet could be dressed up if you wanted to do so.  For my card, I also drew from ColourQ's challenge this week...


Repetition is very pleasing to the eye, so it's a great choice in designing a card.  You can see that in my card here, I repeated the stamped image, as well as the small flowers below it.  I am growing quite fond of sewing on paper... if you're a regular to my blog, I'm sure you already know that!  :)

Well, I need to get going.  Still have a lot to do with getting organized.  Thanks for stopping by!

Friend to friend silhouette card supplies:
Stamps:  Pocket Silhouettes
Ink:  Peach Parfait, Poppy Parade and Old Olive
Paper:  Old Olive, So Saffron, Whisper White, Peach Parfait, and Poppy Parade cardstock, In Color Designer Series Paper (Level 1 hostess)
Accessories/Tools:  Trio Flower (retired), Scallop Trim Border, 1-1/4" Circle, and 1-3/8" Circle Punches, Old Olive 5/8" Satin Ribbon, Metallic Brads, sewing machine and thread

Friday, August 6, 2010

A Giving Life card

Good morning!

It's been a while since I've played along with a creative challenge!  I created this card using Mojo Monday's sketch this week:


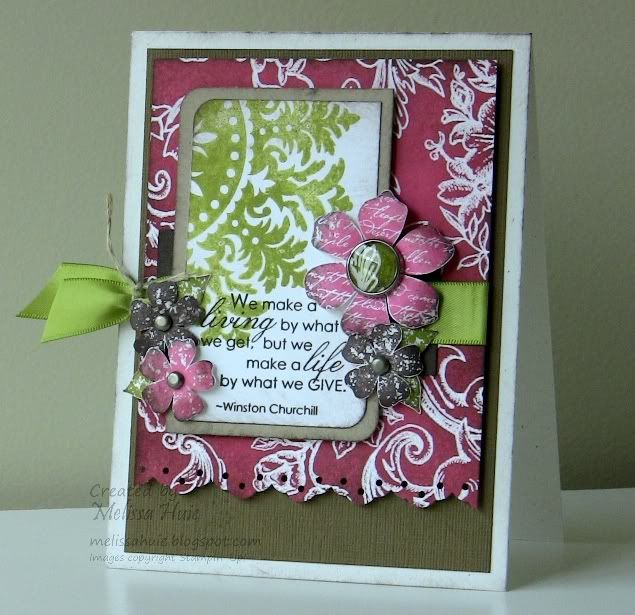
I added a lot of color to the Presto Patterns Specialty Designer Series Paper using the brayer and Regal Rose Classic ink, then sponged with Early Espresso to soften it.  The center of the large flower has Presto Patterns DSP brayered with Old Olive, made into a brad with the Pewter Build-a-Brad kit.

The pink flowers were stamped using the rock and roll technique - first I inked up the stamp in Regal Rose, then I rolled the edges of the stamp into Early Espresso.  I also sponged a little bit of Early Espresso to soften the white edges I left from cutting out the flowers.  To make it easier to see the sentiment, I stamped off once (stamped on scratch paper, then stamped on my cardstock without re-inking).  I actually stamped the sentiment twice with Early Espresso to make it dark enough.. although you can't tell, right?  That's the beauty of the Stamp-a-ma-jig.. just don't move it and you can easily and cleanly stamp an image or sentiment more than once!  :)

Thanks for stopping by!  Have a fabulous day!

A Giving Life card supplies:
Stamps:  Medallion, Vintage Vogue and Occasional Quotes (Level 3 Hostess set)
Ink:  Old Olive, Regal Rose and Early Espresso
Paper:  Soft Suede textured cardstock, Naturals White, Early Espresso, Crumb Cake, and Whisper White cardstock, Presto Patterns Specialty Designer Series Paper
Accessories/Tools:  Linen Thread, Old Olive 5/8" Satin Ribbon, Pewter Build-a-Brad, Metallic Brads, Corner Rounder and Eyelet Border Punches, Brayer, Stampin' Sponges

Tuesday, July 6, 2010

Hydrangea Thank You card

Hello!  I hope you had a great weekend!

Here's a card that I made, using Mojo Monday's sketch this week...


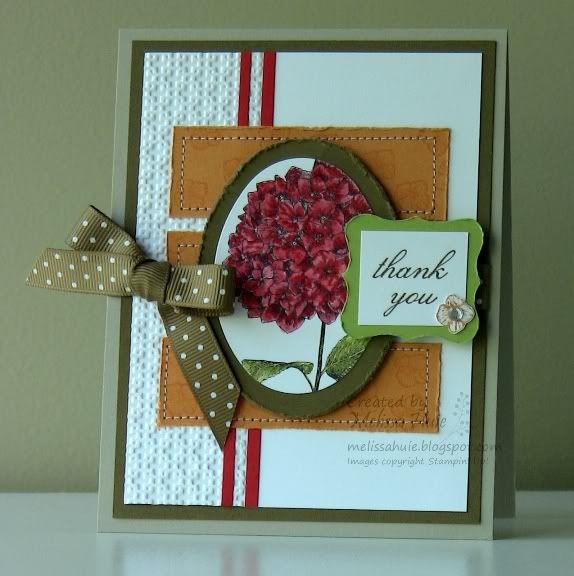
I just love this new stamp from the new Idea Book & Catalog.  So pretty!  It makes me want to buy some hydrangeas for my room, but I'm not sure they'd last too long indoors.

Anyway, so I tried out stitching on paper for the first time!  I think it turned out pretty nicely.  I was tickled pink when I tried it and it worked, and couldn't help admiring it.  LOL.. you can relate... right??

I watercolored the hydrangea petals using Poppy Parade, one of SU!'s new In Colors.  It's such a pretty red! I don't have the ink pads yet, just the markers that I pre-ordered last month, but watercoloring is a breeze with markers!  Simply scribble with the brush end onto something like a plastic clamshell stamp case, then pick up the color using an Aqua Painter or Blender Pen.  I did the same with Pear Pizzazz (another new In Color) on the stem and leaves.  After I had a base color, I went back in and added shading by directly coloring on the image with the markers.

I removed the rhinestone from a Clear Rhinestone Brad to add a nice accent onto the tag.  I can't wait to get the new Rhinestone (and Pearl, by the way) Accents in the new catalog!  My wishlist is definitely a mile long.. whew!  :)

Well, gotta run!  Thanks for stopping by, and have a fabulous rest of the evening!

Hydrangea Thank You card supplies:
Stamps:  Because I Care
Ink:  Jet Black StazOn, Soft Suede Classic Stampin' Pad, VersaMark ink
Paper:  Sahara Sand, Soft Suede, Whisper White, Pear Pizzazz, Peach Parfait, and Poppy Parade cardstock
Accessories/Tools:  Soft Suede 1/2" Polka-Dot Grosgrain Ribbon (retired), Poppy Parade, Pear Pizzazz and Peach Parfait Stampin' Write Markers, Blender Pen, Curly Label Punch, Cutter Kit, Ovals Originals die, Square Lattice Textured Impressions folder, Big Shot, sewing machine and thread

Friday, June 11, 2010

Stampin' Addicts Retiring Mega Hop!


Hi!

It's that time again!!  Welcome to another Stampin' Addicts blog hop!  This hop is all about the stamp sets on the Last Chance Lists (ask your demo for more info), and will run Friday, June 11th, through Sunday, June 13th.

I am stop #27 on the hop!  You may have just come from Jason's Stampin' Pad.  Didn't you just love what he did with the One of a Kind stamp set?  So many different looks!  If this is your first stop, don't worry!  All of the blogs are linked in a big circle, so you can always find your way around.  If you get lost, you can see a complete list of the participating blogs here at Stampin' Addicts!

My projects feature the stamp set Very Thankful.  Have you checked out this set yet??  It comes with a great variety of images, each with a different way of saying "thank you", in different fonts.  I used it in this way in my projects; however, it's more than just for "thank you" cards!  You can easily ink up the images alone and use them for whatever purpose, or even just use the sentiments.  And if you purchase this set through your demonstrator, $2 of each sale goes to the Ronald McDonald House Charities!  How awesome is that!  :)

By the way, I'll just be posting the supply lists for these projects.  Be sure to come back on Monday after the hop to read more details!  Stick around, because I'm also giving away some scrumptious blog candy!

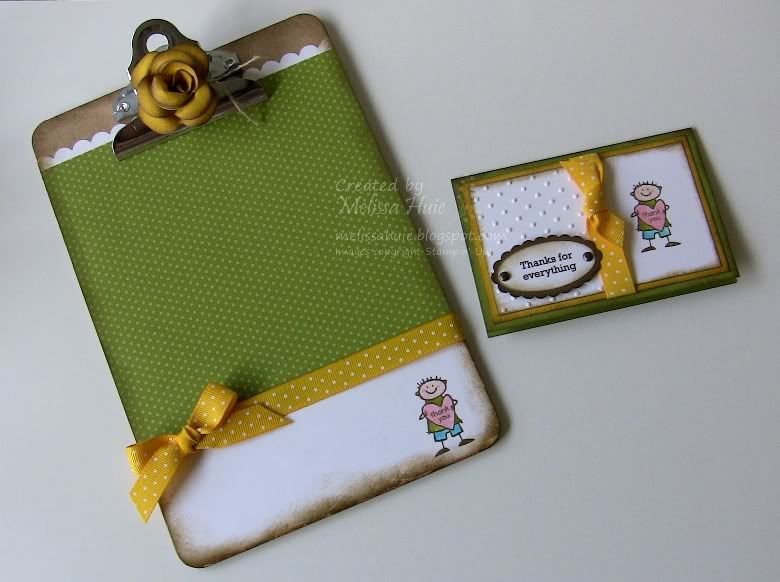
Here is my first project, a gift set using this cute little guy from the stamp set.  You could easily create a girl instead by extending the hair with the coordinating Stampin' Write marker after stamping!  This particular gift set would be perfect for a teacher, or anyone else who works with children.  The card to the right of the mini clipboard is a gift card holder.. who doesn't like gift cards?

Gift set supplies:
Stamps:  Very Thankful
Ink:  Soft Suede, Tempting Turquoise and Old Olive Classic Stampin' Pads
Paper:  The Write Stuff Specialty Designer Series Paper, and Whisper White, Crushed Curry, Soft Suede, and Old Olive cardstock
Accessories/Tools:  Blush Blossom and Pretty in Pink Stampin' Write Markers, Blender Pen, Linen Thread, Crushed Curry 1/2" Polka-Dot Grosgrain Ribbon, Vintage Brads, Chit-Chat Rub-ons, Perfect Polka Dots Textured Impressions Folder, Big Shot, and Fancy Flower XL, Scallop Oval, Large Oval, Slit, and Scallop Edge Punches, Paper Piercing Tool, Mat Pack

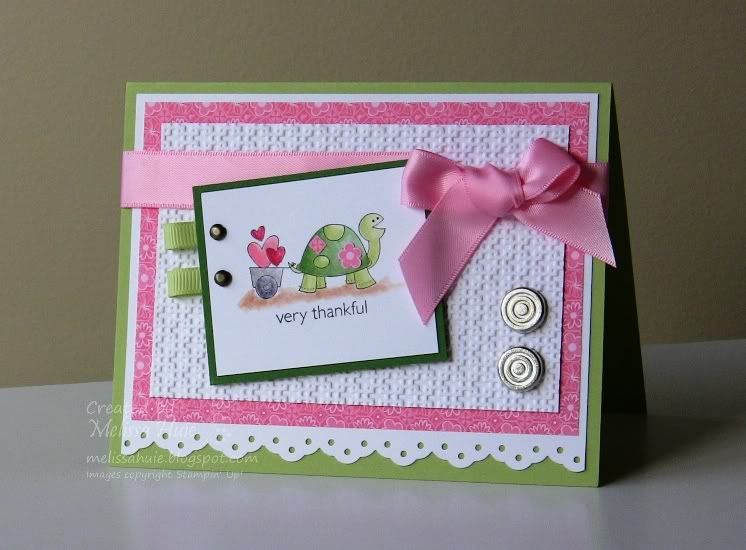
My next project is a card using this week's Mojo Monday sketch, with inspiration sparked by this week's Stampin' Celebration challenge!

Isn't the little turtle cute?  That's probably my favorite image from the set, tied with the peacock!

Very Thankful card supplies:
Stamps:  Very Thankful
Ink:  Jet Black StazOn ink, and Certainly Celery, Garden Green, Creamy Caramel, Ruby Red, Cameo Coral, Going Gray, and Basic Gray Classic Stampin' Pads
Paper:  Pink Flamingo Designer Series Paper, and Certainly Celery, Whisper White and Garden Green cardstock
Accessories/Tools:  Blender Pen, Pretty in Pink 5/8" Satin Ribbon, Certainly Celery 1/4" Grosgrain Ribbon, Circle Designer Brads, Vintage Brads, Square Lattice Textured Impressions Folder, Big Shot, Eyelet Border Punch, Paper Piercing Tool, Mat Pack

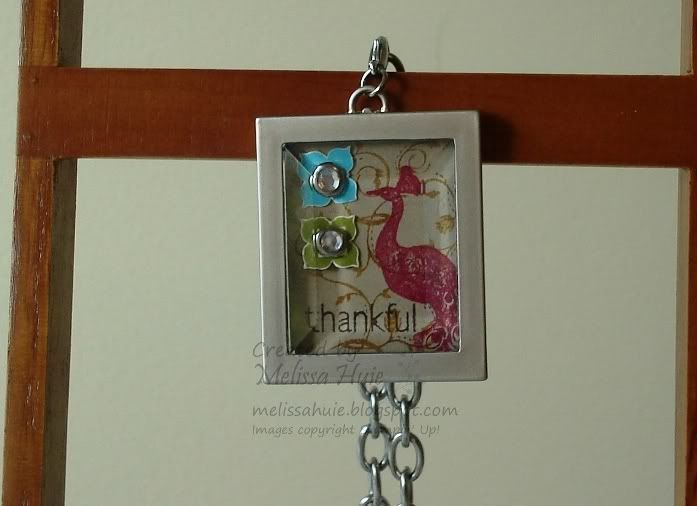
Onto our next project!  Here is a Charm Insert, shown inside the Simply Adorned 1" x 1-1/4" Rectangle Charm.  On Monday, I'll have a picture of the insert outside of the charm, so you can see the details more clearly.

Charm Insert supplies:
Stamps:  Very Thankful
Ink:  Tempting Turquoise, Old Olive and Chocolate Chip Classic Stampin' Pads
Paper:  Kraft and Very Vanilla cardstock
Accessories/Tools:  More Mustard and Real Red Stampin' Write Markers, Simply Adorned 1" x 1-1/4" Rectangle Charm, Simply Adorned 18" Chain, Small Clear Rhinestone Brads, Paper Piercing Tool

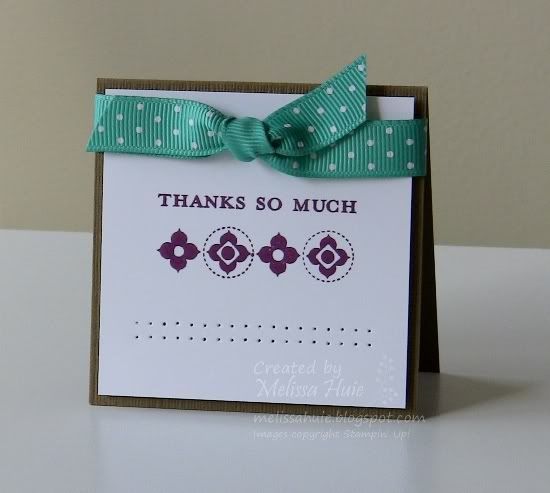
Last, but not least, I have a clean and simple 3" x 3" card.  This size card is great to slip in with a gift!

3" x 3" Thanks card supplies:
Stamps:  Very Thankful
Ink:  Rich Razzleberry Classic Stampin' Pad
Paper:  Soft Suede textured and Whisper White cardstock
Accessories/Tools:  Bermuda Bay 1/2" Polka-Dot Grosgrain Ribbon, Paper Piercing Tool, Mat Pack

Ok, now about that blog candy!  I have an extra Very Thankful stamp set up for grabs!  Leave a comment by June 13th, 11:59PM EST telling me what your favorite project is, and I'll use Random.org to pick a lucky winner!  Make sure you come back on June 15th, when I'll announce the winner of the stamp set!

I hope you enjoyed my projects using this stamp set.. thanks for stopping by!  Your next stop is Sarah's Ink Spot.  You'll love her spooky, yet cute, projects!  And feel free to join us over at Stampin' Addicts!

Thursday, May 20, 2010

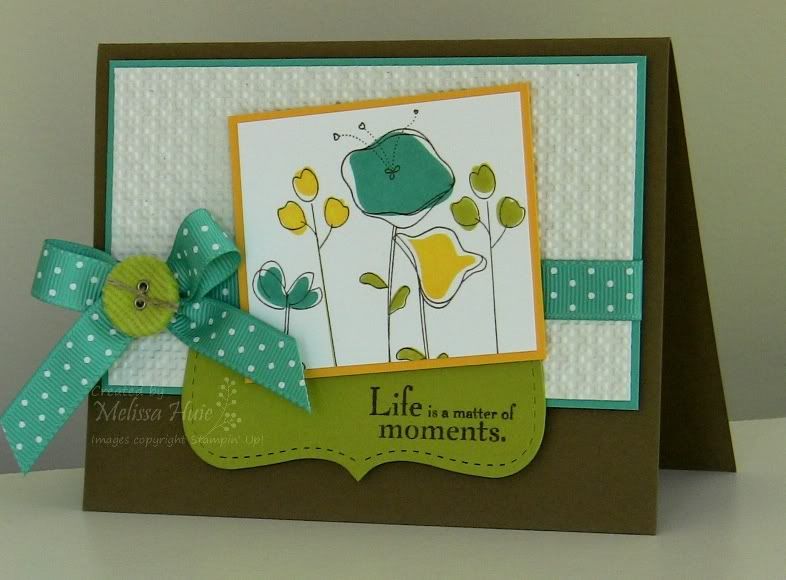
Flower Moments card

Hello and happy Thursday!

Can you believe we're already more than halfway through May??  I really can't believe how much time has passed!

Sorry for my infrequency in posting.  Things have been a little busy here, and I haven't gotten to stamp as much as I've been wanting.  But I do have a card for you today!  I thought I had just about died and gone to fashion heaven (LOL) when I saw Arielle's colourQ challenge this week:


Gorgeous bag, right??  It's SO me!

Anyway, enough gushing!  I used Mojo Monday's sketch this week to create my card:


I did leave out the vertical lines from the sketch.  (I was considering using Linen Thread to create this - do you think it needs it?)  Whew!  I am certainly going to miss Bermuda Bay!  Remember that this color, along with Summer Sun, will be retiring next month!  Make sure you get this from your demo before it's too late. ;)  The green color, Kiwi Kiss, is already retired.  For some reason I'm partial to greens, and I really, really love this color combo.  Just makes me think of fresh spring flowers!

The sentiment is from the Elements of Style stamp set, stamped on a Kiwi Kiss Top Note die-cut.  Don't forget that you receive a free pack of Designer Brads with the purchase of the Elements of Style stamp set during May!

Thanks for stopping by!

Flower Moments card supplies:
Stamps:  Elements of Style, Awash with Flowers (available July 1)
Ink:  Kiwi Kiss (retired), Soft Suede, Summer Sun (retiring), and Bermuda Bay (retiring)
Paper:  Soft Suede, Naturals White, Whisper White, Kiwi Kiss (retired), Summer Sun, and Bermuda Bay cardstock
Accessories/Tools:  Square Lattice Textured Impressions Folder, Bermuda Bay 1/2" Polka-Dot Grosgrain Ribbon, Kiwi Kiss Corduroy Button (retired), Linen Thread, Top Note Bigz Die, Big Shot

Thursday, May 13, 2010

Trendy Mojo Trees!

Hi!

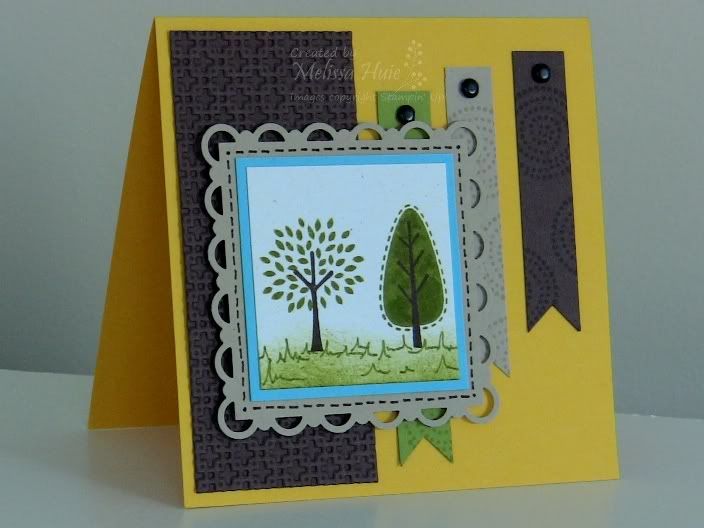
I wanted to break out a stamp set I bought last month during the sale - Trendy Trees!  I just love this week's Mojo Monday sketch.. how fun is this sketch??


Here's my card:


What do you think of the grass?  I certainly didn't want my trees "floating", so I sponged a little Old Olive Classic ink along the bottom.  I added a little depth by drawing in some blades of grass with the Old Olive Stampin' Write marker.  The little strips on the side of the card were created out of cardstock and stamped with one of the stamps from the set and VersaMark ink.  I finished off the image panel with some faux stitching lines, drawn with the Chocolate Chip Stampin' Write marker.

The card is 4-1/4" square, so it will fit easily into a standard card envelope!  It is made from Summer Sun cardstock, one of the colors retiring in June.. be sure to get yours if you haven't already.. before it's gone!

Thanks for stopping by, and have a great rest of the night!

Trendy Trees square card:
Stamps:  Trendy Trees
Ink:  Chocolate Chip and Old Olive Classic Stampin' Pads, VersaMark ink
Paper:  Summer Sun (retiring!), Chocolate Chip, Kraft, Naturals White, and Old Olive cardstock
Accessories/Tools:  Square Lattice Textured Impressions folder, Vintage Brads, Scallop Trim Border and Corner Punches, Chocolate Chip and Old Olive Stampin' Write markers, Stampin' Sponges, Big Shot

Friday, April 30, 2010

Stampin' Addicts Summer Mini Blog Hop!


Hello and welcome to stop #10 of the Stampin' Addicts Summer Mini Blog Hop!  The hop runs from April 30th through May 2nd.  You may have hopped on over from Dawnmarie's blog - didn't you just love all of the fabulous things she did with the new Presto Patterns Specialty Designer Series Paper?  If this is your first stop, don't worry!  The blogs are linked full-circle, so you can find your way through the entire hop.  You can find the complete list of the blogs in this post at SA.

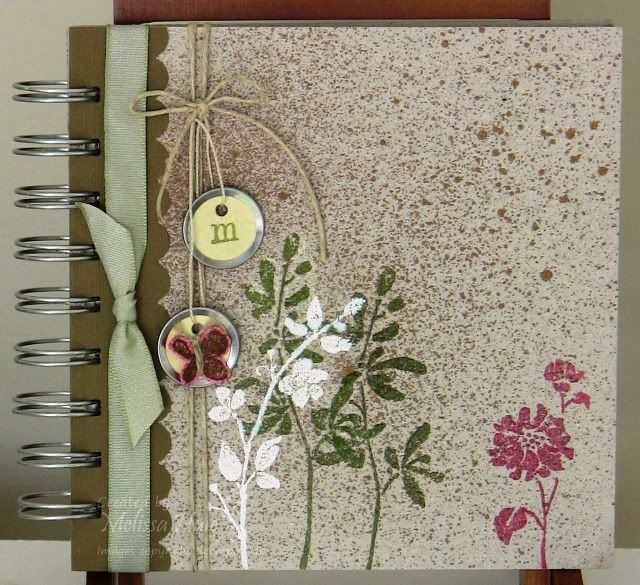
I am featuring the stamp set Watercolor Trio... remember that you can order this and other Summer Mini products beginning May 1st from your demonstrator!  I'll just be including supply lists for these projects in this post.  If you like what you see, please remember to bookmark my blog and come back after the hop is over for more details!

Have you checked out Stampin' Up!'s awesome On Board Art Journals?  They come ready for your personalization, and are wonderfully durable!  Here is a 5" x 5" one that I have stamped.  I'm not sure what I'll use it for yet though!

Art Journal supplies:
Stamps:  Watercolor Trio, Calendar Alphabet & Numbers
Ink:  Old Olive, Regal Rose and Whisper White Craft Stampin' Pads, Soft Suede Classic Stampin' Pad
Paper:  Soft Suede and Regal Rose cardstock
Accessories/Tools:  On Board 5" x 5" Art Journal, Scallop Edge Border and Spiral Punches, Clear and White Stampin' Emboss Powders, Log Cabin Smooch Spritz, Mini Vintage Tags, Mellow Moss taffeta ribbon, Hemp Twine, Linen Thread, Color Catcher


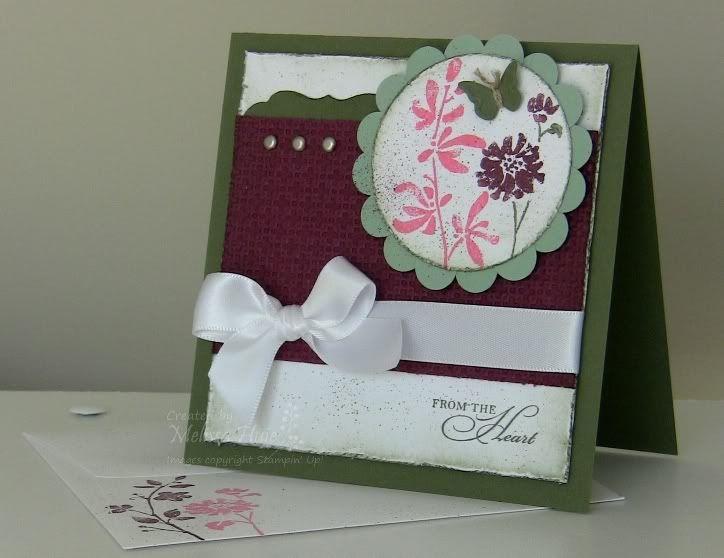
Next, I have a 5" square card with a coordinating envelope, created using this week's Mojo Monday sketch and ColourQ Challenge #30:

From the Heart card supplies:
Stamps:  Watercolor Trio
Ink:  Always Artichoke, Bravo Burgundy and Cameo Coral Classic Stampin' Pads
Paper:  Always Artichoke, Whisper White, Bravo Burgundy, and Sage Shadow cardstock
Accessories/Tools:  Whisper White satin ribbon, Always Artichoke and Bravo Burgundy Stampin' Write Markers, Vintage Brads, Lots of Tags Sizzlits dies, Beautiful Wings Embosslits die, Square Lattice Textured Impressions Embossing Folder, 1/2" Circle Punch, Linen Thread, Stampin' Sponges, Color Spritzer, Cutter Kit, Circle Scissors Plus, Big Shot, Whisper White Medium Square Envelope


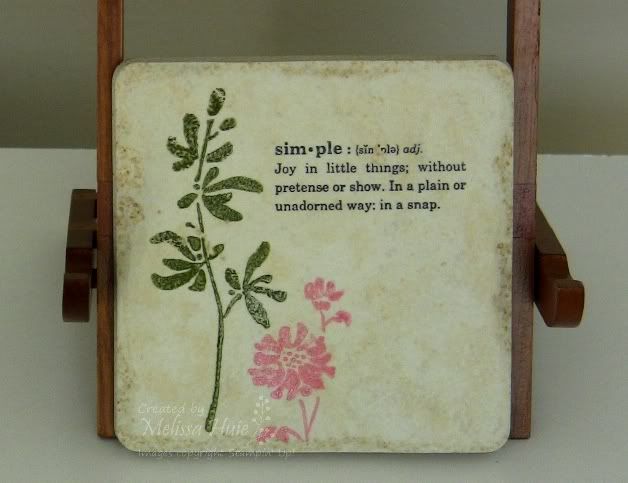
On to our next project, a coaster.  I feel the images in this set go perfectly with this saying from Define Your Life!  You can find tumbled stone tiles at your local home improvement store.

Simple Joy Tile supplies:
Stamps:  Watercolor Trio, Define Your Life
Ink:  Old Olive and Regal Rose Craft Stampin' Pads, Jet Black StazOn ink
Accessories/Tools:  Clear Stampin' Emboss Powder, tumbled tile


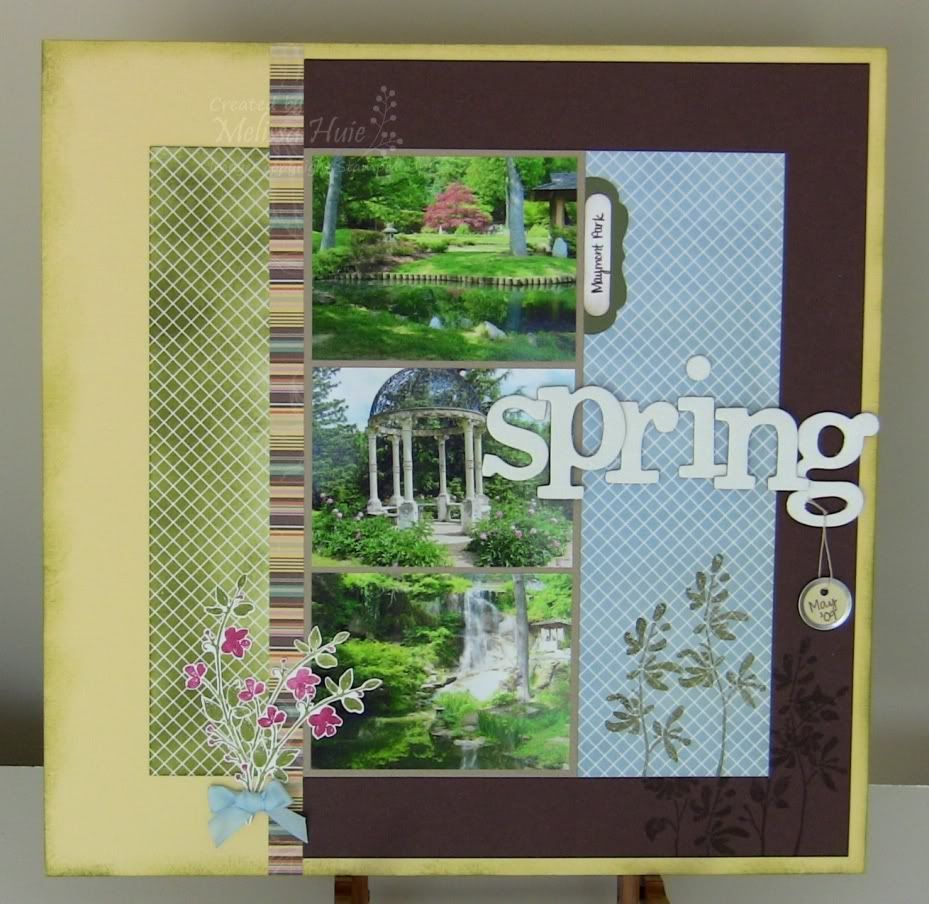
And finally, I have a 12" x 12" scrapbook page to show you!  These pictures were taken at Maymont Park, near where I lived in Virginia.  Love spending time there!

"Spring" 12" x 12" page supplies:
Stamps:  Watercolor Trio
Ink:  Old Olive, Chocolate Chip and Bashful Blue Classic Stampin' Pads, Whisper White and Old Olive Craft Stampin' Pads
Paper:  Barely Banana, Chocolate Chip, Kraft, Always Artichoke, and Whisper White cardstock, Presto Patterns Specialty Designer Series Paper, Sweet Pea Designer Series Paper pad
Accessories/Tools:  Chocolate Chip, Rose Red, and Old Olive Stampin' Write Markers, On Board Timeless Type Chipboard, Mini Vintage Tags, Bashful Blue taffeta ribbon, Clear and White Stampin' Emboss Powders, Brayer, Stampin' Sponges, Word Window Punch, Lots of Tags Sizzlits dies, Big Shot


I hope that you have enjoyed my projects, and I thank you for stopping by!  Your next stop is Mary's blog.  She is showcasing our wonderful Simply Adorned charms - I can't wait for you to see what she has done with them!  Enjoy the rest of the hop!

Tuesday, March 23, 2010

Hearts For You card

Hi!

Just a quick post today as I've got dinner on the stove!  :)

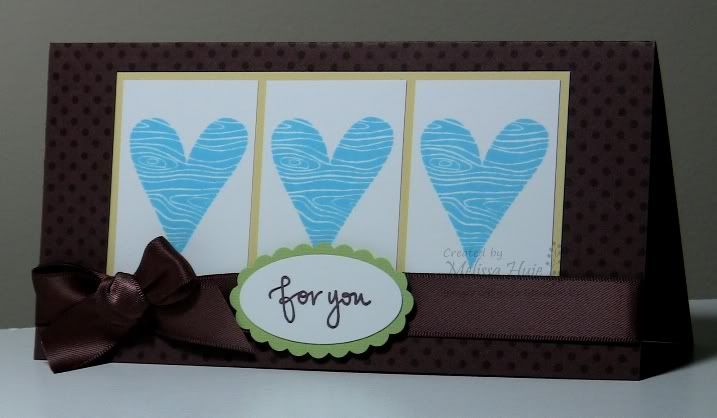
It's been a long time since I've done a Mojo Monday challenge, so here we go!  I also used Arielle's colourQ challenge for this week.


It's a fairly simple card!  The finished size of the card is 6-1/2" x 3-1/4", which will fit in SU!'s Small Open-End Envelopes.  I stamped the Dot, Dot, Dot image repeatedly to create a background on my card base - super simple to line up using the Stamp-a-ma-jig!

Hope you're having a great week so far!

Hearts For You card supplies:
Stamps:  I {Heart} Hearts, Great Friend, and Dot, Dot, Dot
Ink:  Tempting Turquoise, Chocolate Chip
Paper:  Chocolate Chip, Barely Banana, Certainly Celery, and Whisper White cardstock
Accessories/Tools:  Scallop Oval and Large Oval Punches, Chocolate Chip 5/8" satin ribbon

Thursday, February 25, 2010

Happy birthday, Stampin' Addicts!
Hello!

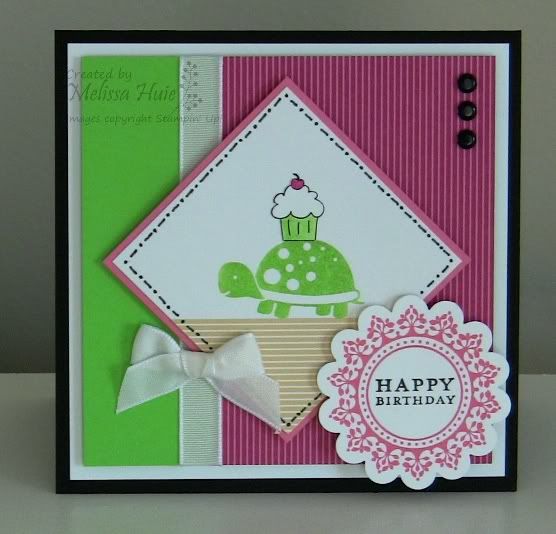
So I hope you enjoyed the Birthday Blog Hop this past weekend!  I created this card in honor of Stampin' Addicts' first birthday, using a little help from Mojo Monday's sketch and colourQ's color combo this week...


Arielle's color picks were Melon Mambo, Regal Rose, Apricot Appeal, and Green Galore.  Green Galore is definitely a color I don't use very much!  I balanced out these bright colors with Basic Black and Whisper White, and my card measures 4-1/4" square.  To create the focal point, I stamped the turtle from Fox & Friends in Green Galore, then added a little cupcake on top of his shell from Crazy for Cupcakes.  The Crazy for Cupcakes stamp set has a pedestal with several cupcakes on it, but I simply stamped and cut one out.  I then colored in the cupcake using the ink pads and Blender Pen.  Too cute!

If you haven't checked out Stampin' Addicts yet, you really should!  It is a positive community for stampers, centered around Stampin' Up!.  Feel free to give me a shout-out over there.. my username is simply Melissa!

See you later!

SA Birthday Card supplies:
Stamps:  Fox & Friends, Crazy for Cupcakes, Vintage Labels
Ink:  Jet Black StazOn, Regal Rose, Green Galore, Melon Mambo
Paper:  Basic Black, Whisper White, Regal Rose, and Green Galore cardstock, Welcome Neighbor Designer Series Paper pad
Accessories/Tools:  Blender Pen, Basic Black Stampin' Write Journaler, Whisper White taffeta ribbon, Vintage Brads, Scallop Circle punch

Monday, January 25, 2010

Mojo and Inspiration - Owl Birthday

Happy Monday!

Can you believe January's almost over?  Time just seems to slip away, much too quickly.  I have a card to show you!  My friend Marie started an inspiration challenge over at her blog, From Boots to Stamps.  Here is her source of inspiration, from the Behr paint website:


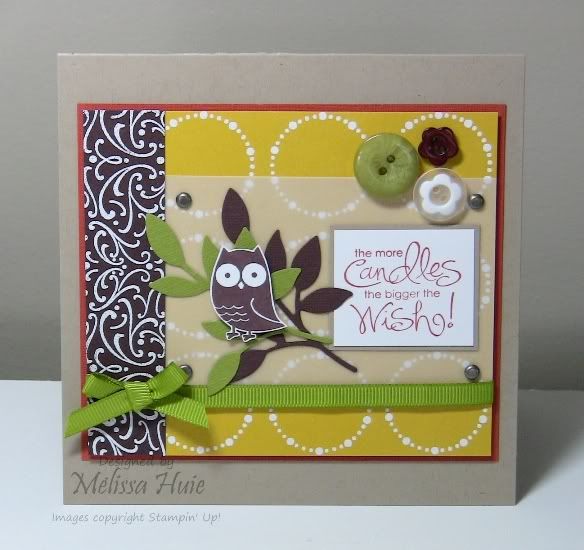
I am a huge earthy colors girl.  I want this room!  Even though it uses such a bold color (which looks to me like Dusty Durango, by the way), it seems like the perfect place to relax.  I just love all of the patterns here!  I also used this week's Mojo Monday sketch for my card.


You can see that I pulled inspiration from the colors in the picture, and I am so in love with those pillows!  I used a stamp from the Circle Circus stamp set and heat-embossed it with White Embossing Powder to re-create the pattern.  I also heat-embossed the Chocolate Chip panel with the Sweet Swirls wheel.  The finished card measures 5-1/4" square, a perfect fit for our Medium Square Envelopes.

I invite you to play along!  Please visit Marie's blog and check out the other creations on Stampin' Addicts as well!

Owl Birthday card:  Fox & Friends, Whimsical Words (SAB freebie) and Circle Circus stamp sets; Dusty Durango and Chocolate Chip Classic Stampin' Pads; VersaMark ink; Kraft, Dusty Durango, Whisper White, Chocolate Chip, Crushed Curry, and Old Olive cardstock; Vellum cardstock; Playground Designer Buttons; Button Latte; Vintage Brads; Old Olive 1/4" grosgrain ribbon; Little Leaves Sizzlits die; Sweet Swirls wheel; White embossing powder

Monday, January 18, 2010

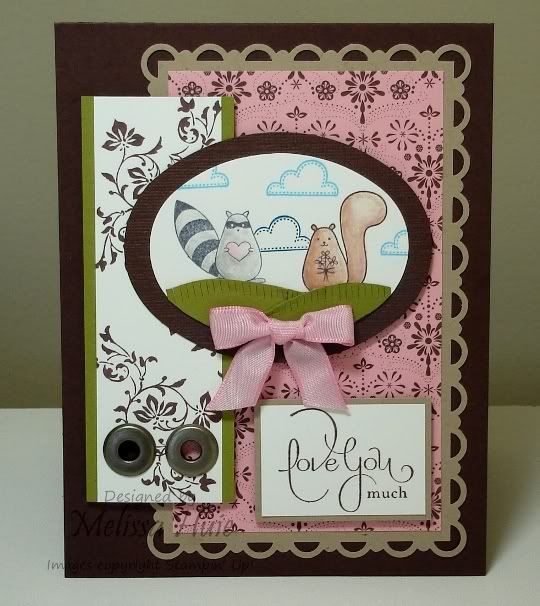
Love You Much!

Hi!

Today's card was inspired by this week's challenges from Pals Paper Arts and Mojo Monday...


I tell you, I just love the new sentiment stamp set, Well Scripted, from the Occasions Mini.  The font is just gorgeous!  And aren't the little critters from the Love Bandit set just so darn cute?  I colored them in by using the Classic ink pads and a Blender Pen.  They were also masked when stamping the darker cloud, so that it appears that the cloud is behind them.  So cute!

Placement with the cling-mounted stamps as a breeze, although I will admit that I used the Stamp-a-ma-jig for the sentiment... just to be sure!  I created the side piece using a stamp from the Vintage Vogue set, making it look like a piece of patterned paper.  The beautiful pink DSP in the background is from the Sending Love Specialty paper pack.  The papers in this pack are fabulous - one side has a glittery design.  I used the non-glittery side here.

The grass was fun to create!  After cutting the shapes I wanted to make the "hills", I simply used my craft knife to cut little slits and ruffled up the "grass" a little.

Have a great day!  We're going to test-drive some cars.  Hopefully we'll find a good one!

Love You Much Critter card:  Love Bandit, Vintage Vogue, Good Neighbors, and Well Scripted stamp sets; Chocolate Chip, Basic Gray, Going Gray, Creamy Caramel, Pretty in Pink, Not Quite Navy, and Tempting Turquoise Classic Stampin' Pads; Chocolate Chip, Old Olive, Kraft, and Whisper White cardstock; Sending Love Specialty Designer Series Paper; Scallop Trim Corner and Border punches; Pretty in Pink taffeta ribbon; Pewter Jumbo Eyelets; Crop-a-dile; craft knife; Blender Pen; Ovals Originals die

Thursday, December 17, 2009

Mojo Monday #117

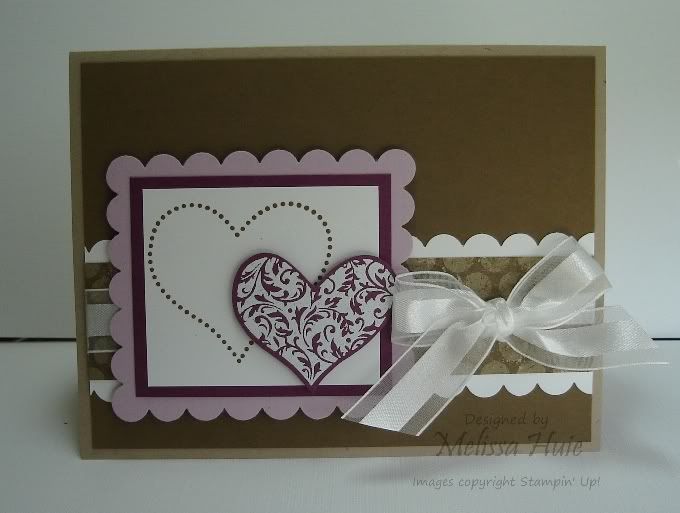
Hi everyone!  Here is my card for Mojo Monday's sketch challenge #117:


The original sketch uses a scalloped circle for the focal point, but I made a scalloped rectangle using the Scallop Edge punch.  I used the new I {Heart} Hearts stamp set, which will be available for purchase on January 5th, 2010 in the new Occasions Mini catalog.  (If you are not a regular customer of mine, but would like one, please email me and I will get one sent out to you!)  I got this set in the new clear-mount option, which I am very pleased with!  The stamps are still made of rubber, so you still get that great crisp, clear image that Stampin' Up! is known for with their stamps.  The stamps are stored in a DVD-size case, so it's perfect for minimal storage space!

I'm excited because I'm almost done with my Christmas cards!!  Are you done?

Scalloped Heart card:  I {Heart} Hearts stamp set; Soft Suede Classic Stampin' Pad; VersaMark ink; Kraft, Soft Suede, Rich Razzleberry, Pale Plum, and Whisper White cardstock; The Write Stuff Specialty Designer Series Paper; Scallop Edge punch; Whisper White organza ribbon; white embossing powder