Showing posts with label 3-D projects. Show all posts

Sunday, January 22, 2012

Accordion Scrapbook - UStamp with Dawn and Friends - Let's Score!

Hello!

Just popping in again to share my other project for the UStamp with Dawn and Friends Let's Score! event... sorry, popping in is all I seem to do nowadays!


This is my accordion scrapbook and matching card.  And yes.. that's a doughnut, haha.  :)  The mini scrapbook is scored using the Simply Scored tool, and ties closed with the Basic Gray Satin Ribbon:


I have to say, I love how the Basic Gray grounds the brighter colors.. and I'm just in love with this year's In Colors, aren't you?

Click the banner below to be taken to the UStamp with Dawn and Friends Let's Score site!


Thanks so much for stopping by!  I hope you have a great rest of the weekend!

Thursday, January 5, 2012

All-Occasion Card Set - UStamp with Dawn and Friends - Let's Score!

Happy New Year!!

Just popping in to share one of my projects for the latest UStamp with Dawn and Friends event - Let's Score! My project went live on the site today, an all-occasion card set...


All of the cards fit nicely into the box, along with their coordinating envelopes.  I put together two of my favorite stamp sets - Kindness Matters, and Always Elegant.  Let me know what you think! :)

Here's a side view of the box.. it took a while to put all of those pearls on there, ha!  I love how it turned out, though.


Click the banner below to be taken to the Let's Score! site!


As always, thanks for stopping by! :)

Thursday, December 1, 2011

UStamp with Dawn and Friends! Up on the Rooftop Blog Hop!


Welcome to the UStamp with Dawn and Friends!! Up On The Roof Top Blog Hop!! Holiday 2011.

If you have been following the blog hop from the beginning, you should have just come from Mercedes' blog and seen her beautiful rosette. Isn't it just gorgeous?  I love the way she created the poinsettia!

If you are just jumping in on the blog hop, no problem, as you can start at any point. All of the designers' blogs are linked together, so you will be able to see ALL of the super projects we have for you!

I chose to create a Christmas tree ornament. Wouldn't this just be a great gift? Every time the recipient looks at it on the tree, they'll think of you! :)


I created the ornament using just a clear glass ball ornament, covered in Metallic Silver Waffle Paper. You'll want to sit down with your favorite movie or show for this part! :)

Here's a close-up of the ornament:


Don't you just love those sparkly snowflakes? I was pleasantly surprised to see that even though it's a Sizzlit die, the Northern Frost Decorative Strip Die will cut through the thicker Silver Glimmer Paper! And I just love the font in Hand-Penned Holidays!

Here's my matching card:


Cards are so much more fun with a coordinating inside and envelope, don't you think?


** Comments are closed for the blog candy, but I'd still love to hear from you! :) ** Now, as a special thank you for stopping by my blog I am giving away blog candy! Please leave a comment telling me about your favorite holiday tradition to be entered for a nice little bag of goodies containing current Stampin' Up! products. I will randomly select and announce a winner on Tuesday, so please check back to see if you are the lucky recipient!

But wait!  There's more!  :)

You have the opportunity to get the downloadable PDF Tutorial for my project free! It's a gift from UStamp with Dawn and Friends!! Yay! See the blinkie below to access the FREE blog hop website.

In the spirit of the holiday season, you have the opportunity to get in on "Special Holiday Pricing" for the upcoming UStamp with Dawn and Friends!! SCORE!! Event. The Stampin' Up! Simply Scored Tool is HOT STUFF, and SCORE!! will feature 40+ projects, all created using the Simply Scored Tool. SCORE!! is a MUST NOT MISS Event!! See the blinkie below to join and get in on the Early Bird savings.

And now for the most exciting giveaway of the season...
Everyone that joins the new and exciting upcoming event - SCORE!! - with "Special Holiday Pricing" will be entered into a Drawing to win 1 of 3 FREE Passes for an ENTIRE YEAR of UStamp with Dawn and Friends!! events!!
YES!!
You read that right!!
YOU could win a whole year of UStamp with Dawn and Friends!! events FREE!!
***Special Holiday Pricing of just $19.99 ends Dec 8th*** 
Winners will be announced on Friday, Dec 9th. 
Click the Blinkie below to join SCORE!! with Special Holiday Pricing and a chance to win a FREE Year of UStamp with Dawn and Friends!! events!


Click the blinkie below and you will be taken to the Up on the Rooftop Blog Hop website!


Of course it's ***FREE*** to join and there you will find the tutorials for all the blog hop projects, plus live chats, challenges and more prizes!!

You will even have an opportunity to be considered for a spot as a Guest Designer!! Yes!! It is all FREE, so tell all your friends and join the fun with UStamp with Dawn and Friends!!
***

Last, but certainly not least, please hop on over to Julia's Cards, where you will find Julia with a lovely frame to show you!


Thanks again for stopping by, and Happy Holidays!

Sunday, November 13, 2011

10 Things I Love About You mini album - UStamp with Dawn and Friends

Hello!

Just a quick post - my mini album entitled "10 Things I Love About You" went live today on the UStamp with Dawn and Friends Knockout Punches event!


Our 10-year anniversary is coming up in February, so I decided to create an album with 10 things I love about Seth. :)  How awesome is it that I have it done early?  Yay!

The album covers were cut from On Board sheets, and covered with paper.  Here's a peek inside:


If you'd like to access the tutorial, you can find this along with over 50 other projects as part of the UStamp with Dawn and Friends Knockout Punches event!  I have one more project for this event, which will post soon!


Thanks for stopping by, and have a great night! :)

Tuesday, October 25, 2011

Life's Moments Paper Bag Album - UStamp with Dawn and Friends

Hello!

Here is the last project set that I created for the Paper Parade event at UStamp with Dawn and Friends!


It's a paper bag mini album!  This was the first time I'd made a paper bag album and I just loved it!  My favorite color combo lately seems to be Pink Pirouette + Marina Mist + Pear Pizzazz + Soft Suede, doesn't it?  And of course, you have to add in my all-time favorite Crumb Cake too. :)

Here are a few pages from the album:


With the next couple of pages, you can see there's a little side pocket under the Beau Château Side Note to the right:


Each set of pages has an insert where paper bag originally opened.  Here's one of my inserts:


My tutorial (along with over 40 other full-color PDF tutorials as a package deal!) can be found over at UStamp with Dawn and Friends Paper Parade.  Thanks for stopping by!

Sunday, October 16, 2011

Housewarming Gift Set - UStamp with Dawn and Friends Paper Parade

Hello!

My housewarming gift set project went live on UStamp with Dawn and Friends Paper Parade last week!  This project would be a great alternative to a bottle of wine or a toaster, don't you think? :)


The set includes a framed wall décor piece that says "Home Sweet Home", and has Mini Clothespins attached to allow you or the recipient to switch out the photo when they'd like!  Also included is a set of tumbled tile coasters.  I just love the Sweet Floral image, don't you?  I can see so many uses for this pretty background stamp!

If you'd like step-by-step instructions for this project and over 40 others, visit UStamp with Dawn and Friends Paper Parade!

Have a great rest of the weekend, and thanks for stopping by!

Thursday, October 6, 2011

Halloween Wreath - UStamp with Dawn and Friends Paper Parade!

Hello there!

I'm just popping in to show you one of my projects that I made for UStamp with Dawn and Friends Paper Parade that was posted this morning!  This event is all about celebrating our lovely cardstock and Designer Series Paper.


Wouldn't this be lovely over the mantel, as part of your Halloween decorations?  You could certainly hang it on your front door, too, but I wouldn't put it where it could be exposed to the elements (in between a front door and screen door could work).  And can you believe.. it's only made from about half a pack of the First Edition Specialty Designer Series Paper!  It's definitely not a small wreath however, as it uses a 12" wooden wreath frame as the base, and is approximately 20" across.  It was so fun to make, and definitely creates a wow factor!

You can find my step-by-step tutorial as part of the UStamp with Dawn and Friends Paper Parade event!  There are over 40 full-color tutorials included in the price - a great deal!

Let me know what you think, and thanks for stopping by!

Tuesday, August 23, 2011

UStamp with Dawn and Friends!

Hello!

I just wanted to share with you my special holiday project!  When Dawn came to me and asked me if I would like to be a guest designer for her UStamp with Dawn and Friends holiday event, I was just so excited!  This event is called I ♥ the Holidays and is just filled with all kinds of lovely goodness!

Here's a look at my project, which went up at midnight - I just love how it turned out!


The little book on the left is a Christmas Planner!  I've always been meaning to create one of these, but would always run out of time.  Nothing like being prepared for Christmas in August!  :)


The planner opens up, and there is a mini book inside, with folders for gift, meal, and decoration planning and journaling, as well as spaces for you to document special traditions and other notes.  There are also pockets inside for the card and tags!


If you'd like step-by-step instructions on how to make it, head on over to UStamp with Dawn and Friends!  You get over 40 amazing tutorials and project ideas from awesome designers.. well worth the price IMO!

Have a great night, and thanks for stopping by!

Sunday, December 5, 2010

My Christmas Wreath

Hello!

I knew I wanted to make my own Christmas wreath this year (although I've never made or bought one before), and had many different ideas on how to go about doing it.  I toyed with a few different wreath bases in my head for a while, and the one that I kept going back to and finally decided upon was this ruffled wreath made by Emily Jones of Jones Design Company.  I was drawn to its natural feel.  I pretty much followed her tutorial, using a 10" styrofoam wreath from a dollar store, and burlap bought by the yard.  Then I just spiffed it up!

Here's the end result!  I absolutely love it!


I used a few things from my stash, and some wreath adornments found at the local craft store.  The pinecones are those ones that smell like cinnamon... yum!


Love how the banner turned out!  After I made each pennant, I hot-glued it to the retired silver elastic cord, and hand-sewed it onto the wreath.


I made the pretty little flower below out of the Deck the Halls Designer Series Fabric (SO glad I have two more packages on the way.. I love this stuff!)... I just die-cut some flowers using the retired Flower Layers #3 Big Shot die, folded and layered them, then sewed them together and onto two unfolded layers of flowers.  I sewed this as well to the wreath.


And here's how it looks on our door!  You'll have to excuse the lighting, as the sun had already set.. :)  Maybe I'll try and take another photo in the morning.


I also am thinking about getting a longer wreath holder... as you can see, our peep-hole is a little blocked!  You can kind of see through it, but there's a big ol' pinecone there, haha.  I'd love to hear what you think about it!  

Well, I gotta go.. think I'll make myself some hot chocolate!  It has been snowing a little bit off and on, and it's quite cold out.  Hope you are staying warm where you are, and thanks for stopping by!  :)

I'm linking this here:

Tuesday, November 9, 2010

My inspiration board!

Hello!

I've had this pretty bulletin board for a while, having wanted to create an "inspiration board" of sorts and finding the board at a craft store on clearance.  I wanted to incorporate Stampin' Up!'s decorative line in somehow, originally planning on using a stencil.  I couldn't decide what stencil to use, though. ;)

I adore the Upsy Daisy DE, and realized it would look perfect on the board.  I simply cut it down to create the look I wanted before applying.  It literally took me a couple of minutes to prepare and apply it to the bulletin board!  (Just to let you know, the daisies aren't as blinding white in real life as they are in the pictures.  LOL - I really think the pictures don't do this much justice!)


Next, I cut out the letters to spell "create" out of chipboard and using the Simple Letters Bigz dies.  I then cut the letters out of Sweet & Sour Specialty Designer Series Paper and adhered it to the chipboard using the Anywhere Glue Stick (love this for covering chipboard).  I inked the letters with Whisper White Craft ink, then added them to the board with Stampin' Dimensionals.  Of course, I also had to use my Music Notes wheel on my Old Olive punched borders.  :)  The group of scrunched flowers was the finishing touch!

Here are some close-up shots of the two corners:


Of course, the board is "naked" at the moment... I'm going to work on making some altered push pins and clothespins and start hanging things received from friends and inspirational photos, etc.  I also might add some other things to the actual design of the board, but you get the idea. :)

Thanks for stopping by!

Inspiration bulletin board supplies:
Stamps:  Music Notes wheel
Ink:  VersaMark ink, Whisper White Craft Stampin' Pad
Paper:  Old Olive cardstock, Sweet & Sour Specialty Designer Series Paper, Thoroughly Modern DSP (retired)
Accessories/Tools:  Upsy Daisy White Décor Elements vinyl, On Board Long Board chipboard, Simple Letters Bigz dies, Eyelet Border and 1-3/8" Scallop Circle Punches, Early Espresso 1/8" Taffeta Ribbon, Circle Designer Brads (retired), Big Shot

Friday, October 15, 2010

Mini Notebook Cover with Designer Fabric

Happy Friday!!

I started this project a few weeks ago, and then put it aside for a while.  I finished it today!

I thought it would be cute to use Stampin' Up!'s beautiful new Designer Fabric to create a cover for a notebook.  Well, I had some mini composition notebooks laying around that I found on clearance last year, so I created this...


I love how it turned out!  I actually used the Deck the Halls Designer Fabric from the Holiday Mini Catalog... so as you can see, the fabric is more than just for the holidays!  The mini notebook slides into the cover (like those old textbook covers you used to make out of paper bags for school), so it's replaceable when you fill up the notebook.

To start out, I measured and cut a piece of Crumb Cake cardstock to make a "folder".  This just covers the outside of the notebook, leaving excess space around the edges to allow for the sewing.  I attached some of the fabric to the front of the Crumb Cake cardstock using the Anywhere Glue Stick, then created a pocket on the inside to hold the notebook.  I attached the Chantilly Crochet Trim, then sewed around the edges with my sewing machine (you can see a little blooper there on the bottom edge where my needle kind of skipped a little... oops!  Hey, adds to the homemade look, right?).  The edges of the fabric on the inside are finished, not left raw.

Here's the inside:


And here's the back, which I left pretty plain:


To create the tag, I first punched a piece of Naturals Ivory cardstock with the Decorative Label Punch (love this new punch!), then stamped the Music Notes wheel across twice with Crumb Cake ink.  I then stamped "notes" in Early Espresso with the Sweet Shoppe Lowercase Alpha set (my new favorite alpha), and distressed the edges with Crumb Cake ink.  Next, I adhered it to the front with Multipurpose Liquid Glue, and hand-sewed it to the front.  Tip: It was so easy to create the straight line of holes with the Mat Pack and Paper Piercing Tool before sewing!  I also hand-sewed the buttons.


Aren't those flowers sweet?  They were created using the Floral Fusion Sizzlits die, and Always Artichoke and Early Espresso cardstock.  I curled the edges to give them a little extra dimension.  A gorgeous Antique Brad finished off the bigger flower.  :)

And of course, I had to add one of my butterflies.  They seemed like the perfect finishing touch!

Well, I have to go cook dinner.  Thanks for stopping by, and I hope you have a great weekend!

P.S.  Don't forget that the Clearance Blitz ends on Monday, 10/18!

Mini Notebook Cover supplies:
Stamps:  Sweet Shoppe Lower Alpha
Ink:  Early Espresso, Always Artichoke and Crumb Cake
Paper:  Crumb Cake, Naturals Ivory, Always Artichoke, and Early Espresso cardstock
Accessories/Tools:  Deck the Halls Designer Fabric, Linen Thread, Chantilly Crochet Trim, Music Notes wheel, Antique Brad, Neutrals Designer Brads, Beautiful Wings Embosslits die, Floral Fusion Sizzlits die, Decorative Label Punch, Big Shot, sewing machine and thread

Monday, June 14, 2010

Blog Hop Project Details

Happy Monday!

I hope you enjoyed this past weekend's Retiring Blog Hop!  As promised, here are some more details about my projects...

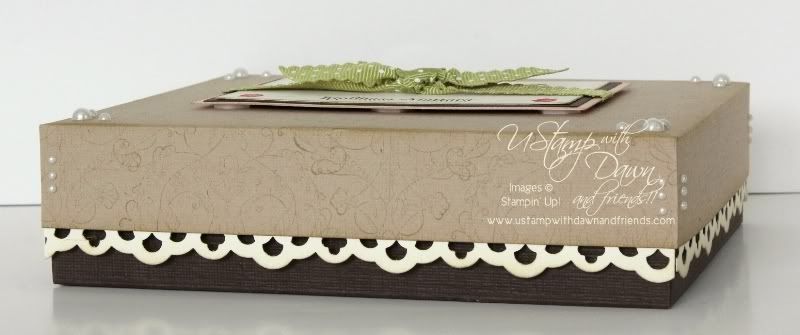
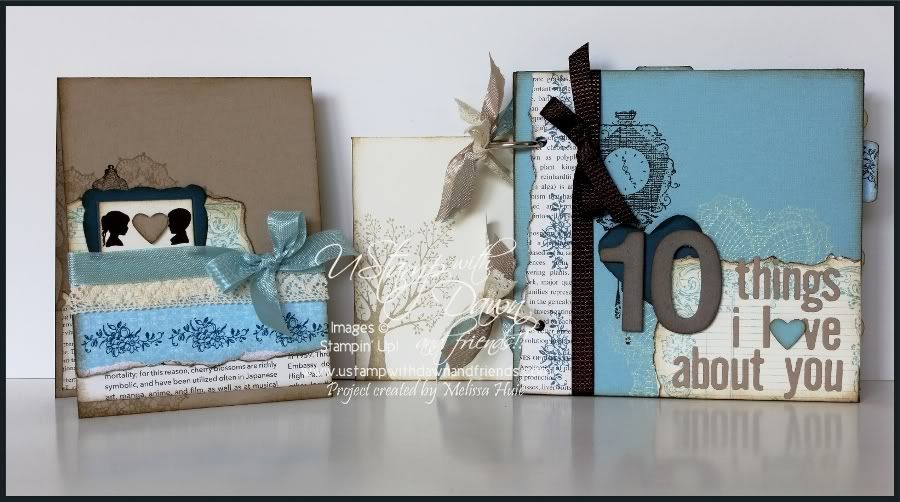
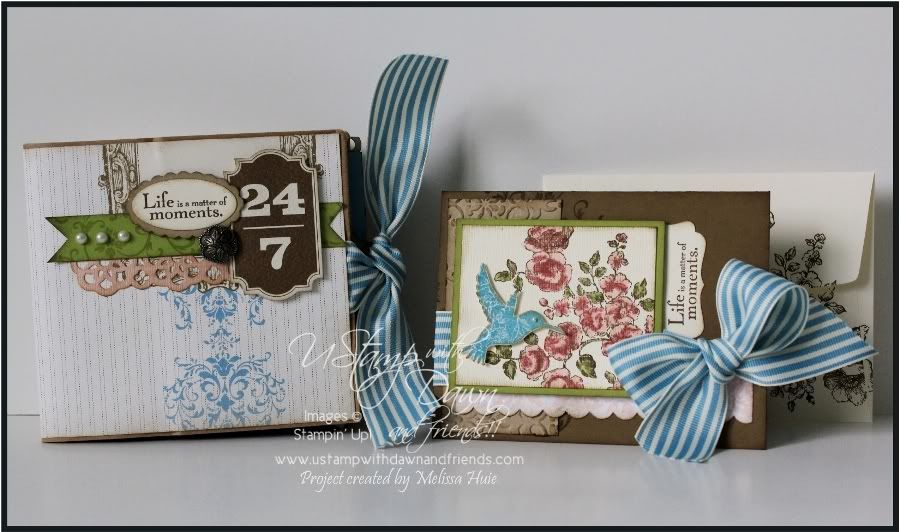
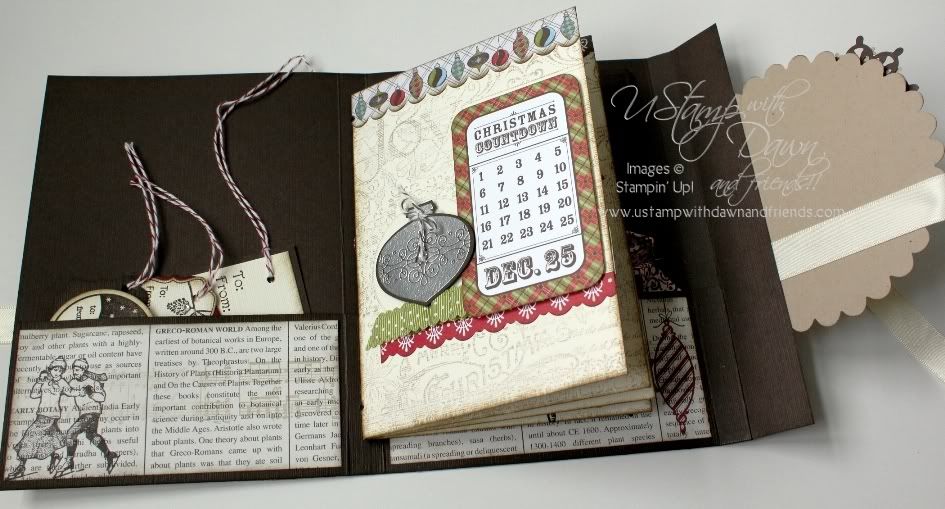
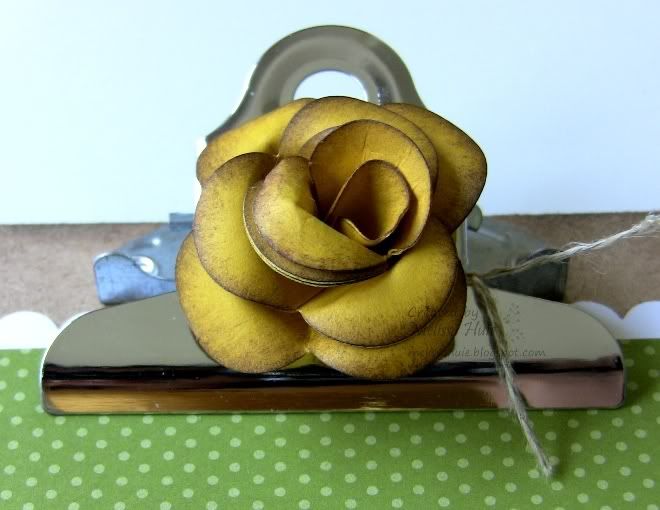
So first off, the altered mini clipboard.. this was so much fun to make!  I bought this mini clipboard for a little over a dollar at an office supply store.  It's the perfect size for one of those smaller memo pads, or to hang from a wall with a mini calendar or treasured photo.


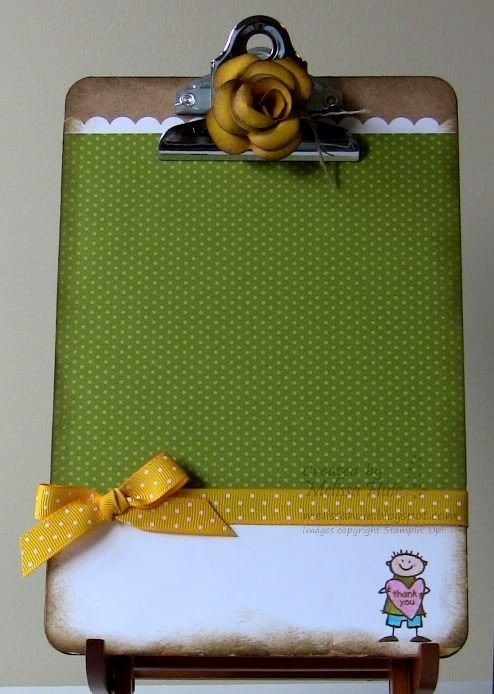
I first measured and cut a piece of Whisper White cardstock, punching the top end with the Scallop Edge Border Punch, then adhered a piece from The Write Stuff Specialty DSP.  Make sure you use adequate amounts of adhesive.. you want this to be completely adhered to prevent air bubbles.  I then applied a découpage medium to the back of the Whisper White piece, as well as to the clipboard.  Next, I laid the paper down, smoothing out all air bubbles with my bone folder.  With the help of my Stamp-a-ma-jig, I stamped the little guy from the stamp set in the corner with Soft Suede Classic ink, and colored him in with ink pads/Blender Pen and markers.  (Remember that even though Blush Blossom is retiring, SU! will still carry the Stampin' Write marker.)  I then inked up the edges of the entire thing with Soft Suede ink and a Stampin' Sponge, and tied some Crushed Curry ribbon along where the DSP ends.

I wanted to cover up the office store's name on the clip, so I decided to try out one of those paper roses I had been seeing everywhere.  To create my rose, I actually followed an awesome tutorial by Julie Williams, which you can see here.  I tied some Linen Thread around the clip, then attached the rose with some Pop-up Glue Dots.  It adds so much to the clipboard, and makes it a little feminine.  So cute!


Altered Mini Clipboard supplies:
Stamps:  Very Thankful (retiring)
Ink:  Soft Suede, Tempting Turquoise and Old Olive Classic Stampin' Pads
Paper:  Whisper White and Crushed Curry (retiring) cardstock, The Write Stuff Specialty Designer Series Paper (retiring)
Accessories/Tools:  Pretty in Pink and Blush Blossom Stampin' Write Markers, Blender Pen, Linen Thread, Crushed Curry 1/2" Polka-Dot Grosgrain Ribbon (retiring), Scallop Edge Border Punch, Stampin' Sponges

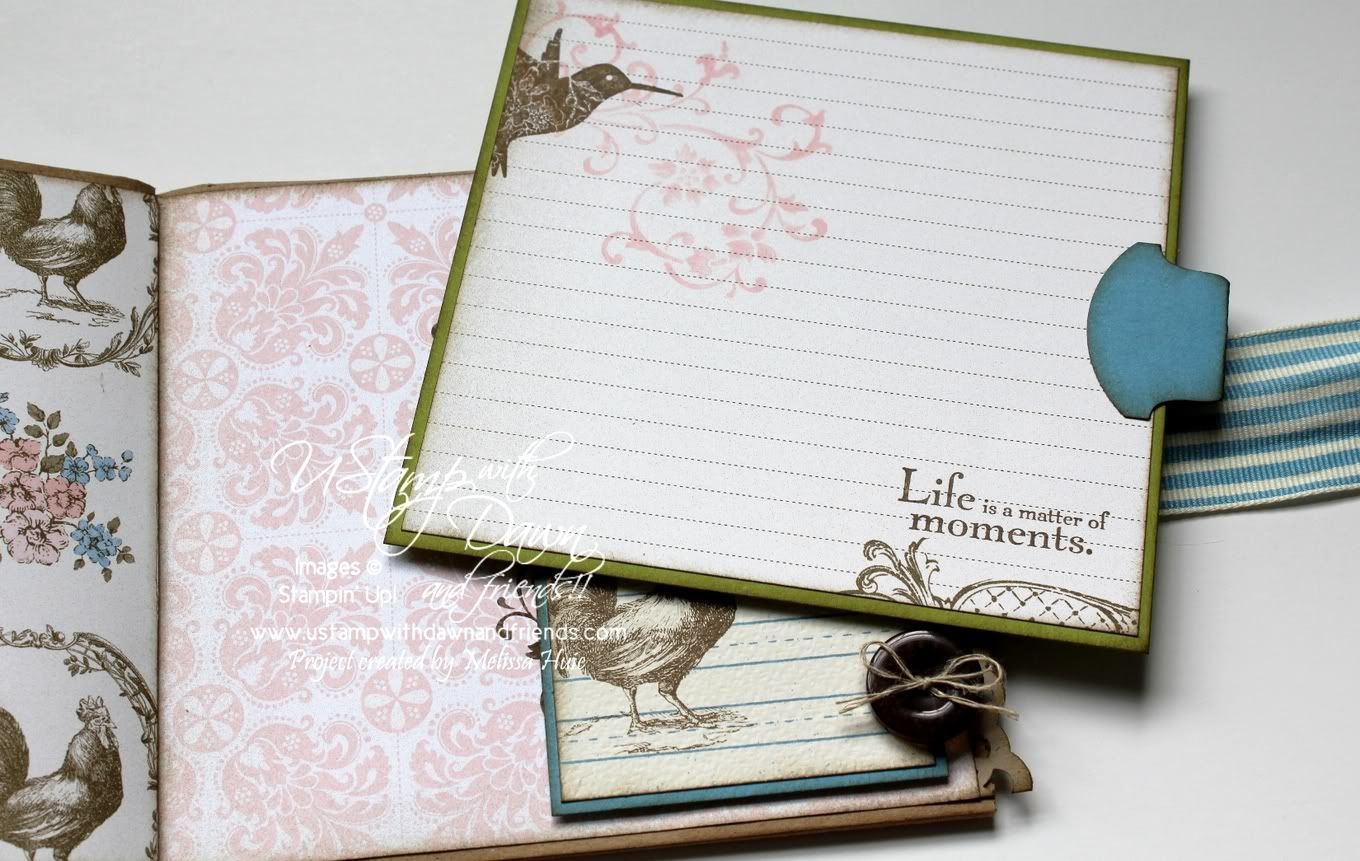
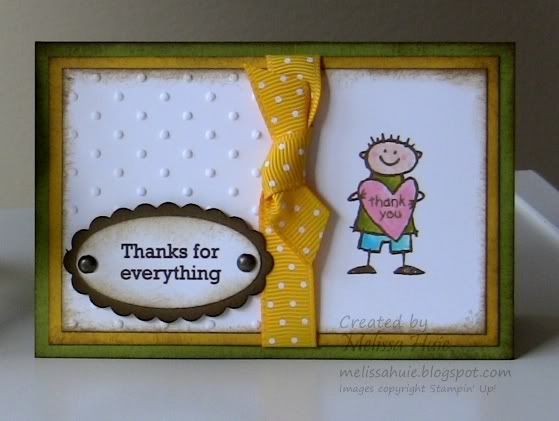
I also created a matching gift card holder, based by Holly K.'s 3-D Challenge over at Stampin' Addicts:


It's very simple!  Holly gives instructions and measurements in the link above, so be sure to check it out!  I colored the little guy the same way as on the clipboard.  I'm not sure if you can see, but I forgot to mention that I gave him little pink cheeks with the marker as well. :)

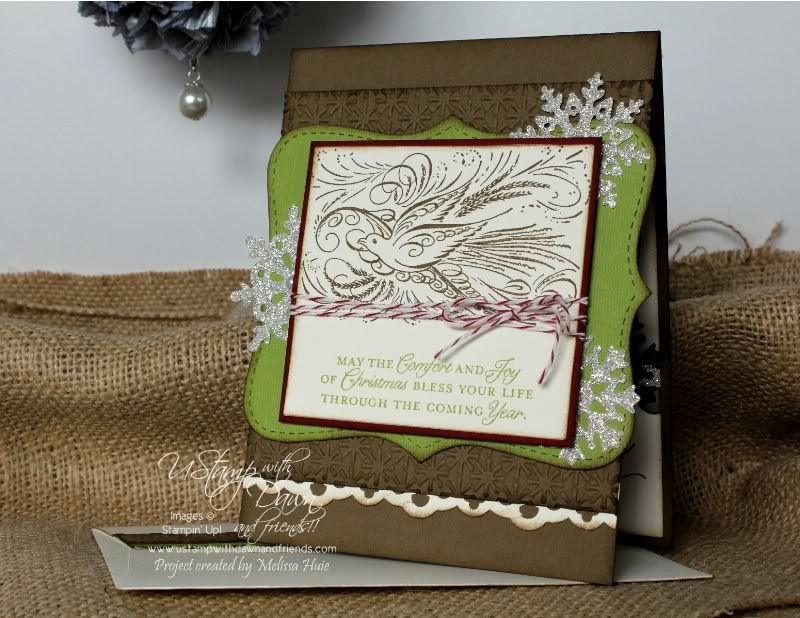
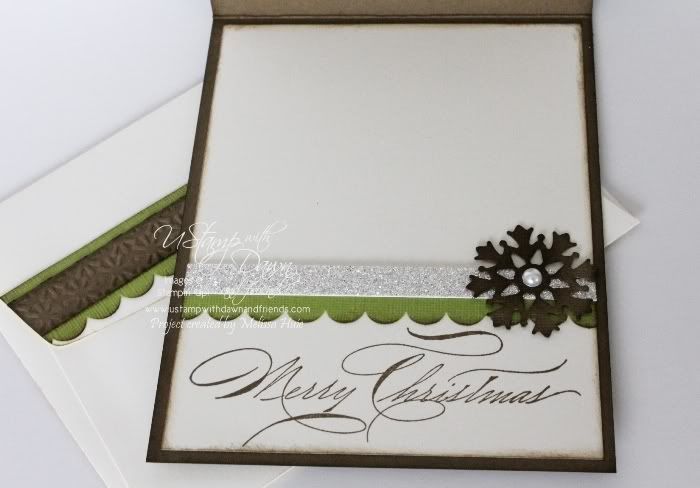
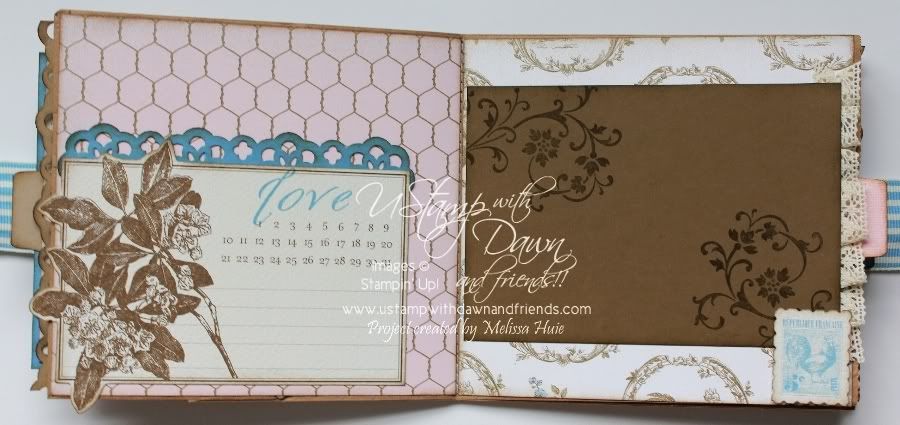
One of the fabulous things about the Textured Impressions embossing folders is that you can emboss just part of your paper!  I love the folders, and I always just have to buy a new one as soon as SU! comes out with another exclusive.  When I ran it through, it didn't create a crease there at the end of the embossing (since the paper hangs out of the folder, it may show that part by creasing), but I wanted to set it apart from the image with the Crushed Curry ribbon.  I applied a rub-on from the Chit-Chat pack on two lines, then punched it out with the Large Oval punch, matting with the Scallop Oval.  Here's the inside view:


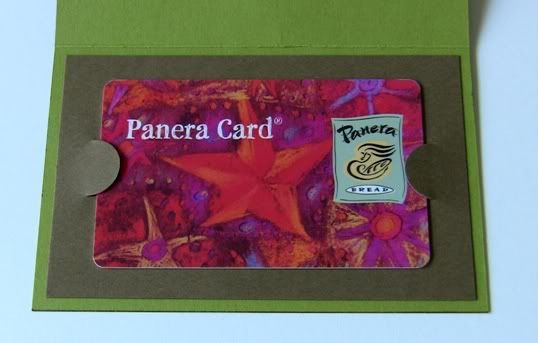
I know the Panera Bread gift card doesn't really match, so just imagine it does!  I had a Starbucks gift card somewhere here that matched perfectly with my color scheme, but of course I couldn't find it in the wee hours of the morning!  LOL  Anyway, I created a layer with Soft Suede cardstock, and just eyeballed where the Slit Punch would need to be to hold in the gift card.

By the way, the Slit Punch is retiring, so be sure to snatch one up.. it is just perfect for gift card holders and other projects!  I use it all the time!  Plus, this gift set would be just perfect for about anything... just change out the stamped images and sentiment, and you're good to go!

Gift Card Holder supplies:
Stamps:  Very Thankful (retiring)
Ink:  Soft Suede, Tempting Turquoise and Old Olive Classic Stampin' Pads
Paper:  Whisper White, Old Olive, Soft Suede, and Crushed Curry (retiring) cardstock
Accessories/Tools:  Pretty in Pink and Blush Blossom Stampin' Write Markers, Blender Pen, Crushed Curry 1/2" Polka-Dot Grosgrain Ribbon (retiring), Stampin' Sponges, Vintage Brads (retiring), Chit-Chat Rub-ons (retiring), Perfect Polka Dots Textured Impressions Folder, Big Shot, Slit Punch (retiring), Large Oval Punch, Scallop Oval Punch

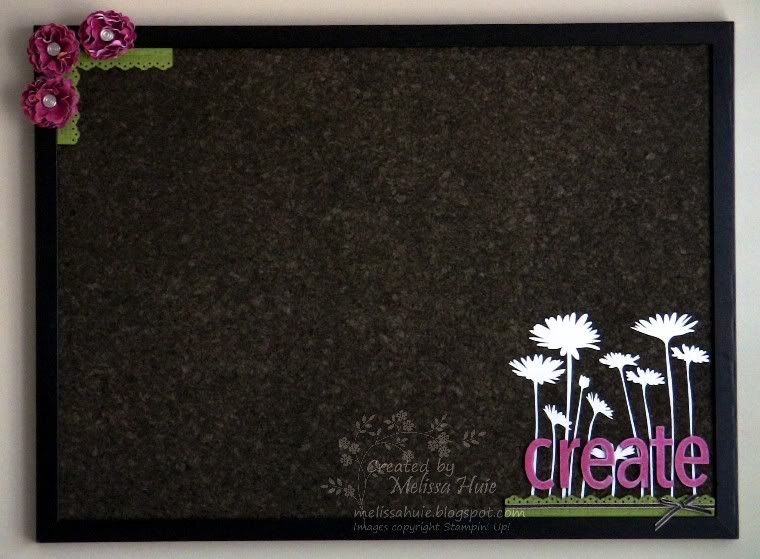
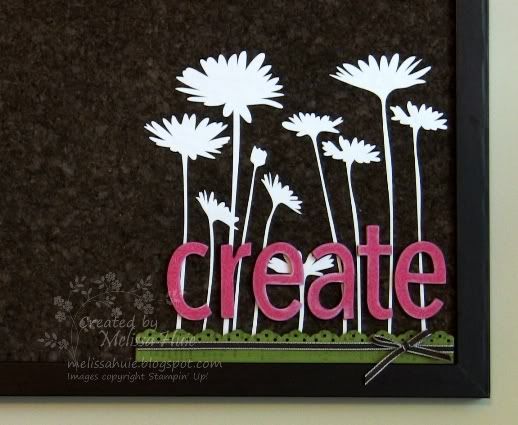
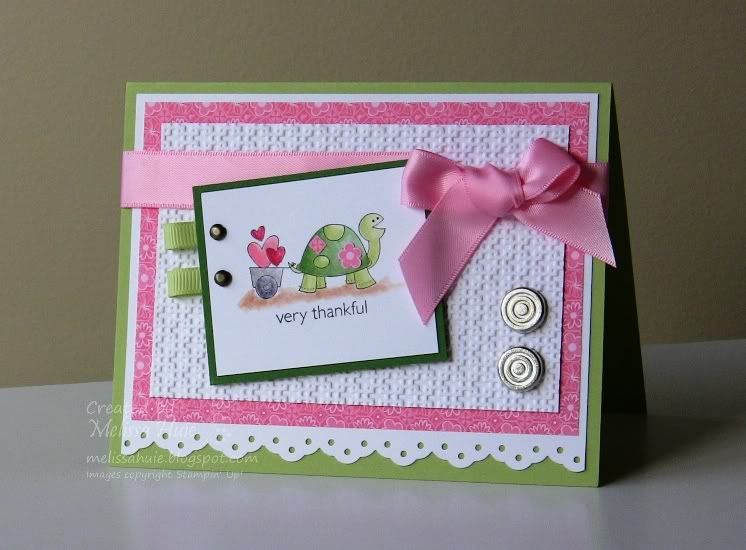
Ok, now here's the standard-sized card I created, using Mojo Monday's sketch #142 and Stampin' Celebration's Inspiration Challenge #6...


I won't go into too much detail, as I don't want to bore you and you can probably figure out what I did... well, I colored in the cute little turtle and his cart of love with ink pads and a Blender Pen.  I then cut out a couple of shapes from the Pink Flamingo DSP (same sheet as behind the embossed piece) and adhered that to the turtle's shell to give it a little something extra.  I guess everything else is pretty self-explanatory (maybe??), but let me know if you want to know anything else about it!

Very Thankful card supplies:
Stamps:  Very Thankful (retiring)
Ink:  Jet Black StazOn ink, and Certainly Celery, Garden Green, Basic Gray, Going Gray, Cameo Coral, Ruby Red, and Creamy Caramel Classic Stampin' Pads (the last 4 are retiring!)
Paper:  Pink Flamingo Designer Series Paper (retiring), and Certainly Celery, Garden Green and Whisper White cardstock
Accessories/Tools:  Blender Pen, Pretty in Pink 5/8" Satin Ribbon, Certainly Celery 1/4" Grosgrain Ribbon, Circle Designer Brads, Vintage Brads, Square Lattice Textured Impressions Folder, Big Shot, Eyelet Border Punch, Paper Piercing Tool, Mat Pack

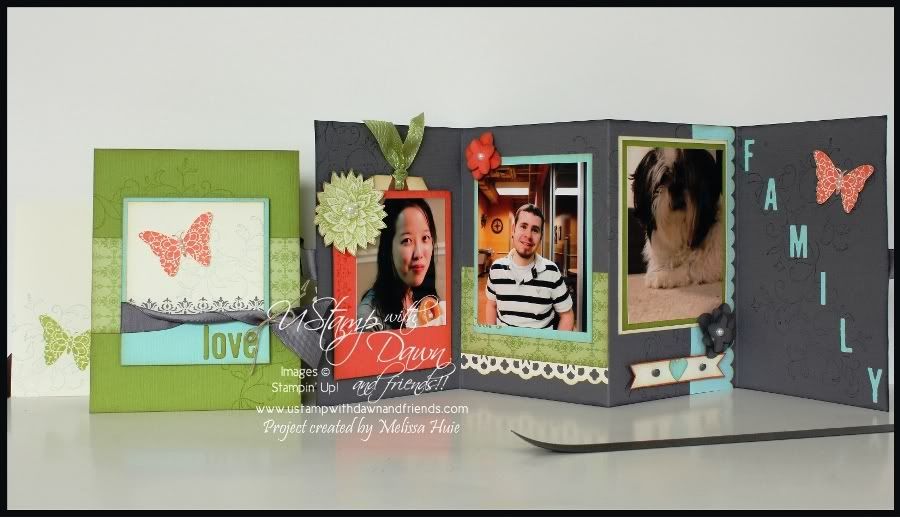
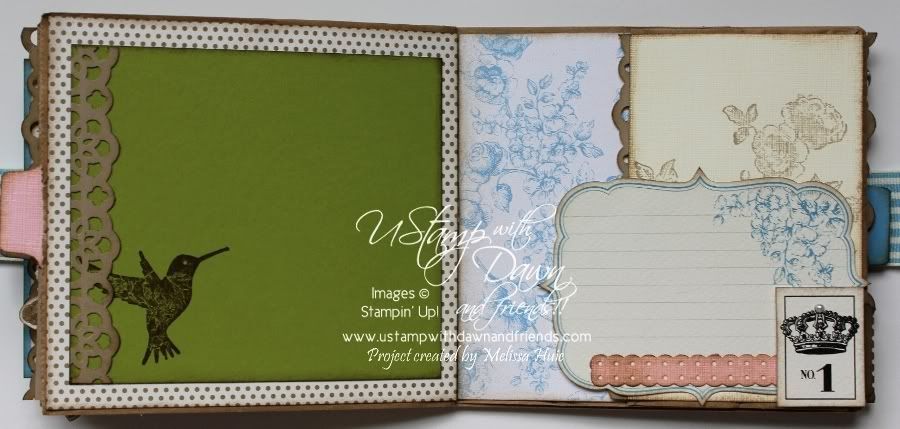
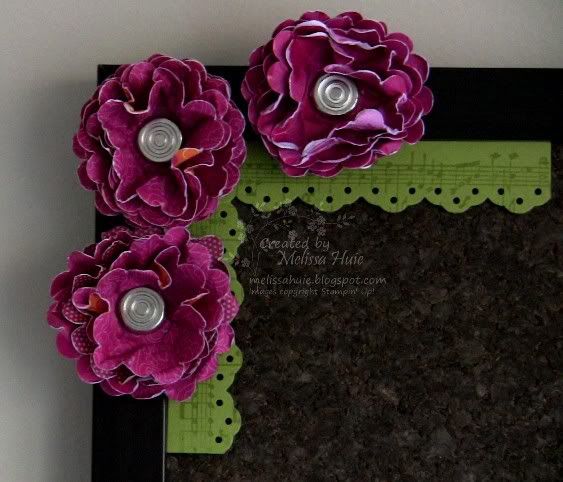
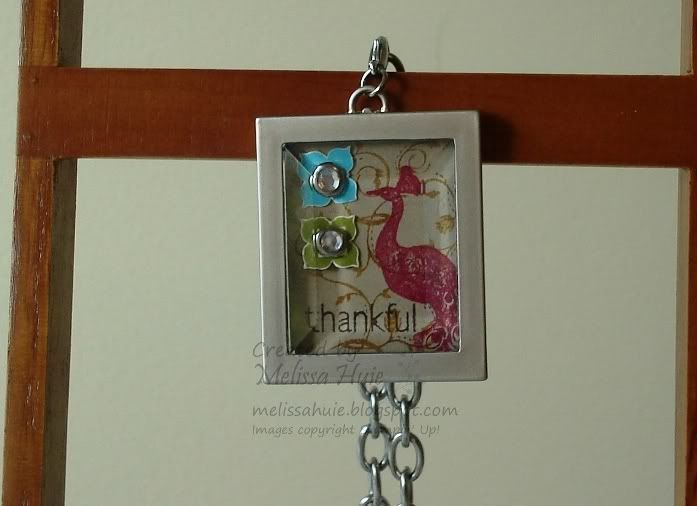
On to my next project!  This is one of my favorites, as I really love making these Simply Adorned Charm inserts.  Here are two photos of the insert.. one inside the charm, and one outside of it:


Making this was very simply too!  I first cut down a piece of Kraft cardstock to 1" x 1-1/4", then stamped on it several times with More Mustard ink, using the vine part of the peacock stamp.  I then stamped just the peacock with Real Red, then layered over the image with the "thankful" part of the turtle stamp (see card above) in Chocolate Chip.  Finished it off with a couple of flowers cut from the "Thanks so Much" stamp from the set to create some pretty accents.  I cut off the backs of the Small Clear Rhinestone Brads with my Craft & Rubber Scissors (these babies cut through so many different materials!) so that it won't be too thick to fit in the charm, then adhered these with Mini Glue Dots.  I love it!

Simply Adorned Charm Insert supplies:
Stamps:  Very Thankful (retiring)
Ink:  Tempting Turquoise, Old Olive and Chocolate Chip Classic Stampin' Pads
Paper:  Kraft and Very Vanilla cardstock
Accessories/Tools:  More Mustard and Real Red Stampin' Write Markers, Simply Adorned 1" x 1-1/4" Rectangle Charm, Simply Adorned 18" Chain, Small Clear Rhinestone Brads, Paper Piercing Tool

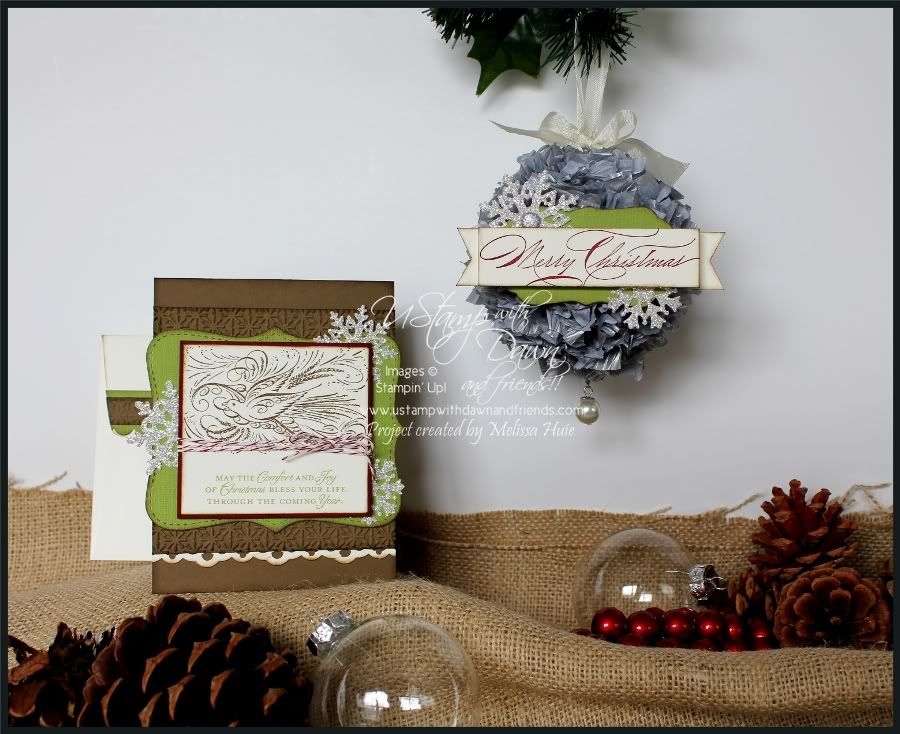
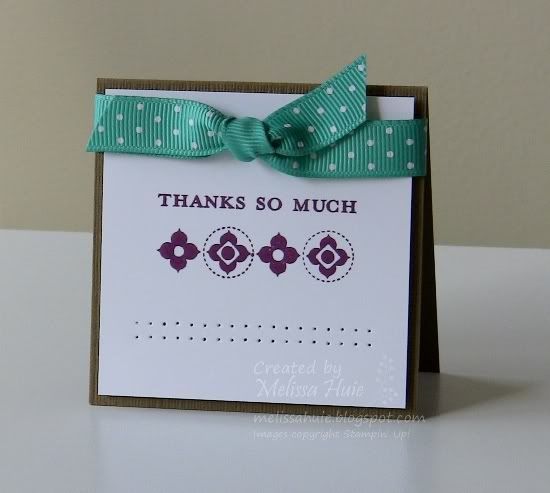
One more project!  Hope you've been sticking with me so far. :)  I wanted to show off all of the stamps in the set, so here's the fourth and final one (the flowers are also shown in the above charm insert):


This adorable little card is perfect for tucking in with a gift!  I love the look of a clean white card with images stamped in colors.  So pretty!  To create the rows along the bottom, I paper pierced using the Mat Pack template.  I'm glad the Mat Pack isn't retiring.. that's definitely a tool I use a lot too!

Simply Adorned Charm Insert supplies:
Stamps:  Very Thankful (retiring)
Ink:  Rich Razzleberry Classic Stampin' Pad
Paper:  Whisper White, and Soft Suede textured cardstock
Accessories/Tools:  Bermuda Bay 1/2" Polka-Dot Grosgrain Ribbon, Paper Piercing Tool, Mat Pack

Thanks for stopping by!