Showing posts with label Designer Fabric. Show all posts

Tuesday, August 23, 2011

UStamp with Dawn and Friends!

Hello!

I just wanted to share with you my special holiday project!  When Dawn came to me and asked me if I would like to be a guest designer for her UStamp with Dawn and Friends holiday event, I was just so excited!  This event is called I ♥ the Holidays and is just filled with all kinds of lovely goodness!

Here's a look at my project, which went up at midnight - I just love how it turned out!


The little book on the left is a Christmas Planner!  I've always been meaning to create one of these, but would always run out of time.  Nothing like being prepared for Christmas in August!  :)


The planner opens up, and there is a mini book inside, with folders for gift, meal, and decoration planning and journaling, as well as spaces for you to document special traditions and other notes.  There are also pockets inside for the card and tags!


If you'd like step-by-step instructions on how to make it, head on over to UStamp with Dawn and Friends!  You get over 40 amazing tutorials and project ideas from awesome designers.. well worth the price IMO!

Have a great night, and thanks for stopping by!

Tuesday, May 10, 2011

Memory Makers Magazine May Blog Bounce


Hello and welcome to another Memory Makers Magazine Blog Bounce!

This month our blog bounce is all about the people/things/events that shape us and make us who we are today.  If you have been following in order, you should have hopped on over from Wendy's blog.  If not, don't worry!  You can go to the Memory Makers Magazine blog and begin the blog bounce, or you can continue on and find your way back around.  Hope you enjoy the bounce!

So as some of you may be able to guess, one of the biggest "things" to impact my life is my furbaby, Fluffy.  She came into our lives when she was just a few months old, in 2004.  I definitely cannot imagine my life without her!


I drew inspiration from this PageMaps blog sketch - I love this sketch and see myself using it again, changing it up even just a little bit!

There's a bit of punching and stitching going on here. :)  The journaling reads:  "As soon as we brought you home (really as soon as I looked into those sweet little eyes), my life forever changed.  My sweet puppy Fluff. :)" I don't know what I'd do without her!  And this picture.. well.. this picture always makes me smile!  She looks so funny in it. :)


The flower in the corner of the photo was created by ripping a strip of Designer Fabric, then twisting it and rolling it around in a circle.  I used Crystal Effects to hold it together, and to attach it to the layout itself.


My flags were created by first cutting a rectangle of Designer Series Paper, then inserting the edge into the corner of the Curly Label Punch.  Doesn't it make such a cool edge?  Love it!

Your next stop on the blog bounce is Lisa's blog.  Thanks for stopping by, and enjoy the rest of the bounce!


Because of you page supplies:
Stamps:  Nature Walk
Ink:  Soft Suede, Baja Breeze, Early Espresso
Paper:  Newsprint, Botanical Gazette, and Green Tea Designer Series Paper, shipping tags (office supply)
Accessories/Tools:  Curly Label, Scallop Edge and Spiral Punches, Old Olive Designer Button, Very Vanilla Designer Button, Victoria Crochet Trim, Pear Pizzazz Seam Binding Ribbon, Early Espresso Baker's Twine, Alphabet Soup On Board Chipboard Letters, Basic Black Stampin' Write Journaler, Billboard Decorative Strip Die, Big Shot, sewing machine and vanilla thread

Friday, May 6, 2011

Another Mother's Day card and a giveaway!

Happy Friday!  Here is another Mother's Day card!


I used one of my favorite stamp sets from the Occasions Mini catalog, Nature Walk - let's hope that one makes it into the Idea Book & Catalog in July! :)  I love, love, love this set and see myself using and keeping it forever, hehe.

I stamped the flowers from the set on the shipping tag in Rose Red, then stamped the butterfly in Old Olive twice - once on the tag, then once on Very Vanilla cardstock.  I cut out the one on Very Vanilla, and adhered it over the image stamped on the tag, bending the back wing up slightly.  I stamped the French Script (retired) stamp in Crumb Cake on the piece of Woodland Walk DSP, then stamped the bird cage over top of the script in Early Espresso.

Next, I sewed around the DSP, just like the previous card.  A strip of Sticky Strip on the back of the Early Espresso cardstock allowed me to quickly and easily create a ruffle from the Springtime Vintage Designer Fabric (still available).  Added some embossing, and other embellies shown, and the card was complete!  :)

Shabby Mother's Day card supplies:
Stamps:  Nature Walk, Teeny Tiny Wishes, French Script background (retired)
Ink:  Crumb Cake, Soft Suede, Early Espresso, Rose Red, Old Olive
Paper:  Crumb Cake, Baja Breeze, Very Vanilla, and Early Espresso cardstock, Woodland Walk Designer Series Paper, shipping tag (office supply)
Accessories/Tools:  Baja Breeze Seam Binding Ribbon, Linen Thread, Very Vanilla Designer Buttons, Springtime Vintage Designer Fabric, Modern Label and Word Window Punches, Square Lattice Textured Impressions Folder, sewing machine and espresso thread, Big Shot

Ok, now on to the giveaway!  In appreciation of all of my lovely followers and readers, I am giving away two prizes!

-  One person will win the It's the Thought wood-mount stamp set + a roll of Always Artichoke Seam Binding Ribbon, and...


-  One person will win a pack of Rhinestone Basic Jewel Accents + the new Strength & Hope clear-mount stamp set.

To enter the giveaway, please leave a comment telling me which prize is your favorite, and what you love about spring!  Please leave your comment by Thursday, May 12th.  Although I love my international readers as well, to comply with SU! rules this giveaway is only open to U.S. residents... sorry!

Well, I hope all of you have a fabulous weekend!  All of you wonderful mothers out there - Happy Mother's Day! :)

Oh, and did you know that tomorrow is (inter)National Scrapbooking Day?  Hope you get some scrappy time!  Thanks so much for stopping by!

Monday, March 28, 2011

Project 12 - February 2011

Hello!  It's been a while, and I apologize!  I've been keeping very busy, tackling so many projects here and there.  Hopefully I can get back to a regular blogging schedule soon. :)

First, I wanted to acknowledge the sweet bloggers that awarded me with blog awards... the Stylish Blogger Award from Jenn and Jennifer, and the Versatile Blogger Award from Jade.  Thank you, ladies!  I'm very flattered!  :)  If you would like to see my tell-all post (well, not really, haha), please click on over to this post!

I finished my Project 12 layout for February!  You can see the February sketch at the Scrapbook & Cards Today blog here.

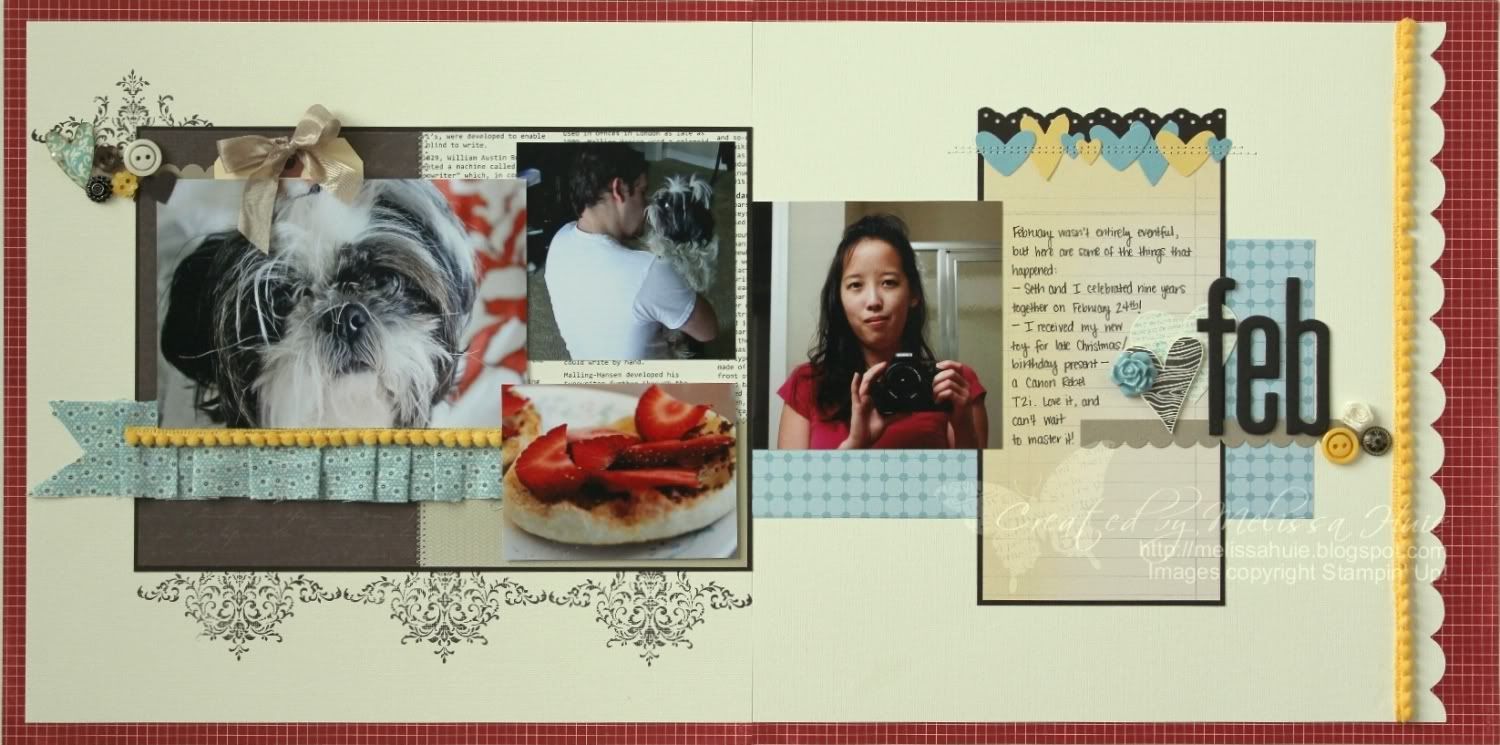
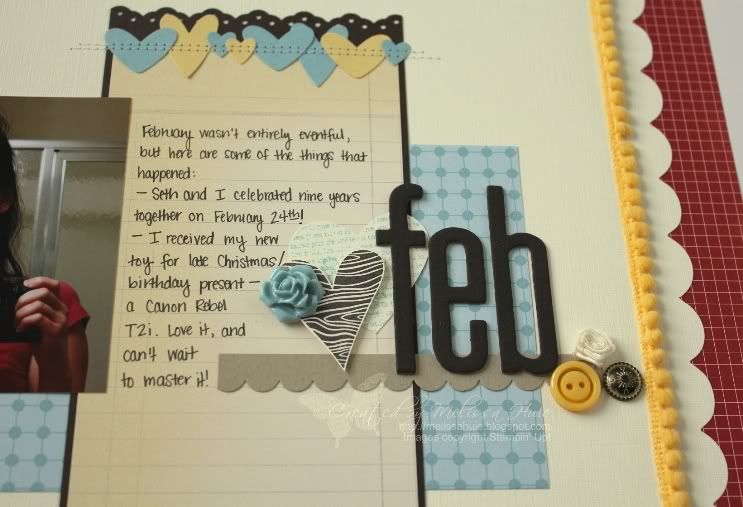
Not much happened in February.  I did get my fancy new camera. :)  And Seth and I celebrated our 9 year anniversary!  Where does the time go?


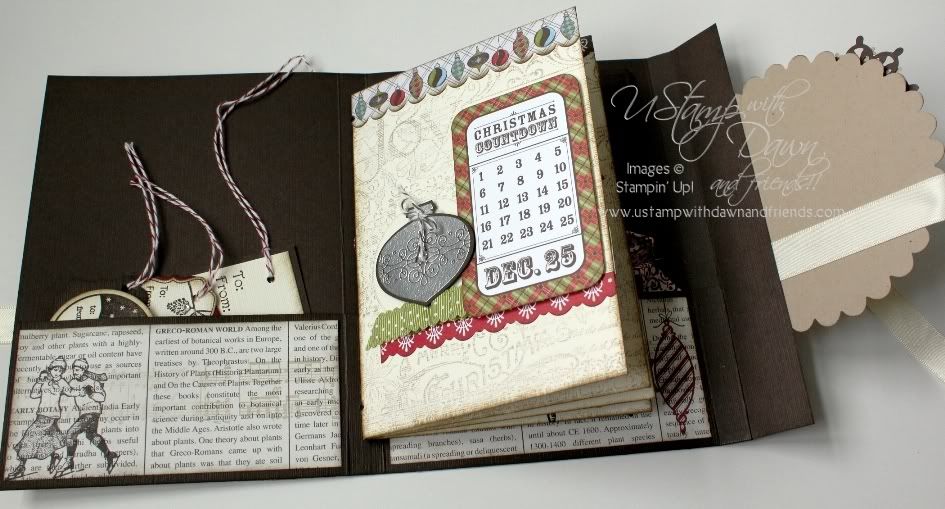
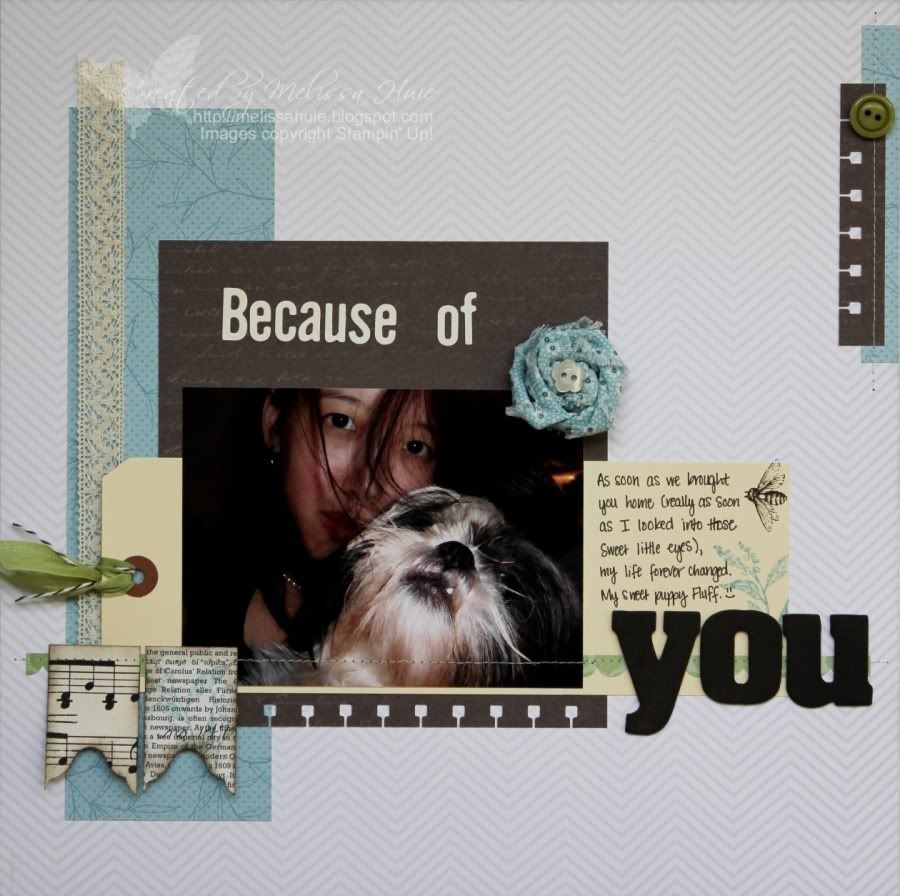
I love how the red grid paper from the Love Letters DSP pops as my background!  And I noticed that I used Baja Breeze again.. can you blame me?  It's such a pretty blue, so you know how happy I was last year when Stampin' Up! added it to their core color collection!  You know I also had to add in my Crumb Cake there as well!

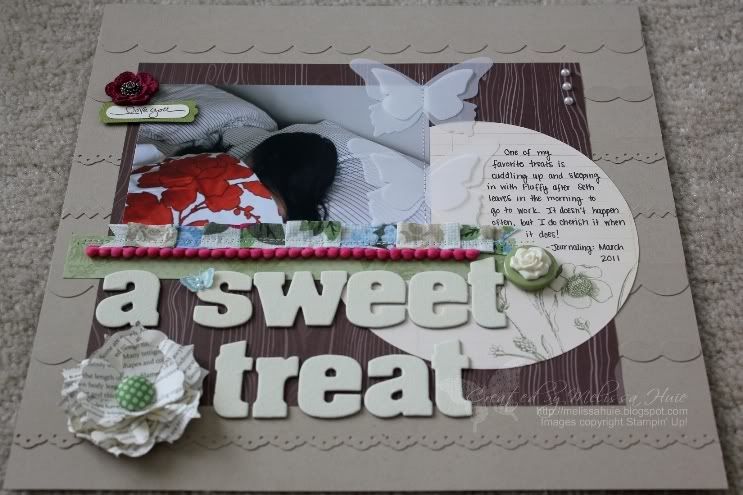
Here is the left page:


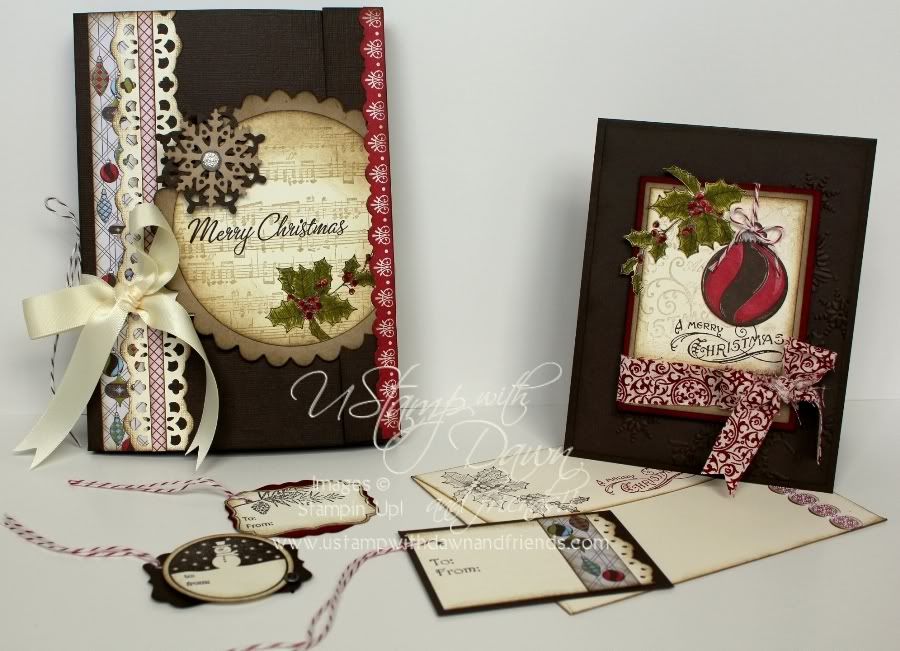
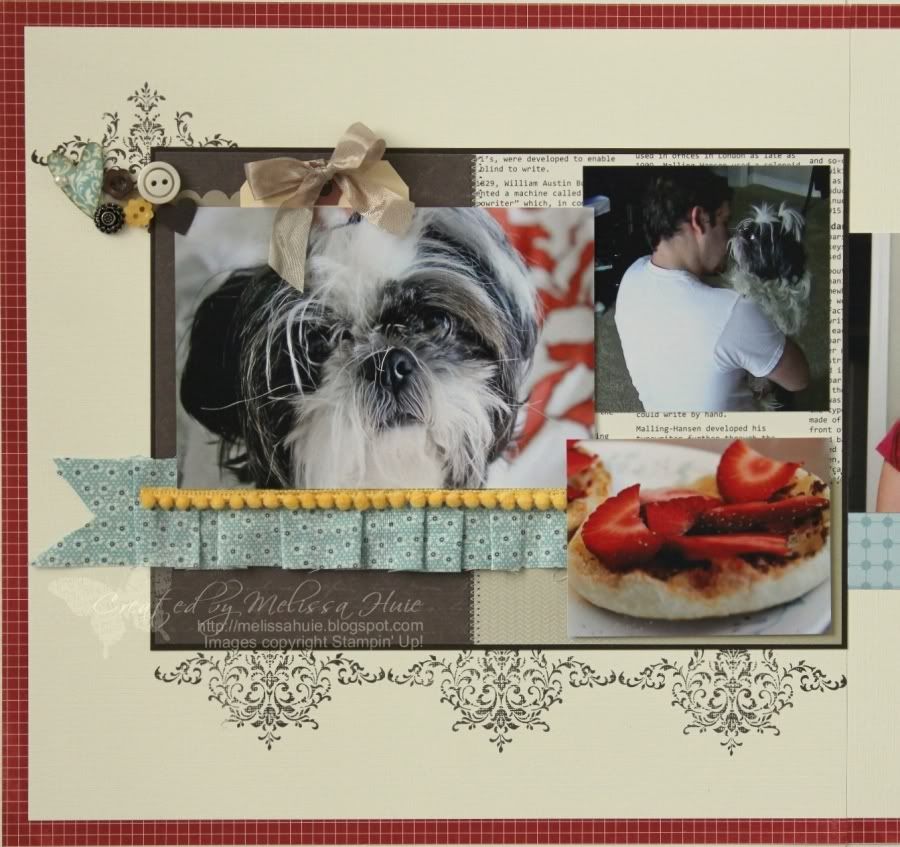
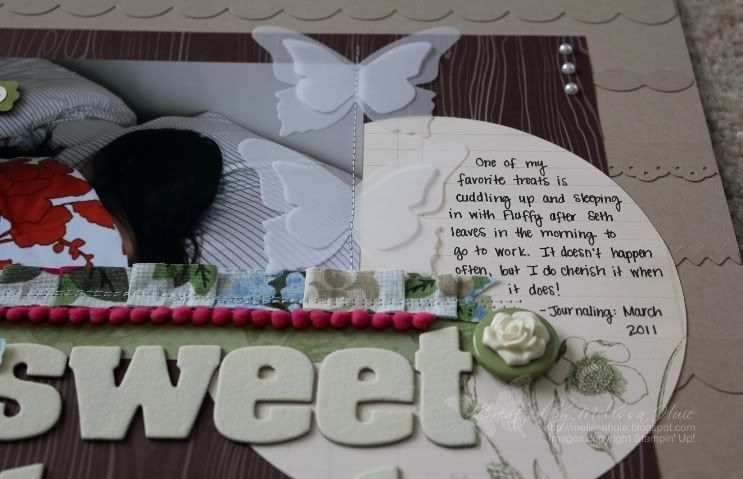
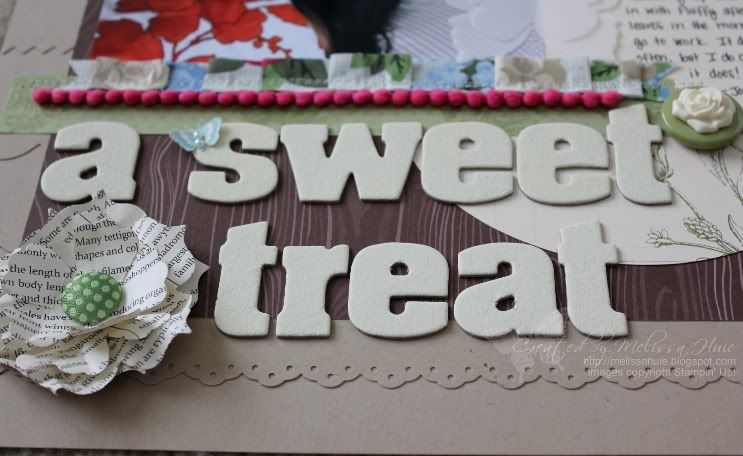
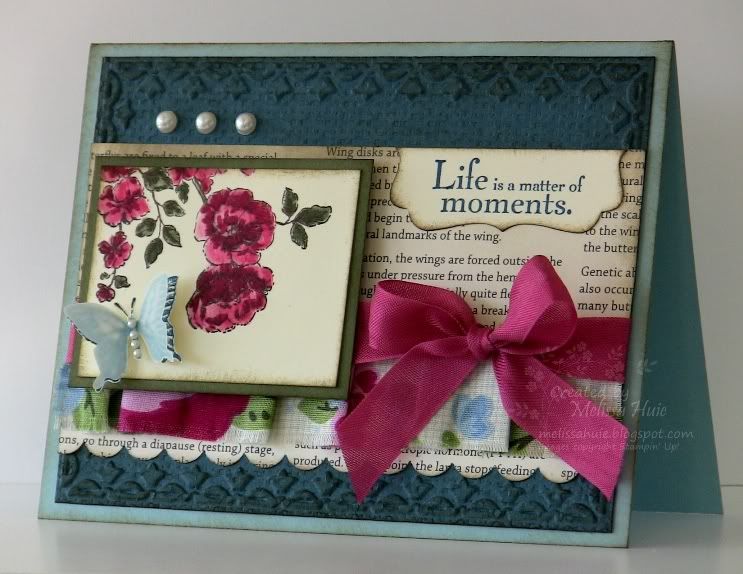
I did a bit of stamping with one of my favorite sets, Bliss (which don't forget, you can get for free as part of Sale-a-bration!)... and some sewing to connect my different patterned papers.  I sewed a little fabric in a ruffle below Fluffy's picture, and did some button and punch layering over in the top corner.

(Have you ever tried an English muffin, toasted, with some chocolate hazelnut butter, topped with sliced strawberries?  YUM!)


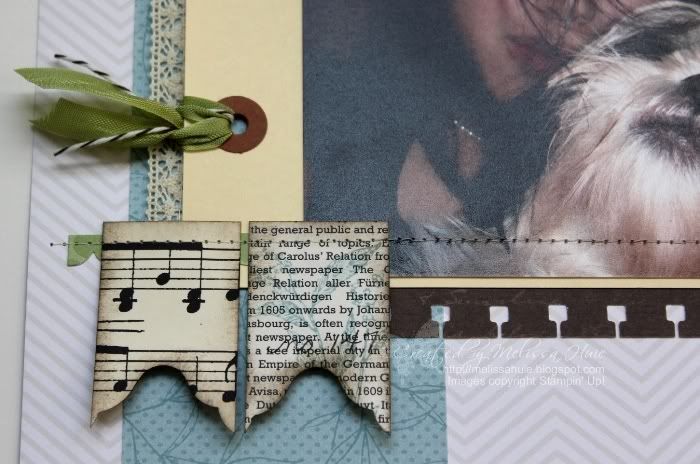
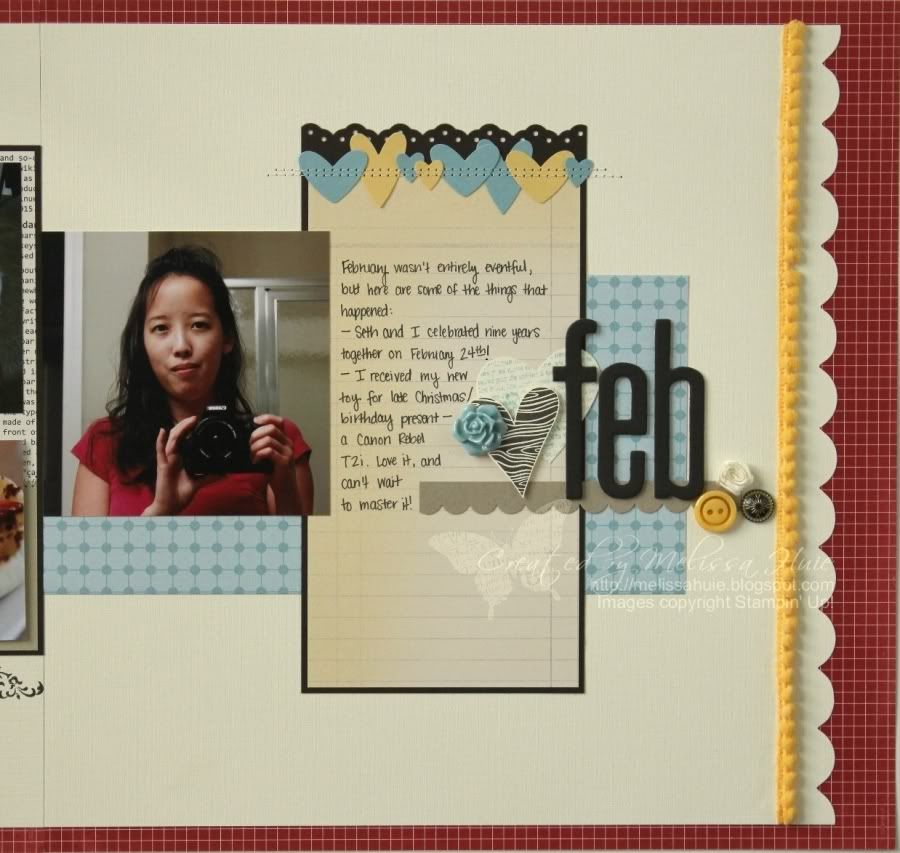
On this page.. well, I cut a strip of the large scallop using the Tasteful Trims Bigz XL die, and hid the seam with the Daffodil Delight pompom trim.  Some more layering with the smaller punched scallop border and a button, brad, and rosette.  I inked the chipboard letters with Early Espresso Craft ink.. love that font!  I adhered a bunch of punched hearts along the top edge of my journaling area, and sewed two lines over top.  (Yes Barb, I am so glad I had the guts to try sewing on my paper crafts!! :) )

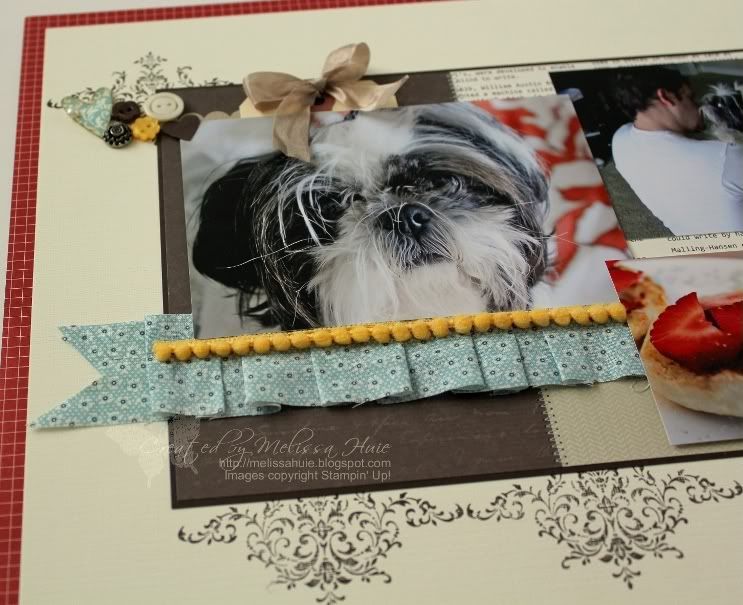
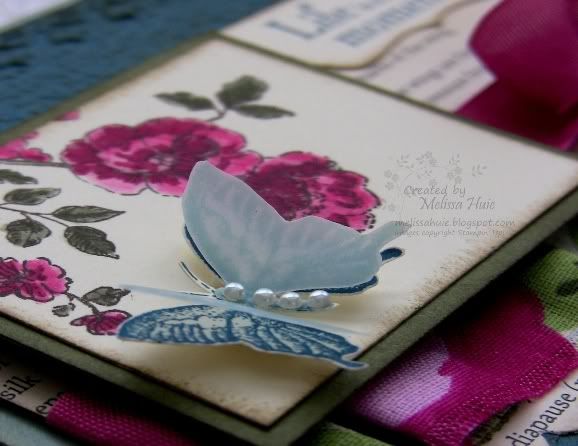
Here are some angled shots... :)


So I noticed that I am almost at 100 followers!  I know that may not be very much to some people, but to me it's a big number!  I really appreciate all of you readers, and the friends I have made through blogging. :)  I'm thinking of doing a giveaway once I hit 100!  Yay!

Ok, I need to run!  Thanks so much for stopping by!

Project 12 February layout supplies:
All supplies by Stampin' Up!
Stamps:  Bliss, I {Heart} Hearts, Punch Potpourri
Ink:  Early Espresso, Baja Breeze
Paper:  Very Vanilla, So Saffron, Baja Breeze, Early Espresso, and Crumb Cake cardstock, Love Letters Designer Series Paper, Urban Garden Designer Series Paper, Botanical Gazette Designer Series Paper, Paisley Petals Designer Series Paper (available next month!)
Accessories/Tools:  Springtime Vintage Designer Fabric, Daffodil Delight Pompom Trim, Crumb Cake Seam Binding Ribbon, Ice Cream Parlor Button (Sale-a-bration), Pearl Basic Jewel, Antique Brads, Neutrals and Brights Designer Buttons, Vintage Flower Adornment, Vanilla Rosette, Alphabet Soup Chipboard, and Heart-to-Heart, Full Heart, Small Heart, Eyelet Border, and Scallop Edge Punches, Tasteful Trim Bigz XL die, Big Shot, sewing machine and vanilla thread

Monday, March 7, 2011

Memory Makers Magazine Blog Bounce - My favorite treat!


Hello and welcome to another Memory Makers Magazine Blog Bounce!

This month, we're showcasing our favorite treats!  You may have just hopped on over from Michelle Coleman's blog, but if not... don't worry!  You can continue on through my blog, or you can start from the Memory Makers Magazine blog.  Hope you enjoy the blog bounce!

One of my favorite treats is sleeping in with Fluffy.  Usually we try and sneak in an extra 30-45 minutes or so of snooze time after Seth leaves in the morning to his research lab at the University of Tennessee.  Seth generally gets Fluffy breakfast (she eats 3x a day like a human) when he gets up, then she loves to take a nap after that!  She makes sure he remembers, too. :)  What's funny though, is that it's almost always hard for me to get Fluffy up after this nap.  She just doesn't want to get up!  Such a sweet little lazy thing.  LOL

It was quite the challenge to get this picture, setting up our tripod and self-timer.  There were so many hilarious outtakes, what with Fluffy's crazy expressions and all!  I'm sure she thought I was absolutely insane, taking pictures of us "sleeping".. hehe!


I'm super happy with my page!  Definitely one of my favorites. :)  I've created a background with border strips before, but only on a card.. this was my first time trying it out on a scrapbook page.  I used the Tasteful Trim Bigz XL die from Stampin' Up!, as well as the Eyelet Border punch.  The purple crochet flower at the top started out white, and I dyed it using the Rich Razzleberry classic ink refill, diluted with water.  Love how that turned out!  The large circle on the right was cut from the beautiful Botanical Gazette Designer Series Paper with the Circle Scissors Plus (6" circle), and it was the perfect journaling area.


Aren't the butterflies sweet?  I cut them out of vellum paper (thinner than the vellum cardstock) with the Beautiful Butterflies SU! die.  I wanted to create a light, airy look, so I sewed them to the layout.  I love how the vanilla flower adornment looks with the big button here - just like a cameo!  And if you didn't already realize how much I love the pompom trim.. well, I just wish SU! came out with it in so many more colors!

Here are a couple more shots to show you the details and layers (click to see a larger photo):


The flower here at the bottom was created using the Fun Flowers SU! die - I crinkled up multiple layers and added a fun fabric brad in the middle.


Ok, your next stop is Wendy Smedley's blog, which can be found here.  I can't wait to see what her favorite treat is!  Thanks so much for stopping by!


"a sweet treat" scrapbook page (12" x 12") supplies:
All supplies are by Stampin' Up!
Stamps:  Short & Sweet, Clearly for You
Ink:  Chocolate Chip, Baja Breeze, and Very Vanilla Craft ink, Rich Razzleberry Classic ink refill
Paper:  Crumb Cake, Old Olive, and Very Vanilla cardstock, First Edition Specialty Designer Series Paper, Botanical Gazette Designer Series Paper, Woodland Walk Designer Series Paper, Vellum Paper
Accessories/Tools:  Springtime Vintage Designer Fabric, Melon Mambo Pompom Trim, Fleurettes II Accents & Elements, Vintage Flower Adornment, Springtime Vintage Big Designer Button, Pearl Basic Jewels, Antique Brad, Sweet Stitches Fabric Brad, Alphabet Soup Chipboard Letters, Eyelet Border, Word Window and Modern Label Punches, Fun Flowers Bigz Die, Beautiful Butterflies Bigz Die, Tasteful Trim Bigz XL Die, Big Shot, Circle Scissors Plus & glass mat, sewing machine and thread

Saturday, January 29, 2011

Vintage Springtime Butterfly

Happy Saturday!

Thank you for all of your comments the other day concerning Etsy.  I may list a few cards and see how it goes, then list more. :)  I'll let you know!

I created a card last night using Stamping 411's sketch this week.  I absolutely loved this sketch, and it's been feeling so wonderful getting back into the challenges!  I also linked this to the "anything goes" challenge over at The Paper Players!


Of course, I used one of my favorite stamp sets, Elements of Style, and paired it with one of my new favorite materials - the Springtime Vintage Designer Fabric... I think it works beautifully with it!  I colored in the stamped image using a Blender Pen and the Rose Red and Always Artichoke markers.  The fabric (which I ruffled) stays put wonderfully with the use of Sticky Strip.

Did you notice the way the large Not Quite Navy piece is embossed?  It's actually embossed twice - once with the Square Lattice, then with the Framed Tulips Textured Impressions folder.  It creates such a cool texture!

I stamped the butterfly from the Dreams du Jour stamp set onto a separate piece in Not Quite Navy, as well as in Baja Breeze on a piece of vellum cardstock.  I then cut those out, and adhered them together and to the card to create a dimensional butterfly.  To give you a better view, here's a close-up photo:


This card made me very happy. :D  Especially because it reminds me that spring is not too far away!  While I do enjoy winter, I think I'm just yearning for sunshine and a little warmer weather.

Well, hope you have a great day!  Thanks so much for stopping by!

Vintage Springtime Butterfly card supplies:
Stamps:  Elements of Style, Dreams du Jour
Ink:  Crumb Cake, Soft Suede, Not Quite Navy, Early Espresso, Baja Breeze, Rose Red, and Always Artichoke Classic ink
Paper:  Always Artichoke, Very Vanilla, Not Quite Navy, Baja Breeze, and vellum cardstock, First Edition Specialty Designer Series Paper
Accessories/Tools:  Rose Red Seam Binding Ribbon, Pearl Basic Jewels, Springtime Vintage Designer Fabric, Decorative Label Punch, Scallop Edge Border Punch, Square Lattice Textured Impressions Folder, Framed Tulips Textured Impressions Folder, Big Shot, Stampin' Sponges, Blender Pen

Sunday, December 5, 2010

My Christmas Wreath

Hello!

I knew I wanted to make my own Christmas wreath this year (although I've never made or bought one before), and had many different ideas on how to go about doing it.  I toyed with a few different wreath bases in my head for a while, and the one that I kept going back to and finally decided upon was this ruffled wreath made by Emily Jones of Jones Design Company.  I was drawn to its natural feel.  I pretty much followed her tutorial, using a 10" styrofoam wreath from a dollar store, and burlap bought by the yard.  Then I just spiffed it up!

Here's the end result!  I absolutely love it!


I used a few things from my stash, and some wreath adornments found at the local craft store.  The pinecones are those ones that smell like cinnamon... yum!


Love how the banner turned out!  After I made each pennant, I hot-glued it to the retired silver elastic cord, and hand-sewed it onto the wreath.


I made the pretty little flower below out of the Deck the Halls Designer Series Fabric (SO glad I have two more packages on the way.. I love this stuff!)... I just die-cut some flowers using the retired Flower Layers #3 Big Shot die, folded and layered them, then sewed them together and onto two unfolded layers of flowers.  I sewed this as well to the wreath.


And here's how it looks on our door!  You'll have to excuse the lighting, as the sun had already set.. :)  Maybe I'll try and take another photo in the morning.


I also am thinking about getting a longer wreath holder... as you can see, our peep-hole is a little blocked!  You can kind of see through it, but there's a big ol' pinecone there, haha.  I'd love to hear what you think about it!  

Well, I gotta go.. think I'll make myself some hot chocolate!  It has been snowing a little bit off and on, and it's quite cold out.  Hope you are staying warm where you are, and thanks for stopping by!  :)

I'm linking this here:

Friday, October 22, 2010

Sweet and Shabby Fabric card

Happy Friday!

I tried something new this week - ripping fabric!  I tore a strip of our gorgeous Deck the Halls Designer Fabric... and I have to say, it felt almost liberating!  LOL

Here's my card...


Wow!  I love the impact of the big, shabby bow, don't you?  And it was so easy to create!  The strip was torn lengthwise along the fabric, and is approximately 1" wide.  I folded my length of fabric in half, and actually snipped about 1" into both layers of the fabric ends, then held the layers together as I tore the strip.  Hope that makes sense!  I feel that helped me in trying to keep the width even throughout the strip.  Then I just tied a nice, big bow and attached an Antique Brad to the center.  I folded the ends of the bow in half and snipped at an angle to create a "V" shape, then roughed up the edges a little by pulling some fibers from the fabric.

I did a little bit of collage stamping for my focal piece, and stitched around the perimeter.  (You can tell which stamp sets are my current favorites, right?  Just checking!)  And of course, I felt that the rhinestones added the perfect touch of bling!  The embossing in the background stands out nicely with the help of Soft Suede ink sponged over it.

So there's another project created using the fabric for something other than Christmas!  I tell you, I'm going to have to buy a few more packages of it... I'm scared to run out; it's so beautiful and versatile!

On another note... I have to share that I am the lucky winner of Donna's Funky Junk giveaway!  YAY!  I can't wait to put the items to use!  Thank you again to Donna!

And thanks for stopping by!  Hope you have a fabulous weekend!

Sweet and Shabby Fabric card supplies:
Stamps:  French Foliage, Notably Ornate, Artistic Etchings
Ink:  Crumb Cake, Cherry Cobbler, Early Espresso, and Soft Suede Classic ink
Paper:  Crumb Cake, Very Vanilla and Pink Pirouette cardstock
Accessories/Tools:  Deck the Halls Designer Fabric, Antique Brad, Rhinestone Basic Jewels, Cutter Kit, Stampin' Sponge, Vintage Wallpaper Textured Impressions Folder, Big Shot, sewing machine and thread

Friday, October 15, 2010

Mini Notebook Cover with Designer Fabric

Happy Friday!!

I started this project a few weeks ago, and then put it aside for a while.  I finished it today!

I thought it would be cute to use Stampin' Up!'s beautiful new Designer Fabric to create a cover for a notebook.  Well, I had some mini composition notebooks laying around that I found on clearance last year, so I created this...


I love how it turned out!  I actually used the Deck the Halls Designer Fabric from the Holiday Mini Catalog... so as you can see, the fabric is more than just for the holidays!  The mini notebook slides into the cover (like those old textbook covers you used to make out of paper bags for school), so it's replaceable when you fill up the notebook.

To start out, I measured and cut a piece of Crumb Cake cardstock to make a "folder".  This just covers the outside of the notebook, leaving excess space around the edges to allow for the sewing.  I attached some of the fabric to the front of the Crumb Cake cardstock using the Anywhere Glue Stick, then created a pocket on the inside to hold the notebook.  I attached the Chantilly Crochet Trim, then sewed around the edges with my sewing machine (you can see a little blooper there on the bottom edge where my needle kind of skipped a little... oops!  Hey, adds to the homemade look, right?).  The edges of the fabric on the inside are finished, not left raw.

Here's the inside:


And here's the back, which I left pretty plain:


To create the tag, I first punched a piece of Naturals Ivory cardstock with the Decorative Label Punch (love this new punch!), then stamped the Music Notes wheel across twice with Crumb Cake ink.  I then stamped "notes" in Early Espresso with the Sweet Shoppe Lowercase Alpha set (my new favorite alpha), and distressed the edges with Crumb Cake ink.  Next, I adhered it to the front with Multipurpose Liquid Glue, and hand-sewed it to the front.  Tip: It was so easy to create the straight line of holes with the Mat Pack and Paper Piercing Tool before sewing!  I also hand-sewed the buttons.


Aren't those flowers sweet?  They were created using the Floral Fusion Sizzlits die, and Always Artichoke and Early Espresso cardstock.  I curled the edges to give them a little extra dimension.  A gorgeous Antique Brad finished off the bigger flower.  :)

And of course, I had to add one of my butterflies.  They seemed like the perfect finishing touch!

Well, I have to go cook dinner.  Thanks for stopping by, and I hope you have a great weekend!

P.S.  Don't forget that the Clearance Blitz ends on Monday, 10/18!

Mini Notebook Cover supplies:
Stamps:  Sweet Shoppe Lower Alpha
Ink:  Early Espresso, Always Artichoke and Crumb Cake
Paper:  Crumb Cake, Naturals Ivory, Always Artichoke, and Early Espresso cardstock
Accessories/Tools:  Deck the Halls Designer Fabric, Linen Thread, Chantilly Crochet Trim, Music Notes wheel, Antique Brad, Neutrals Designer Brads, Beautiful Wings Embosslits die, Floral Fusion Sizzlits die, Decorative Label Punch, Big Shot, sewing machine and thread