Friday, May 28, 2010

Kraft Birthday

Good morning and happy Friday!

For today's card I decided to try out a look I had seen on a few cards and actually on a 8-1/2" x 11" scrapbook layout in a magazine.  I felt that this week's sketch challenge at Stampin' Addicts went perfectly with the look I was going for:


It also went with Stampin' Celebration's fun inspiration challenge!


Mmmm, doesn't that cherry pie just look delicious?  These colors really spoke to me!  I only wish that I had the Wild West Alphabet!  Now I'm itching for a cook-out! :)

Ok, now here's my card...


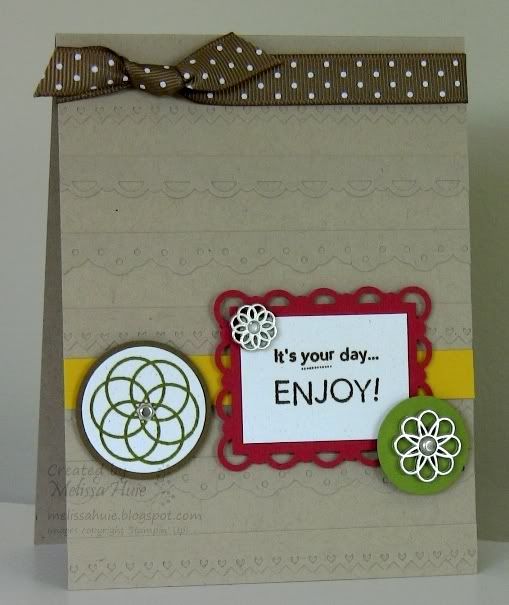
What do you think of the border punch background look?  I simply punched strips of Kraft cardstock with three different border punches, then adhered it onto my Kraft card base.  I added a strip of Crushed Curry for a pop of extra color.  Love how this turned out!

Don't forget that you can get a free pack of Designer Brads when you order select stamp sets.. the Circle Circus set I used here is one of them!  The Filigree Designer Brads are one of the four free choices as well.

If you're finding yourself with some crafty time this weekend, check out both of the challenges!

Have a wonderful day!

Kraft Birthday card:
Stamps:  On Your Birthday, Circle Circus
Ink:  Soft Suede and Old Olive Classic Stampin' Pads
Paper:  Kraft, Riding Hood Red (available July 1st), Old Olive, Crushed Curry (retiring), Soft Suede, and Naturals White cardstock
Accessories/Tools:  Filigree Designer Brads, Soft Suede 1/2" Polka-Dot Grosgrain Ribbon, and Scallop Trim Border, Scallop Trim Corner, Eyelet Border, Pinking Hearts Border, 1" Circle, 1-1/4" Circle, and 1-3/8" Circle Punches

Wednesday, May 26, 2010

Spotlighted Thanks

Good morning!

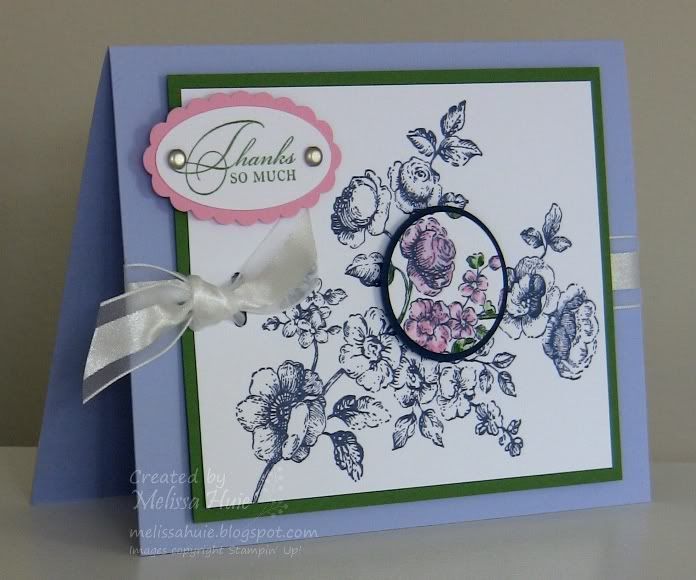
I just loved Stamping 411's sketch challenge this week, and thought I'd put a little twist on the sketch by doing the spotlighting technique.  I discovered Stacey's Curtain Call color challenge a little while ago, and figured this was the perfect chance to play along:


It's been quite a long time since I've used Almost Amethyst, so this color combo was definitely a challenge for me!


The spotlighting technique is very easy to do!  Stamp your image twice, and pick where you'd like to "spotlight" your image.  Punch out this area on your second image and color it in however you'd like.  Layer it, and adhere with dimensional adhesive to the first image, lining it up.  I used a 1-1/4" Circle Punch for the second image punch-out, and a 1-3/8" Circle Punch for the Night of Navy layer.  I kept the card fairly clean to really highlight the "spotlight". :)

Well, I have to run for now.  Thanks so much for stopping by!

Spotlighted Thanks card supplies:
Stamps:  Elements of Style, Watercolor Trio
Ink:  Night of Navy, Pretty in Pink and Garden Green
Paper:  Almost Amethyst, Garden Green, Pretty in Pink, Night of Navy, and Whisper White cardstock
Accessories/Tools:  Vintage Brads, Whisper White Organza Ribbon, and Large Oval, Scallop Oval, 1-1/4" Circle, 1-3/8" Circle, and Slit Punches

Sunday, May 23, 2010

Scrapbook page - yum

Good morning!

So as I said, yesterday I attended a crop with some nice ladies from the area.  I'm such a slow scrapper, so in the 3 or so hours, I only completed 1 page (well, minus the title) and got another about halfway done.  In my defense, I of course didn't plan page kits or anything (procrastinator).  I don't think it was too bad though!

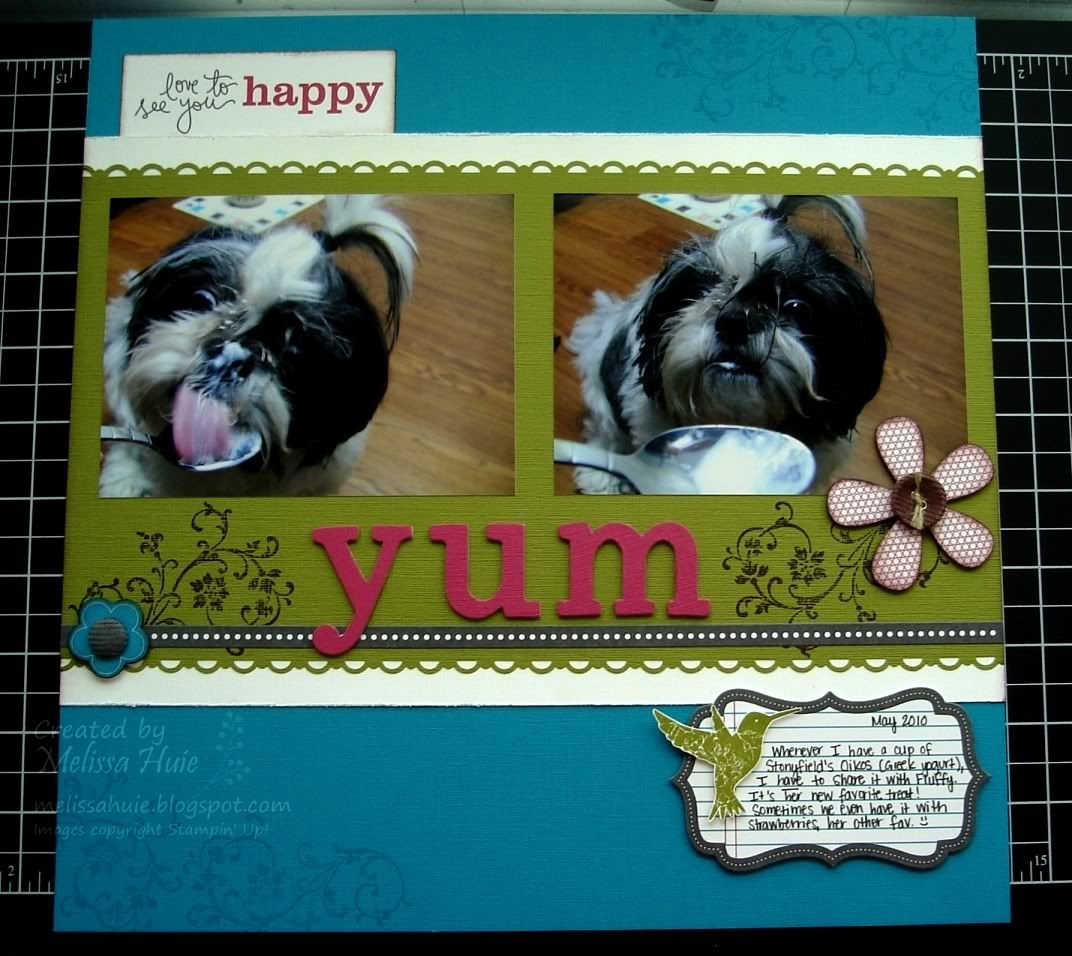
Here's the page I completed, adding the title at home:


LOL, yes, that is Fluffy having some Greek yogurt!  It's her new favorite treat - specifically Stonyfield's Oikos, but I'm sure she wouldn't complain if I gave her another brand.  Talk about spoiled!  :)

I actually took minimal (for me) supplies with me, bringing just a carry tote.  SU!'s Simply Scrappin' kits are wonderful for bringing to crops - you can create SO much with them.  I used a retired one that I bought off of the Clearance Rack, "U R Sweet" (it's sold out, but you can see other CR items in my online store at my website here).  The stamps I used are all from the Elements of Style stamp set in the Summer Mini.  The Simply Scrappin' kits contain lots of textured cardstock, sheets of self-adhesive die-cuts, and Designer Series Paper, and they all coordinate beautifully.  I only added my stamps, a couple of buttons/brads (and Linen Thread), the chipboard title, and the sheet of Whisper White behind the Old Olive punched sheet.  If you're like me, you may not like always directly adhering die-cuts.  When I want to pop them up, I just stick it onto my jeans several times to pick up some lint and take away some of the stickiness, then use Stampin' Dimensionals to adhere it to my project.  I added a little inking as well to make them look less like regular ol' die-cuts. :)

To create my title, I simply adhered chipboard letters from the On Board Timeless Type pack to the back of some Rose Red textured cardstock, then cut around them with my craft knife.  To create a smooth and clean look, I sanded the edges.

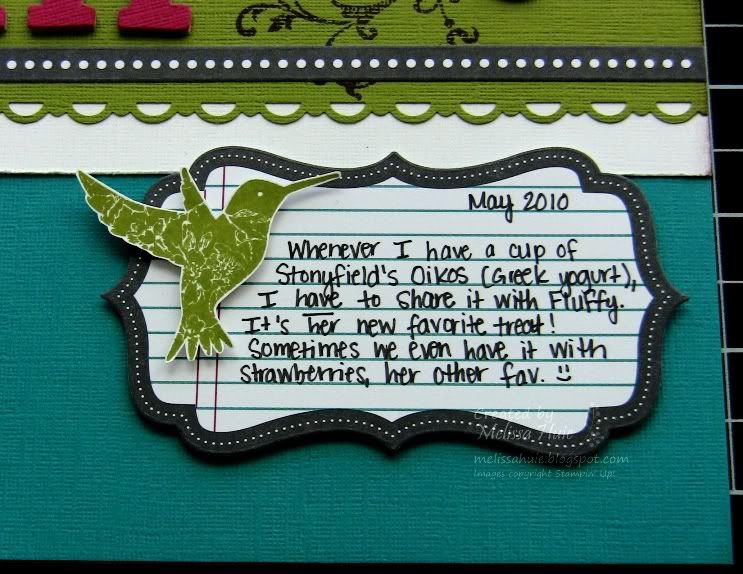
Here's a close-up of my journaling:


It kind of frustrates me when I can't get the real shades of colors to show up in photos!  Most of the time I will get some of the colors perfect, but others will be off.  The pictures were as best as I could get them, but I assure you that Taken with Teal is a lot richer than it appears.  Any suggestions?

Well, thanks for stopping by!  Hope you have a great rest of your weekend!

yum scrapbook page supplies (12x12"):
Stamps:  Elements of Style
Ink:  Old Olive, Chocolate Chip and Taken with Teal
Paper:  Taken with Teal, Old Olive, Rose Red, Whisper White textured cardstock, Whisper White cardstock
Accessories:  U R Sweet Simply Scrappin' Kit (retired), Basic Black Stampin' Write Journaler, Chocolate Chip Corduroy Button, Basic Gray Corduroy Brad, On Board Timeless Type, Stampin' Sponges, Linen Thread, Scallop Trim Border Punch (available July 1), Distressing Tool from the Cutter Kit

Friday, May 21, 2010

SCIC03 - Elegant Thanks card

Hi!  Happy Friday!

I'm so excited (and a little nervous) to be going to a crop tomorrow!  It's a fairly small crop, with a local scrapbooking group I found on Meetup.com.  My first one with them!  I don't go to crops very often, and I'm such a last-minute planner.. let's just say that I need to get going on getting a few things together!

Krystal's fabulous Stampin' Celebration Inspiration Challenge this week just took my breath away!  For some reason I've really taken a liking to purple in the past year or so, and I've always loved rich colors.  Take a look!


And here's my take on it:


I actually used a sketch challenge from one of my favorite online hangouts, the Memory Makers Magazine Forum.  My friend Kathi found a layout sketch created by Becky Fleck (PageMaps), and I turned it into a card.

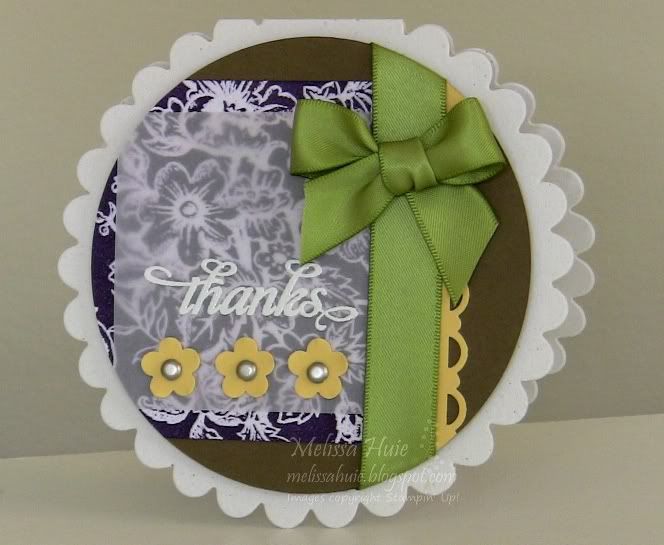
Isn't that sheet with the white flowers just gorgeous??  It's one of the sheets from the Presto Patterns DSP in the Summer Mini.  I just love how many different looks you can get using these papers.  I applied Elegant Eggplant ink across the sheet with a brayer, then sprayed it with Vanilla Shimmer Smooch Spritz.  Then I took a piece of Vellum Cardstock and embossed the sentiment with VersaMark and White Stampin' Emboss Powder.  *Tip - attach vellum easily by using choice placement!  I attached my piece by using the silver brads on the flowers, some Tombow Mono Multi Liquid Glue along the right side under the ribbon, and a Mini Glue Dot under the bow.

I created the card base using a piece of folded Naturals White cardstock, lining it up on the Scallop Circle Bigz die so that the fold is "inside" the die-cut.  The Soft Suede circle is approximately 3-7/8", and there is a So Saffron circle of the same size inside.  I love being able to quickly and easily create any size circle I need (up to 6") with the Circle Scissors Plus!

Well, I need to get packing!  Hope you have a fabulous rest of the day!

Elegant Thanks card supplies:
Stamps:  Thank You Kindly
Ink:  Elegant Eggplant, VersaMark
Paper:  Naturals White, Soft Suede and So Saffron cardstock, Vellum cardstock, Presto Patterns Designer Series Paper
Accessories/Tools:  Vintage Brads, Old Olive satin ribbon, White Stampin' Emboss Powder, Vanilla Shimmer Smooch Spritz, Brayer, Trio Flower Punch, Circle Scissors Plus, Scallop Circle Bigz Die, Scallop Trim Border Punch (available July 1), Big Shot

Thursday, May 20, 2010

Flower Moments card

Hello and happy Thursday!

Can you believe we're already more than halfway through May??  I really can't believe how much time has passed!

Sorry for my infrequency in posting.  Things have been a little busy here, and I haven't gotten to stamp as much as I've been wanting.  But I do have a card for you today!  I thought I had just about died and gone to fashion heaven (LOL) when I saw Arielle's colourQ challenge this week:


Gorgeous bag, right??  It's SO me!

Anyway, enough gushing!  I used Mojo Monday's sketch this week to create my card:


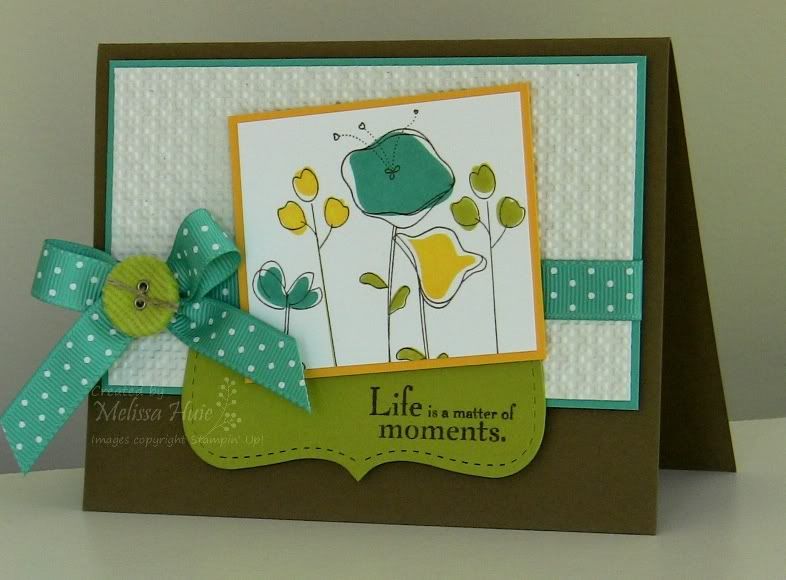
I did leave out the vertical lines from the sketch.  (I was considering using Linen Thread to create this - do you think it needs it?)  Whew!  I am certainly going to miss Bermuda Bay!  Remember that this color, along with Summer Sun, will be retiring next month!  Make sure you get this from your demo before it's too late. ;)  The green color, Kiwi Kiss, is already retired.  For some reason I'm partial to greens, and I really, really love this color combo.  Just makes me think of fresh spring flowers!

The sentiment is from the Elements of Style stamp set, stamped on a Kiwi Kiss Top Note die-cut.  Don't forget that you receive a free pack of Designer Brads with the purchase of the Elements of Style stamp set during May!

Thanks for stopping by!

Flower Moments card supplies:
Stamps:  Elements of Style, Awash with Flowers (available July 1)
Ink:  Kiwi Kiss (retired), Soft Suede, Summer Sun (retiring), and Bermuda Bay (retiring)
Paper:  Soft Suede, Naturals White, Whisper White, Kiwi Kiss (retired), Summer Sun, and Bermuda Bay cardstock
Accessories/Tools:  Square Lattice Textured Impressions Folder, Bermuda Bay 1/2" Polka-Dot Grosgrain Ribbon, Kiwi Kiss Corduroy Button (retired), Linen Thread, Top Note Bigz Die, Big Shot

Thursday, May 13, 2010

Trendy Mojo Trees!

Hi!

I wanted to break out a stamp set I bought last month during the sale - Trendy Trees!  I just love this week's Mojo Monday sketch.. how fun is this sketch??


Here's my card:


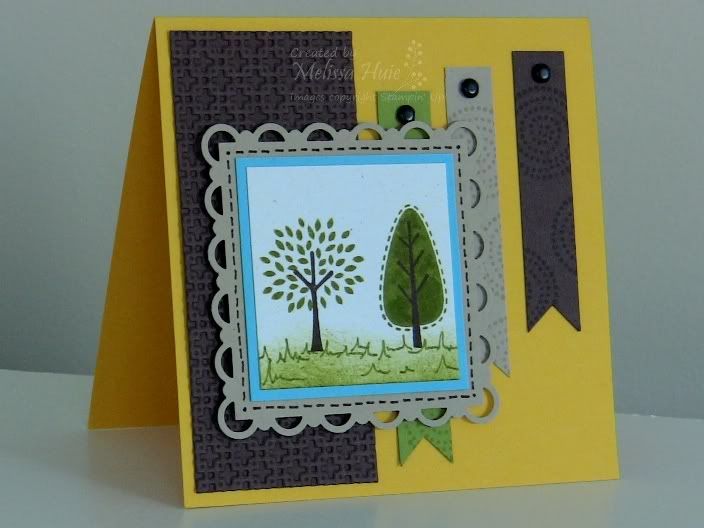
What do you think of the grass?  I certainly didn't want my trees "floating", so I sponged a little Old Olive Classic ink along the bottom.  I added a little depth by drawing in some blades of grass with the Old Olive Stampin' Write marker.  The little strips on the side of the card were created out of cardstock and stamped with one of the stamps from the set and VersaMark ink.  I finished off the image panel with some faux stitching lines, drawn with the Chocolate Chip Stampin' Write marker.

The card is 4-1/4" square, so it will fit easily into a standard card envelope!  It is made from Summer Sun cardstock, one of the colors retiring in June.. be sure to get yours if you haven't already.. before it's gone!

Thanks for stopping by, and have a great rest of the night!

Trendy Trees square card:
Stamps:  Trendy Trees
Ink:  Chocolate Chip and Old Olive Classic Stampin' Pads, VersaMark ink
Paper:  Summer Sun (retiring!), Chocolate Chip, Kraft, Naturals White, and Old Olive cardstock
Accessories/Tools:  Square Lattice Textured Impressions folder, Vintage Brads, Scallop Trim Border and Corner Punches, Chocolate Chip and Old Olive Stampin' Write markers, Stampin' Sponges, Big Shot

Tuesday, May 11, 2010

A new challenge blog and a birthday card!

Good morning!  Hope you had a great weekend!  Happy belated Mother's Day!  :)

My crazily-talented friend Krystal is co-hosting a new challenge blog, called Stampin' Celebration!  Check out this week's fun challenge:


A lot brighter than I'm used to, but hey, that's why they call it a challenge, right??  I'm really warming up to the bright colors, especially when looking at SU!'s new Color Collections!

My mom's birthday is coming up next week, and I'm not sure if we'll be able to travel to see her.  In any case, I'll be dropping this card in the mail to arrive on her birthday.  She doesn't really read my blog, so I feel safe in posting it. :)  I also used Stamping 411's Saturday Sketch Challenge to help me along.  I'm still in my creative funk, so I'm not sure I like the card!  I'm probably my worst critic though.. but I still may create another one!  lol

Anyway, here's my card:


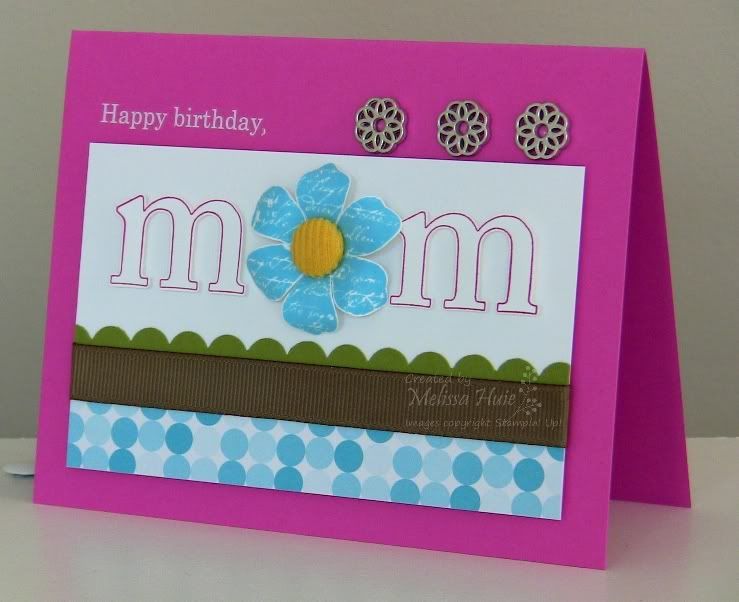
I thought the sketch from Stamping 411 was perfect for putting "mom" across the card.  Not too sure about all the other elements I added, though!  I stamped and cut out the flower from Vintage Vogue, as well as the letters from Jumbo Outline Alphabet.  Before adhering with Stampin' Dimensionals, I curled the flower petals using my bone folder.  A Summer Sun Corduroy Brad created the perfect flower center.  The ribbon is the Soft Suede polka-dot grosgrain, flipped over so that the solid side shows.  Versatile, eh?  By the way, the base cardstock is Pink Passion.. one of the colors retiring in June!

And hey, did you notice the little filigree elements at the top?  You can get those free with purchase of select sets this month, as part of SU!'s National Scrapbooking Month promotion!

Thanks for stopping by!  Have a fabulous day!

Mom's birthday card supplies:
Stamps:  Vintage Vogue, Jumbo Outline Alphabet
Ink:  Melon Mambo and Tempting Turquoise Classic Stampin' Pads
Paper:  Pink Passion, Old Olive and Whisper White cardstock, Pink Flamingo Designer Series Paper
Accessories/Tools:  Soft Suede 1/2" Polka-Dot Grosgrain Ribbon, Scallop Edge Border Punch, Summer Sun Corduroy Brad, Filigree Designer Brads, Chit-Chat Rub-ons, Signo White Gel Pen

Saturday, May 8, 2010

Ever wonder...

... what a pile of 5,400 inches of ribbon looks like?


Well, that is what it looks like!  It's all packaged up and on its way to my wonderful In Color Ribbon Share ladies.  They each are receiving 2.5 yards of each In Color (6).

Did you miss the sign-ups?  Jealous of all the pretty ribbons?  If I can get 6 more to sign up, I will gladly order another share and do this again. :)  Just let me know!

Hope you have a fabulous day!

Thursday, May 6, 2010

From the Heart card and Simple Joy tile details

Hi there!  I hope the weather is nice where you are!

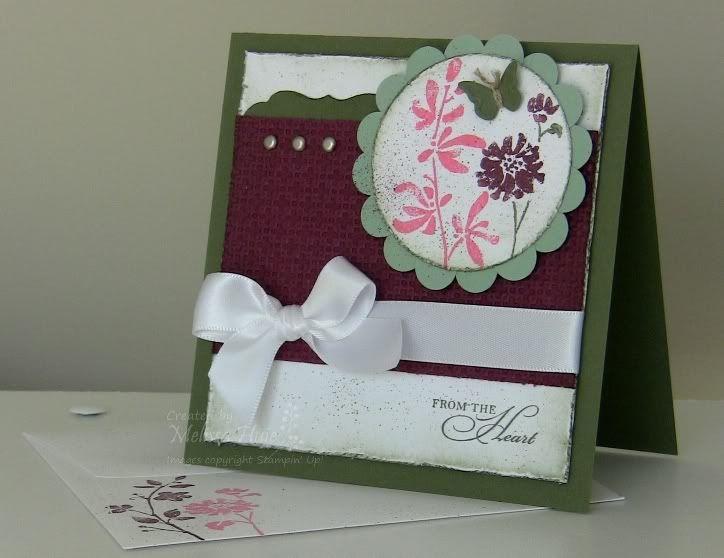
Today I am providing more details on two more of the projects featured in this past weekend's Summer Mini Blog Hop.  First, the card I created using Mojo Monday's sketch #136 and colourQ's color combo #30:


It is a 5" square card.  Almost all of the layers have distressed edges, courtesy of the distressing tool in the Cutter Kit.  The Cutter Kit is a wonderful mini collection of 4 tools, including a distressing tool and three rotary bladed tools - for scoring, cutting and perforating.  The distressing tool is very easy to use!  Simply run your paper across one of the 7 edges, and it roughens it.  Definitely easier (and safer) than using scissors.

I also sponged the edges of all of the layers with Always Artichoke ink.  Don't you adore the Bravo Burgundy piece, embossed with the new Square Lattice Textured Impressions Folder?  Love it!  Now, you may be wondering where in the world I got the larger scalloped circle... I created it with 1/2" circle punch-outs!  Very quick and easy.  And of course, I carried the distressed look through with some spritzing from the Color Spritzer and the Bravo Burgundy and Always Artichoke Stampin' Write Markers.  The little label to the side of the stamped circle is one of the die-cuts you get from the Lots of Labels Sizzlits die set.  I just attached a little piece of it.  The rest of the label die-cut was actually used in my scrapbook page in the blog hop!

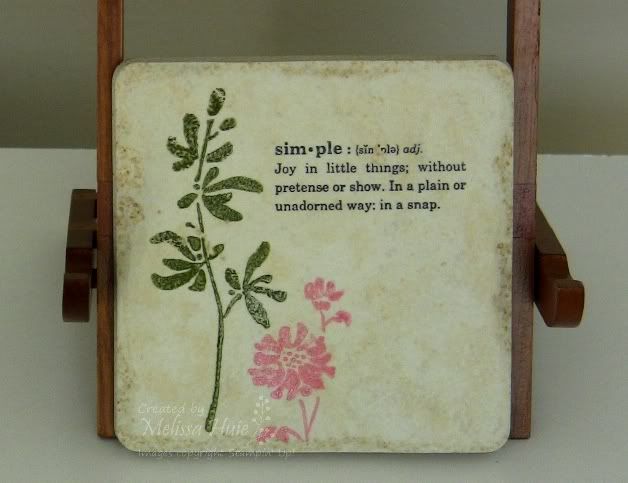
Ok, and next we have the tile:


So as I wrote in my blog hop post, I bought this tile (approximately 4" x 4") at a home improvement store.  Be sure to get the tumbled tiles, as the glazed ones won't work for stamping!

There are two main ways to stamp on tiles - one is the way I have shown here, using Craft ink and embossing powder.  To tell you the truth, if you do this method, you can use Classic ink if your ink pad is juicy enough.  You must emboss it if you use Classic ink, because otherwise, it will rub off when you use it as a coaster.  I stamped both of these images, then heat embossed.  (You'll also want to make sure you use an Embossing Buddy when embossing on tiles, to eliminate static and prevent stray powder from sticking.  Trust me on this! :)  )  Have a little patience, because heat embossing on tiles DOES take a long time.. you have to wait for the tile to heat up enough to melt the powder, and then be careful, as it does get hot!

Another way to stamp on tiles is to use Craft ink.  Stamp your image, and then once all of your stamping is done, bake in a 200 degree Fahrenheit oven for approximately 20-25 minutes, then let cool.  I have quite a few coasters that I have made last fall that have held up to daily usage!  Please note that since Classic ink is water-based dye ink, it will rub off if you don't emboss it.. even after you bake it.  I know I said it already, but that's important to note!

I stamped the definition from Define Your Life using Jet Black StazOn ink.  Did you know that you can even watercolor on your tile?  Stamp your outline image, then use an Aqua Painter and Craft ink to color your image.  After you're satisfied with the look, bake it in an oven for the same amount of time and at the same temperature as above.

Try some stamping on tiles!  I'd love to see what you create.  Thanks for stopping by!

From the Heart card supplies:
Stamps:  Watercolor Trio
Ink:  Always Artichoke, Bravo Burgundy and Cameo Coral Classic Stampin' Pads
Paper:  Always Artichoke, Whisper White, Bravo Burgundy, and Sage Shadow cardstock
Accessories/Tools:  Whisper White satin ribbon, Always Artichoke and Bravo Burgundy Stampin' Write Markers, Vintage Brads, Lots of Tags Sizzlits dies, Beautiful Wings Embosslits die, Square Lattice Textured Impressions Embossing Folder, 1/2" Circle Punch, Linen Thread, Stampin' Sponges, Color Spritzer, Cutter Kit, Circle Scissors Plus, Big Shot, Whisper White Medium Square Envelope

Simple Joy tile supplies:
Stamps:  Watercolor Trio, Define Your Life
Ink:  Old Olive and Regal Rose Craft Stampin' Pads, Jet Black StazOn ink
Accessories/Tools:  Clear Stampin' Emboss Powder, tumbled tile

Wednesday, May 5, 2010

Inspired by...

Hi!

No new project to show, but Kristina Werner is holding a two-pronged Color Inspiration Challenge over at her blog.  We are to submit photos that inspire color combos, then everyone can vote on them!  Check it out and submit a photo too!  (Or vote on mine once you can! :)  )

I took this picture with my cell phone at Target a few weeks ago, because I just loved these art pieces:


Gorgeous, right?

Altered Art Journal Details

Hello!

It's a gorgeous day outside!  After I get done here I think I will take my furbaby to the dog park.. after taking Benadryl, of course!  :)

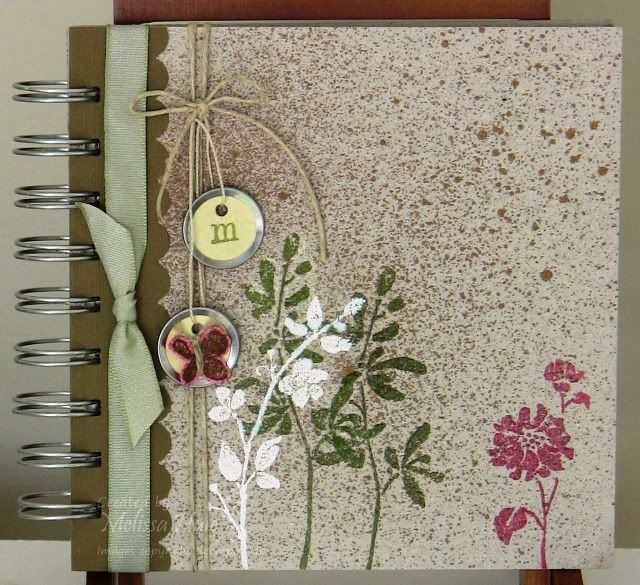
Here are some more details on the 5" x 5" Art Journal that I altered for the Stampin' Addicts Summer Mini Blog Hop this past weekend!  It originally started as a "raw" chipboard album that looks like this (forgot to take a picture of mine, so here's a photo from the SU! online store):


The covers are actually 5-1/4" x 5-1/4", and the book has 20 5" x 5" sheets of Very Vanilla cardstock inside - so they stamp beautifully!  The Spiral Punch works wonderfully for adding extra pages inside.  If you are covering the journal covers with paper, or just adding paper around the binding like I did, the Spiral Punch also helps you create a nice finished look.

Here's my decorated one:


I first spritzed the journal with a bit of Log Cabin Smooch Spritz.  This color is gorgeous!  It's a sort of copper/bronze shimmer, and just creates a beautiful vintage look.  The Smooch Spritz can be a little unpredictable at times (in a good way!), so you'll want to protect your work area with something like our Color Catcher.  I then stamped each flower image with Craft ink - Old Olive, Whisper White and Regal Rose - embossing each one with Clear Embossing Powder.  I just love the opaque-ness of the Craft inks and how beautifully they layer!

After punching the scalloped border along the Soft Suede textured cardstock, I lined up the paper against the binding, making a mark where the first binding hole would be at the bottom of the journal.  Using Paper Snips, snip the mark on the cardstock.  You can then slide that slit into the guide of your Spiral Punch to begin your punching, then go back and punch that slit into a spiral as well.

I used a little Mellow Moss taffeta ribbon, then felt to really amp up the botanical garden look, I needed some Hemp Twine!  (Don't forget that Mellow Moss is one of the colors retiring in June!)  I used the new Mini Vintage Tags to create cute little accents to hang off the Hemp Twine bow.  The tags come with thin Vanilla string attached, and I shortened the one attached to the "m" tag.  I stamped the butterfly from the Watercolor Trio set with Soft Suede ink, onto Regal Rose cardstock, and attached it with a Mini Glue Dot.

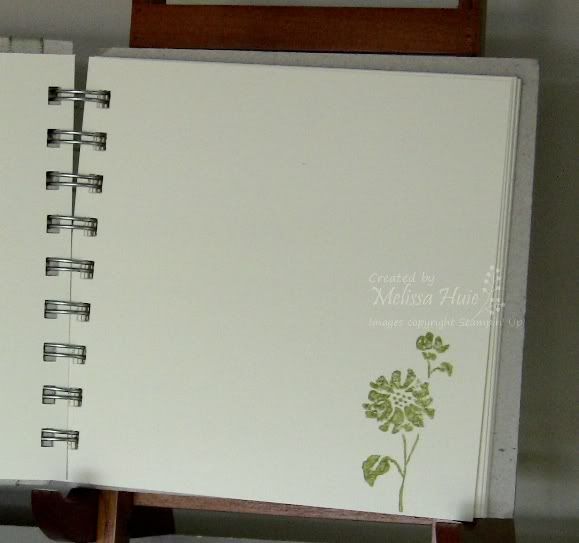
I also stamped the inside of the pages.  I will probably go back and add more stamping.  The pages inside are the same ultrasmooth Very Vanilla cardstock that stamps like a dream!


Here I used Old Olive Classic ink to stamp the flower image.  I actually stamped it off once onto scratch paper to make it a little lighter.

I love this journal!  I can't wait to start using it and also to get more of them!

Have a wonderful day!

Art Journal supplies:
Stamps:  Watercolor Trio, Calendar Alphabet & Numbers
Ink:  Old Olive, Regal Rose and Whisper White Craft Stampin' Pads, Soft Suede and Old Olive Classic Stampin' Pads
Paper:  Soft Suede and Regal Rose cardstock
Accessories/Tools:  On Board 5" x 5" Art Journal, Scallop Edge Border and Spiral Punches, Clear and White Stampin' Emboss Powders, Log Cabin Smooch Spritz, Mini Vintage Tags, Mellow Moss taffeta ribbon, Hemp Twine, Linen Thread, Color Catcher

Tuesday, May 4, 2010

Summer Mini Products Video

Good afternoon!

Check out this video in which Shannon West and Carrie Cudney showcase products from the new Summer Mini!


Watch at YouTube

If you need a hard-copy of the Summer Mini 2010 catalog, be sure to email me and I will send one out to you!

Monday, May 3, 2010

Celebrate National Scrapbooking Month!

Hello and happy May!  I hope you enjoyed the Stampin' Addicts Summer Mini Blog Hop this weekend!

Did you know that May is National Scrapbooking Month?  To celebrate, Stampin' Up! is having a fabulous promotion!  With the purchase of select stamp sets or My Digital Studio, you can get a package of Designer Brads free!  There are four designs, and let me tell you - they're awesome on any crafty project!

Sets that qualify are the following:


Stamp sets

PageDescriptionWood-Mount
Item #
Wood-Mount
Price
Clear-Mount
Item #
Clear-Mount
Price
81
Extreme Elements
115181$26.95------
119
Framed with Love**
114389$27.95------
128
Certified**
113706$27.95------
129
Circle Circus
115778$28.95------
12* 
Elements of Style
118611$27.95120045$19.95
14*
Rough Type
118659$26.95120072$18.95
22*
Sentimental Journey
118513$23.95120075$17.95
25*
First Day
118521$23.95120051$17.95
*From Summer Mini Catalog
**Last Chance stamp set!


My Digital Studio software
PageDescriptionItemPrice
32*My Digital Studio118108 $79.95 
*From Summer Mini Catalog


Designer brads
PageDescriptionItem Retail PricePrice with Qualifying Purchase
179
Flower Designer brads
112579$5.95FREE
179
Filigree Designer brads
112577$5.95FREE
179
Circle Designer brads
112571$5.95FREE
179
Star Designer brads
112572$5.95FREE

Please note that the stamp sets Framed with Love and Certified are going to be retiring in June, so if you had your eye on those sets.. what better chance to get them than this month, with FREE Designer Brads?

You can view the new Summer Mini Catalog by clicking the photo of it in the sidebar to the right.  If you would like a free hard-copy of it, please contact me!