
Today I am providing more details on two more of the projects featured in this past weekend's Summer Mini Blog Hop. First, the card I created using Mojo Monday's sketch #136 and colourQ's color combo #30:
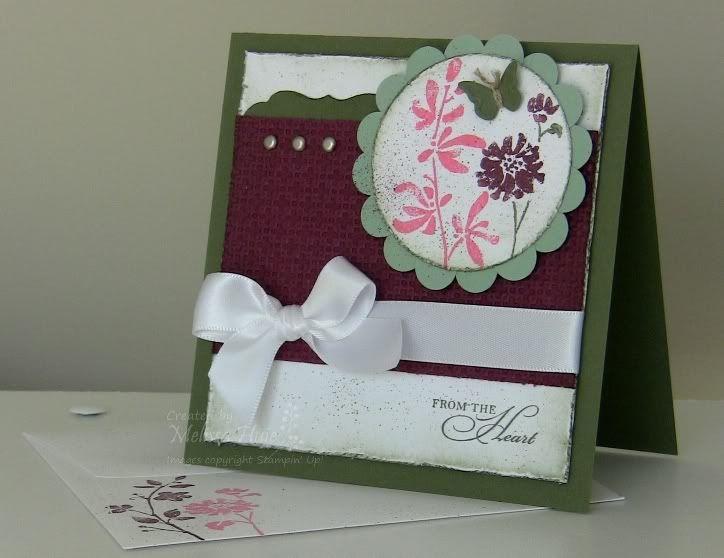
It is a 5" square card. Almost all of the layers have distressed edges, courtesy of the distressing tool in the Cutter Kit. The Cutter Kit is a wonderful mini collection of 4 tools, including a distressing tool and three rotary bladed tools - for scoring, cutting and perforating. The distressing tool is very easy to use! Simply run your paper across one of the 7 edges, and it roughens it. Definitely easier (and safer) than using scissors.
I also sponged the edges of all of the layers with Always Artichoke ink. Don't you adore the Bravo Burgundy piece, embossed with the new Square Lattice Textured Impressions Folder? Love it! Now, you may be wondering where in the world I got the larger scalloped circle... I created it with 1/2" circle punch-outs! Very quick and easy. And of course, I carried the distressed look through with some spritzing from the Color Spritzer and the Bravo Burgundy and Always Artichoke Stampin' Write Markers. The little label to the side of the stamped circle is one of the die-cuts you get from the Lots of Labels Sizzlits die set. I just attached a little piece of it. The rest of the label die-cut was actually used in my scrapbook page in the blog hop!
Ok, and next we have the tile:
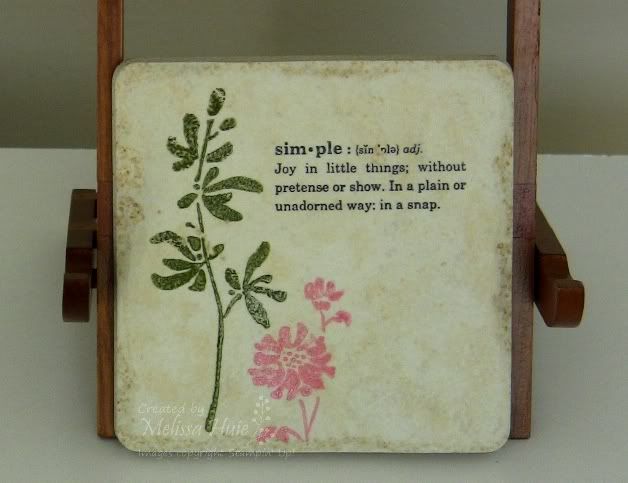
So as I wrote in my blog hop post, I bought this tile (approximately 4" x 4") at a home improvement store. Be sure to get the tumbled tiles, as the glazed ones won't work for stamping!
There are two main ways to stamp on tiles - one is the way I have shown here, using Craft ink and embossing powder. To tell you the truth, if you do this method, you can use Classic ink if your ink pad is juicy enough. You must emboss it if you use Classic ink, because otherwise, it will rub off when you use it as a coaster. I stamped both of these images, then heat embossed. (You'll also want to make sure you use an Embossing Buddy when embossing on tiles, to eliminate static and prevent stray powder from sticking. Trust me on this! :) ) Have a little patience, because heat embossing on tiles DOES take a long time.. you have to wait for the tile to heat up enough to melt the powder, and then be careful, as it does get hot!
Another way to stamp on tiles is to use Craft ink. Stamp your image, and then once all of your stamping is done, bake in a 200 degree Fahrenheit oven for approximately 20-25 minutes, then let cool. I have quite a few coasters that I have made last fall that have held up to daily usage! Please note that since Classic ink is water-based dye ink, it will rub off if you don't emboss it.. even after you bake it. I know I said it already, but that's important to note!
I stamped the definition from Define Your Life using Jet Black StazOn ink. Did you know that you can even watercolor on your tile? Stamp your outline image, then use an Aqua Painter and Craft ink to color your image. After you're satisfied with the look, bake it in an oven for the same amount of time and at the same temperature as above.
Try some stamping on tiles! I'd love to see what you create. Thanks for stopping by!
From the Heart card supplies:
Stamps: Watercolor Trio
Ink: Always Artichoke, Bravo Burgundy and Cameo Coral Classic Stampin' Pads
Paper: Always Artichoke, Whisper White, Bravo Burgundy, and Sage Shadow cardstock
Accessories/Tools: Whisper White satin ribbon, Always Artichoke and Bravo Burgundy Stampin' Write Markers, Vintage Brads, Lots of Tags Sizzlits dies, Beautiful Wings Embosslits die, Square Lattice Textured Impressions Embossing Folder, 1/2" Circle Punch, Linen Thread, Stampin' Sponges, Color Spritzer, Cutter Kit, Circle Scissors Plus, Big Shot, Whisper White Medium Square Envelope
Simple Joy tile supplies:
Stamps: Watercolor Trio, Define Your Life
Ink: Old Olive and Regal Rose Craft Stampin' Pads, Jet Black StazOn ink
Accessories/Tools: Clear Stampin' Emboss Powder, tumbled tile


No comments:
Post a Comment
I appreciate you taking the time to leave a comment.. it makes my day!